STEP BY STEP HOW-TO GUIDE for you to DIY a beautiful NO-SEW Kid’s Tent!

*This post contains affiliate links, meaning I may make a small commission from the sale, but it comes from Amazon’s pocket, not yours - thanks for supporting my small business!
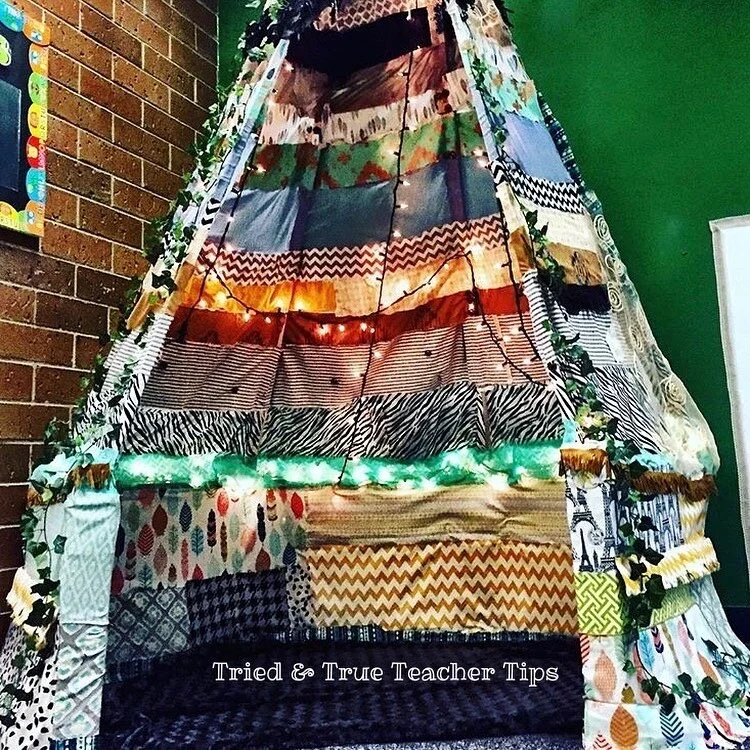
By the way, I didn’t know how to sew when making either of these tents, they are all HOT-GLUED… so can I get a hallelujah?
I PROMISE, ANYONE CAN MAKE THESE!
Today I’m going to be showing you exactly how I did it, so you can do it, too!!!
They resemble teepees but are no way an accurate depiction so I’ve started to simply call them tents.
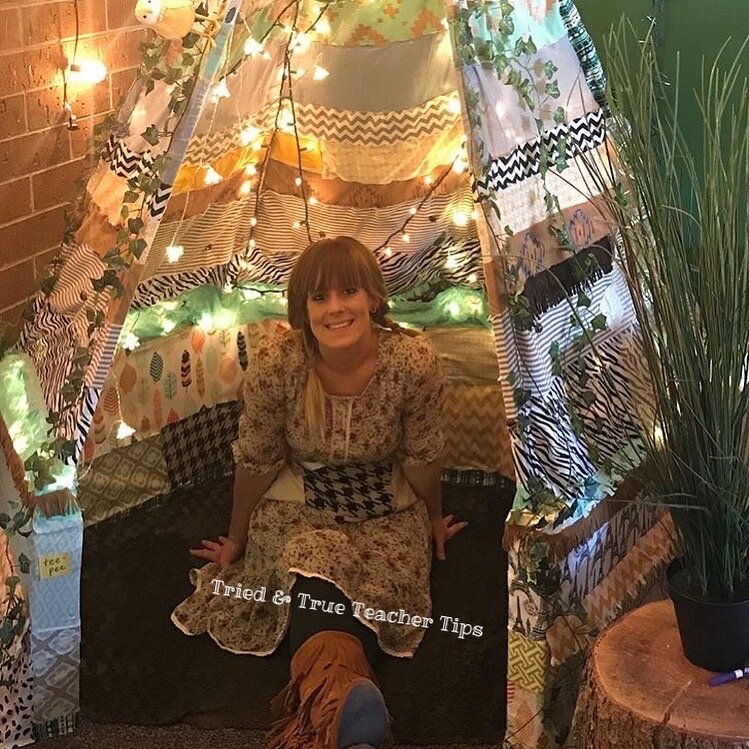
In all honesty, I created the first one because I wanted to make a cozy, calming place to connect with nature inside the classroom.
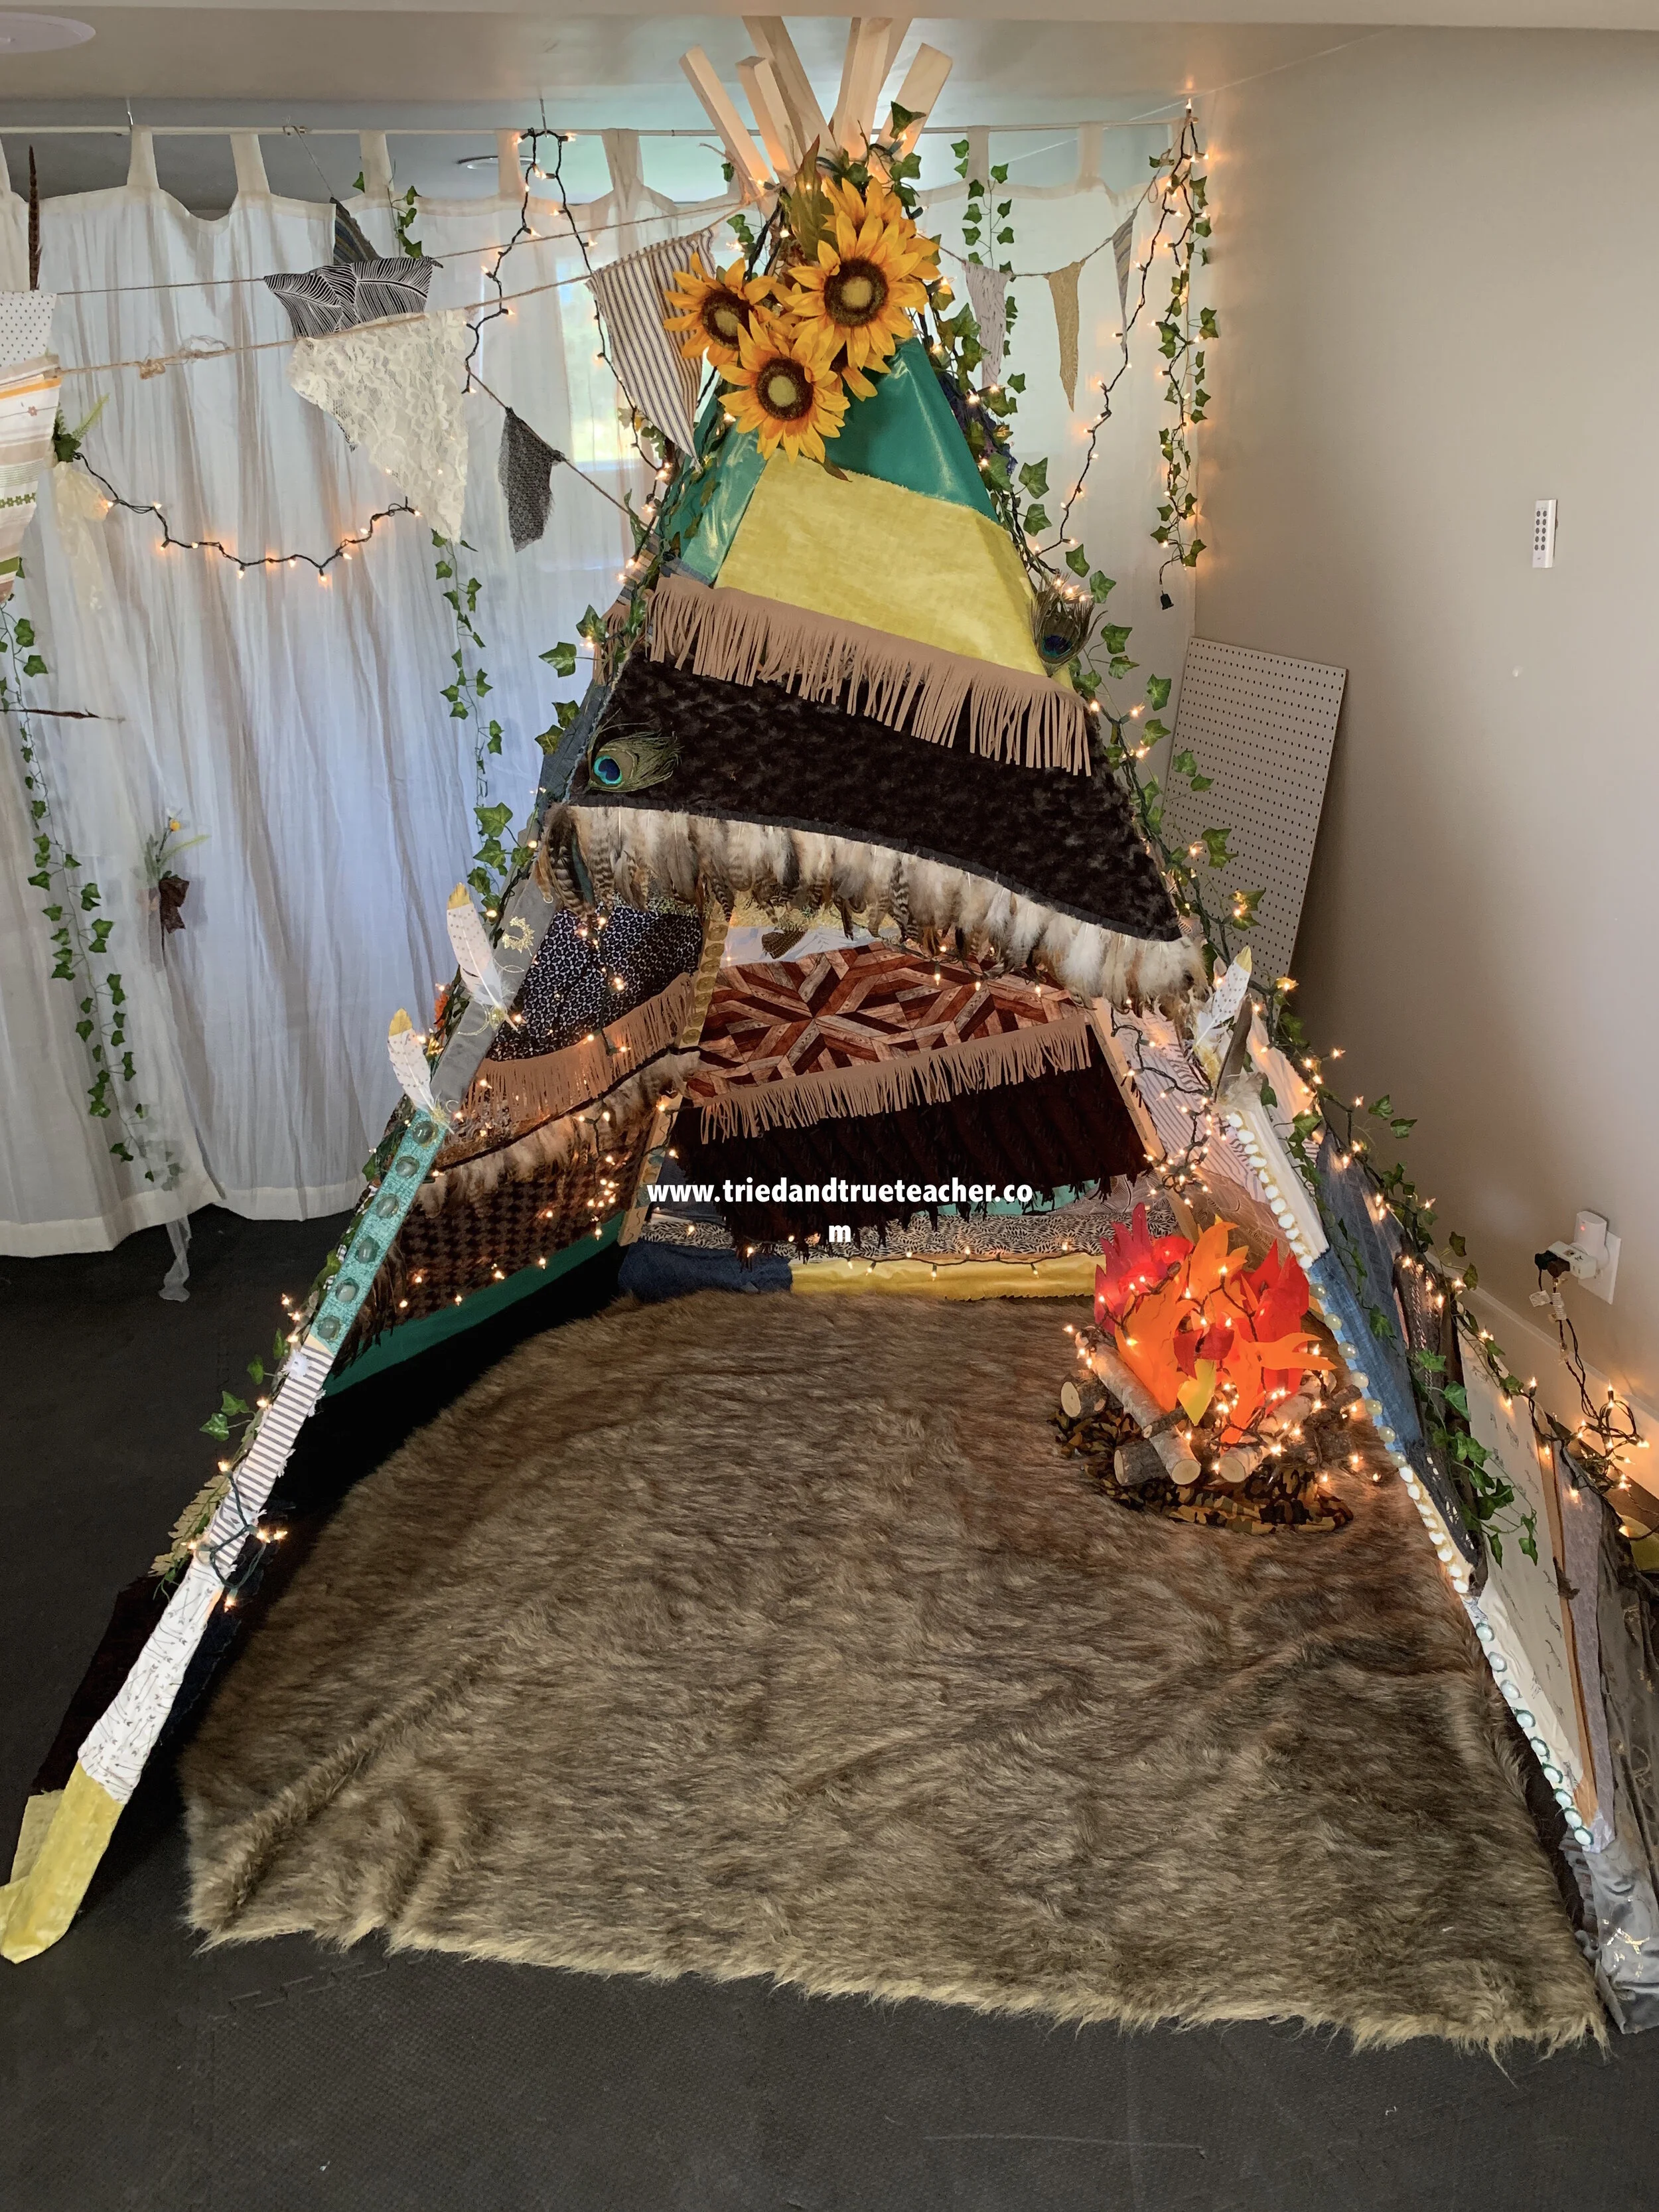
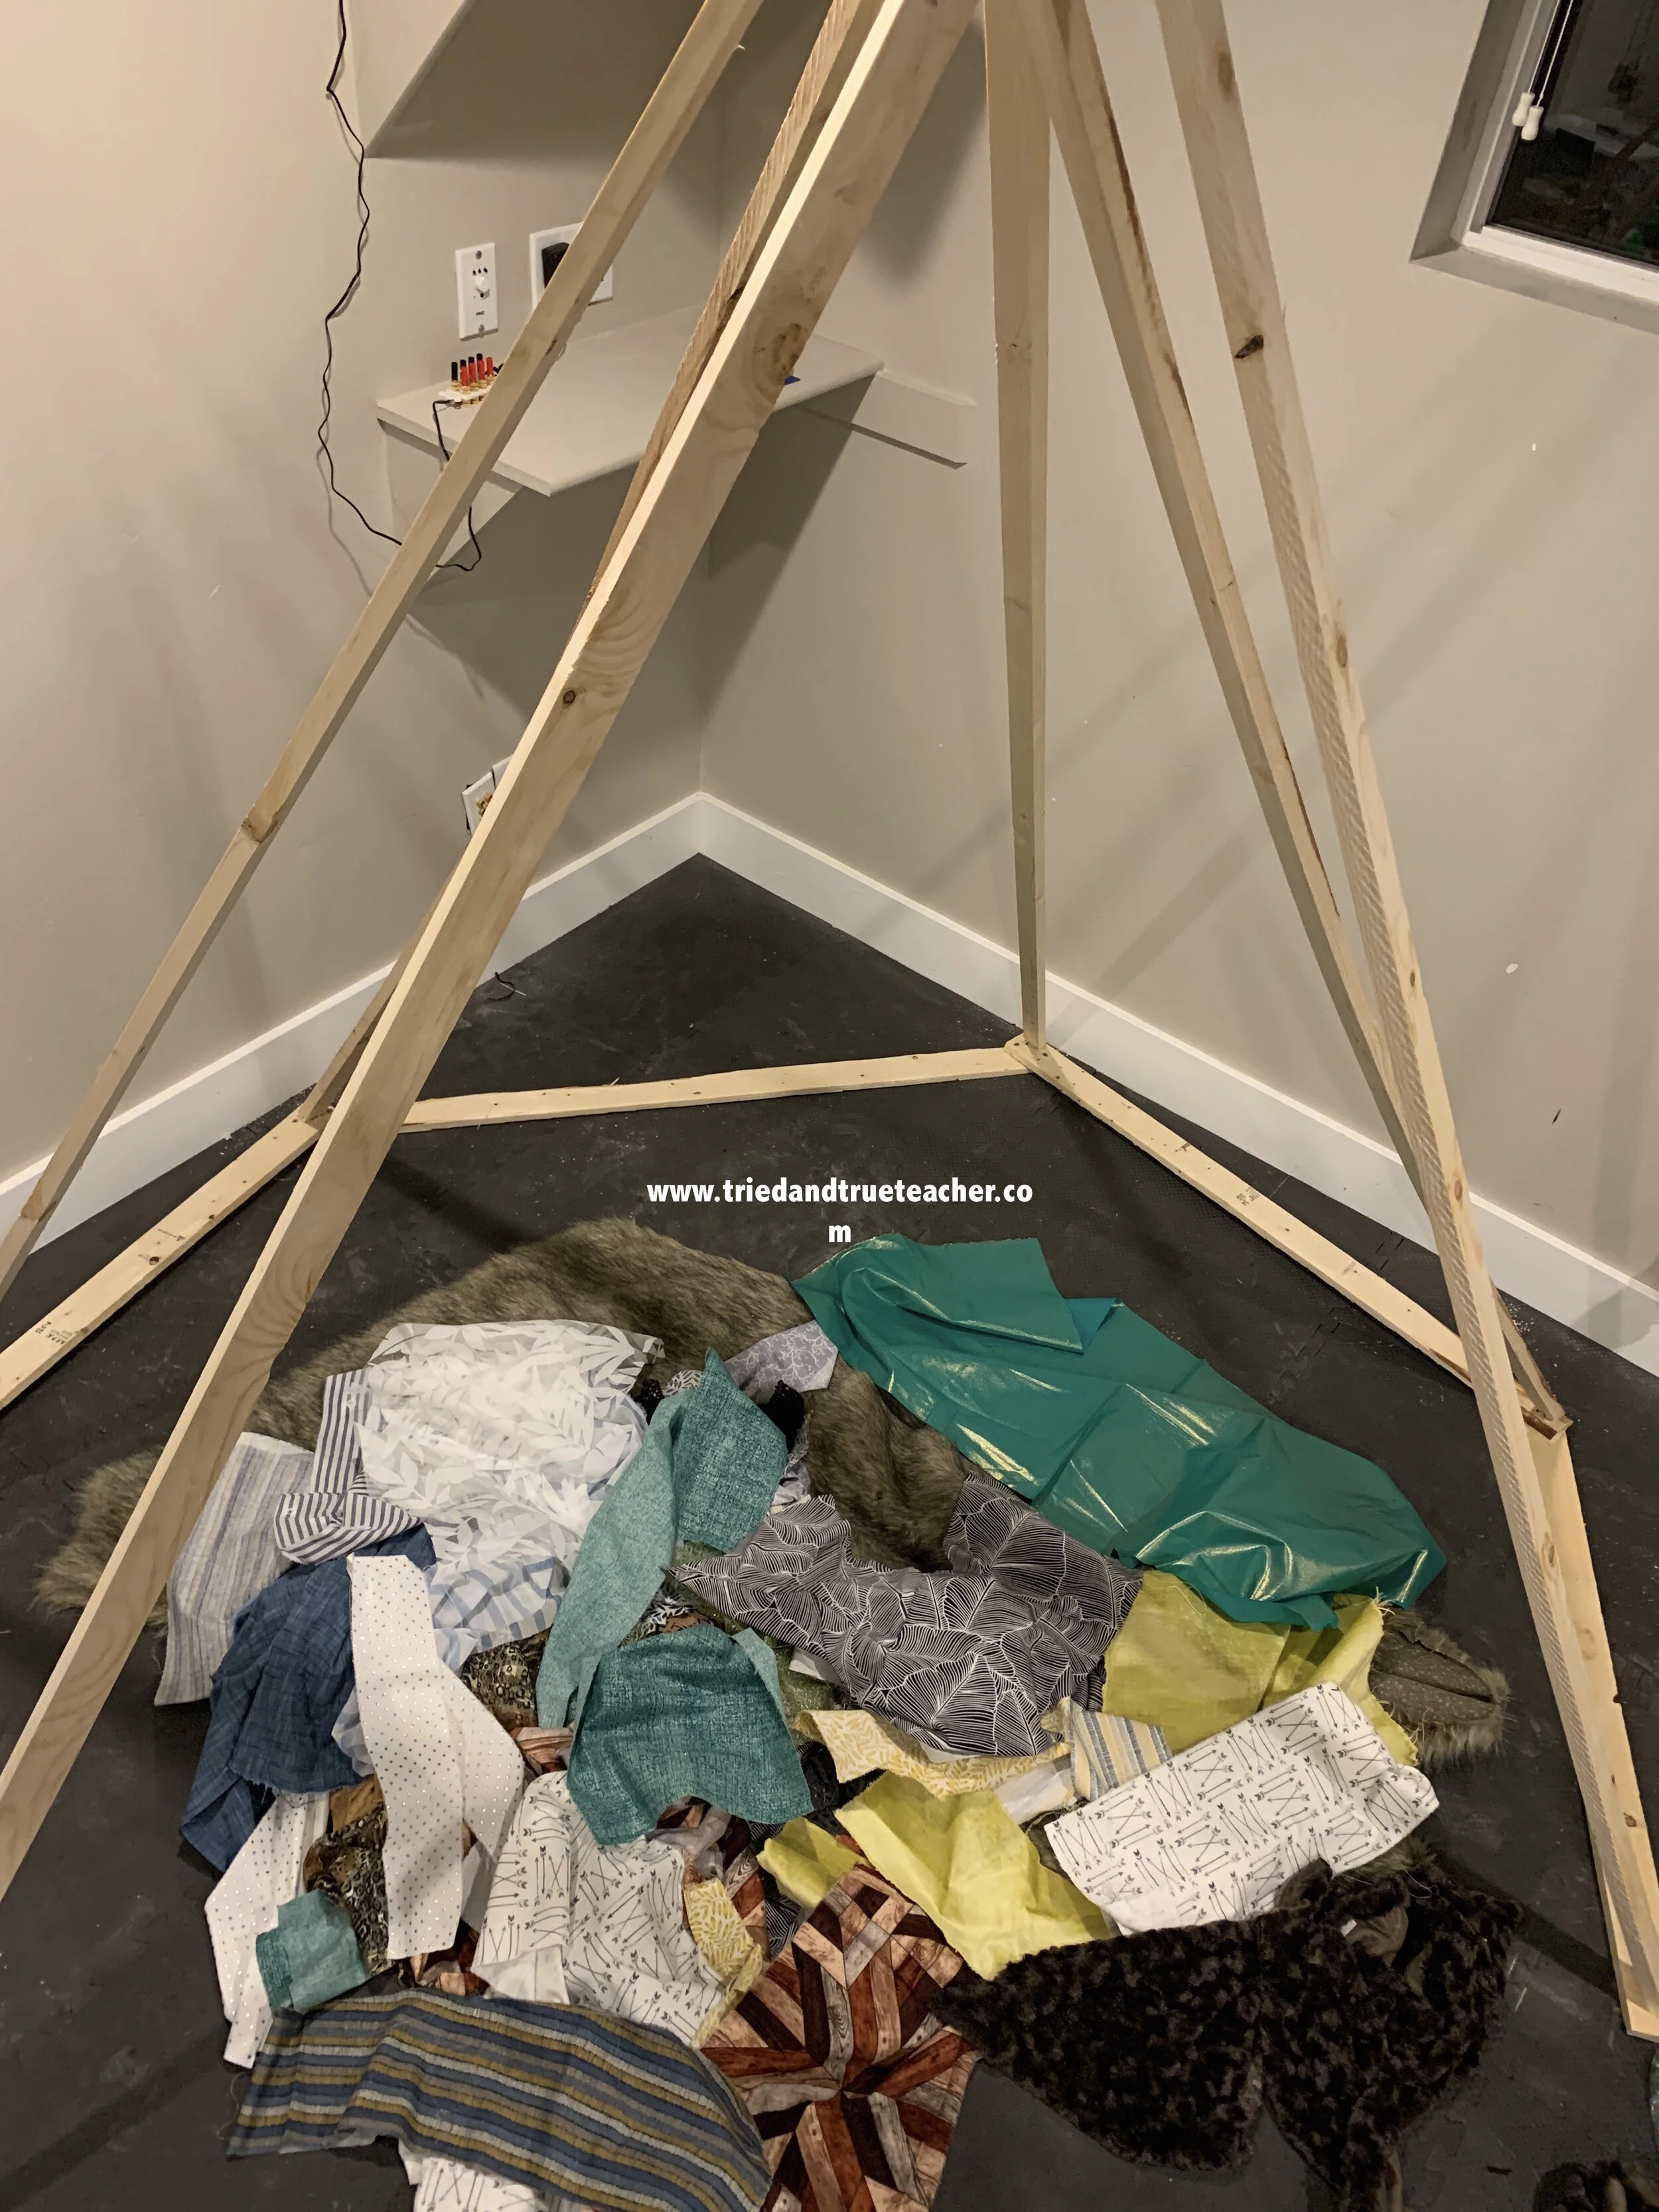
Here are photos of the first DIY tent I made for my classroom…

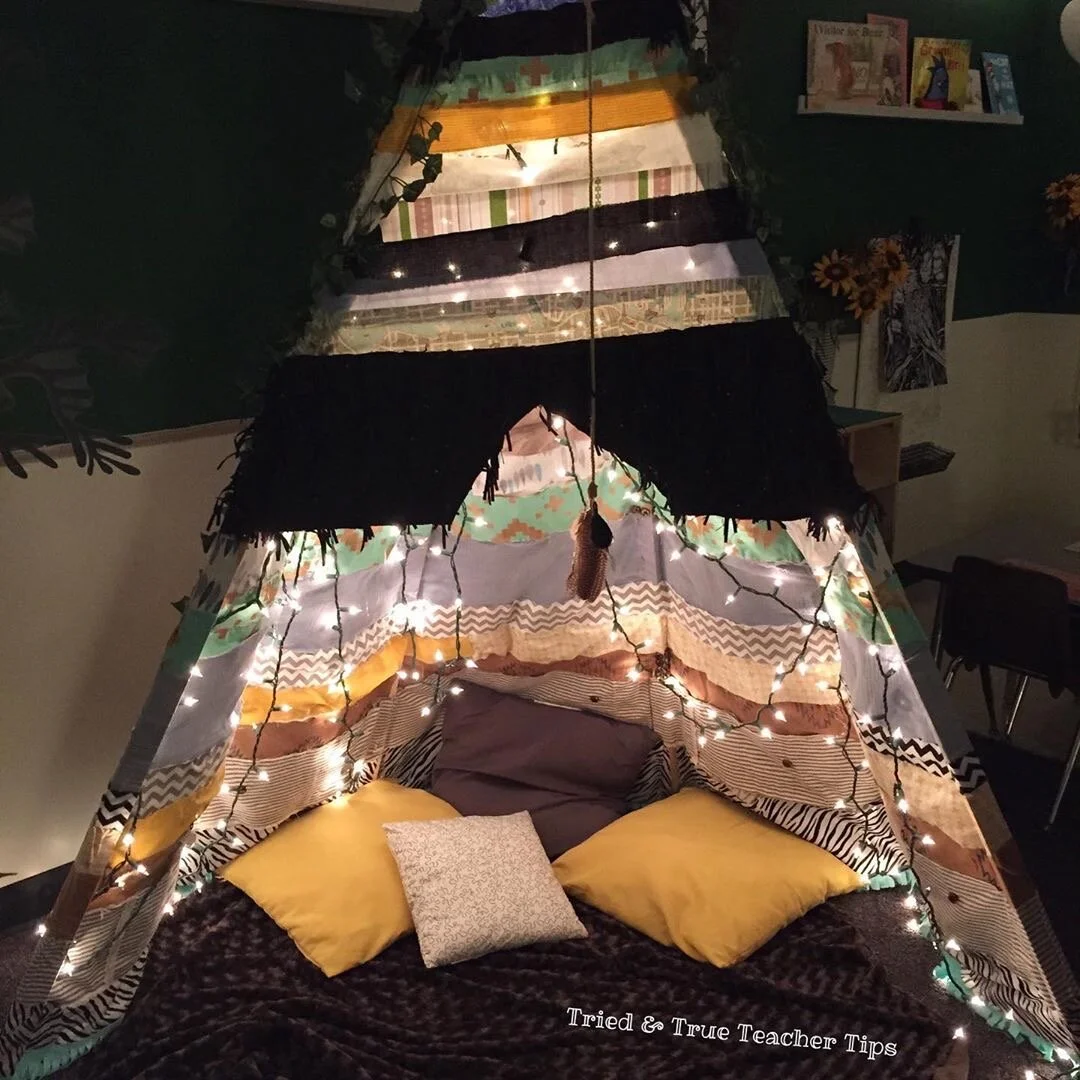
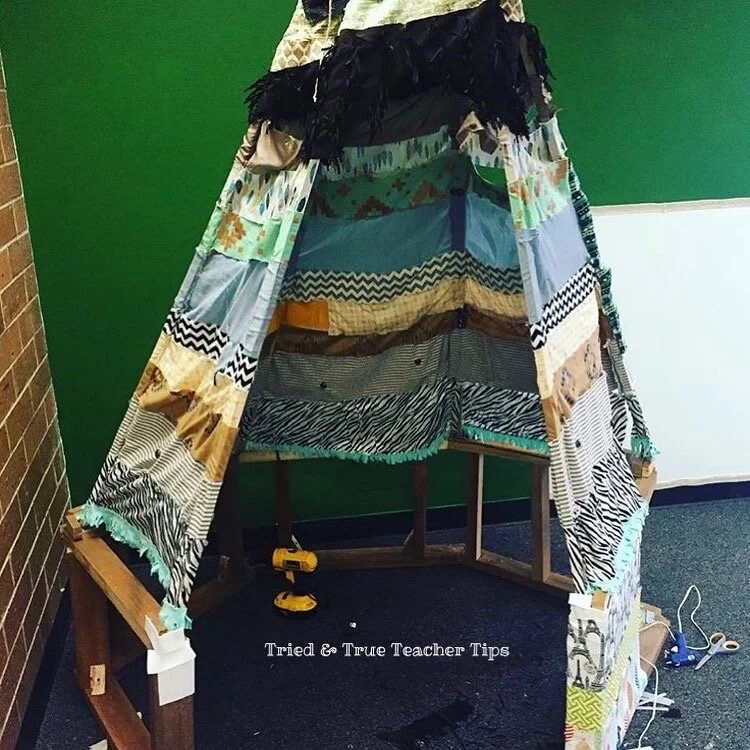
It began as a simple structure with 6 pieces of wood wrapped with fabric.

So here’s your Step-By-Step guide to making one of these tents!
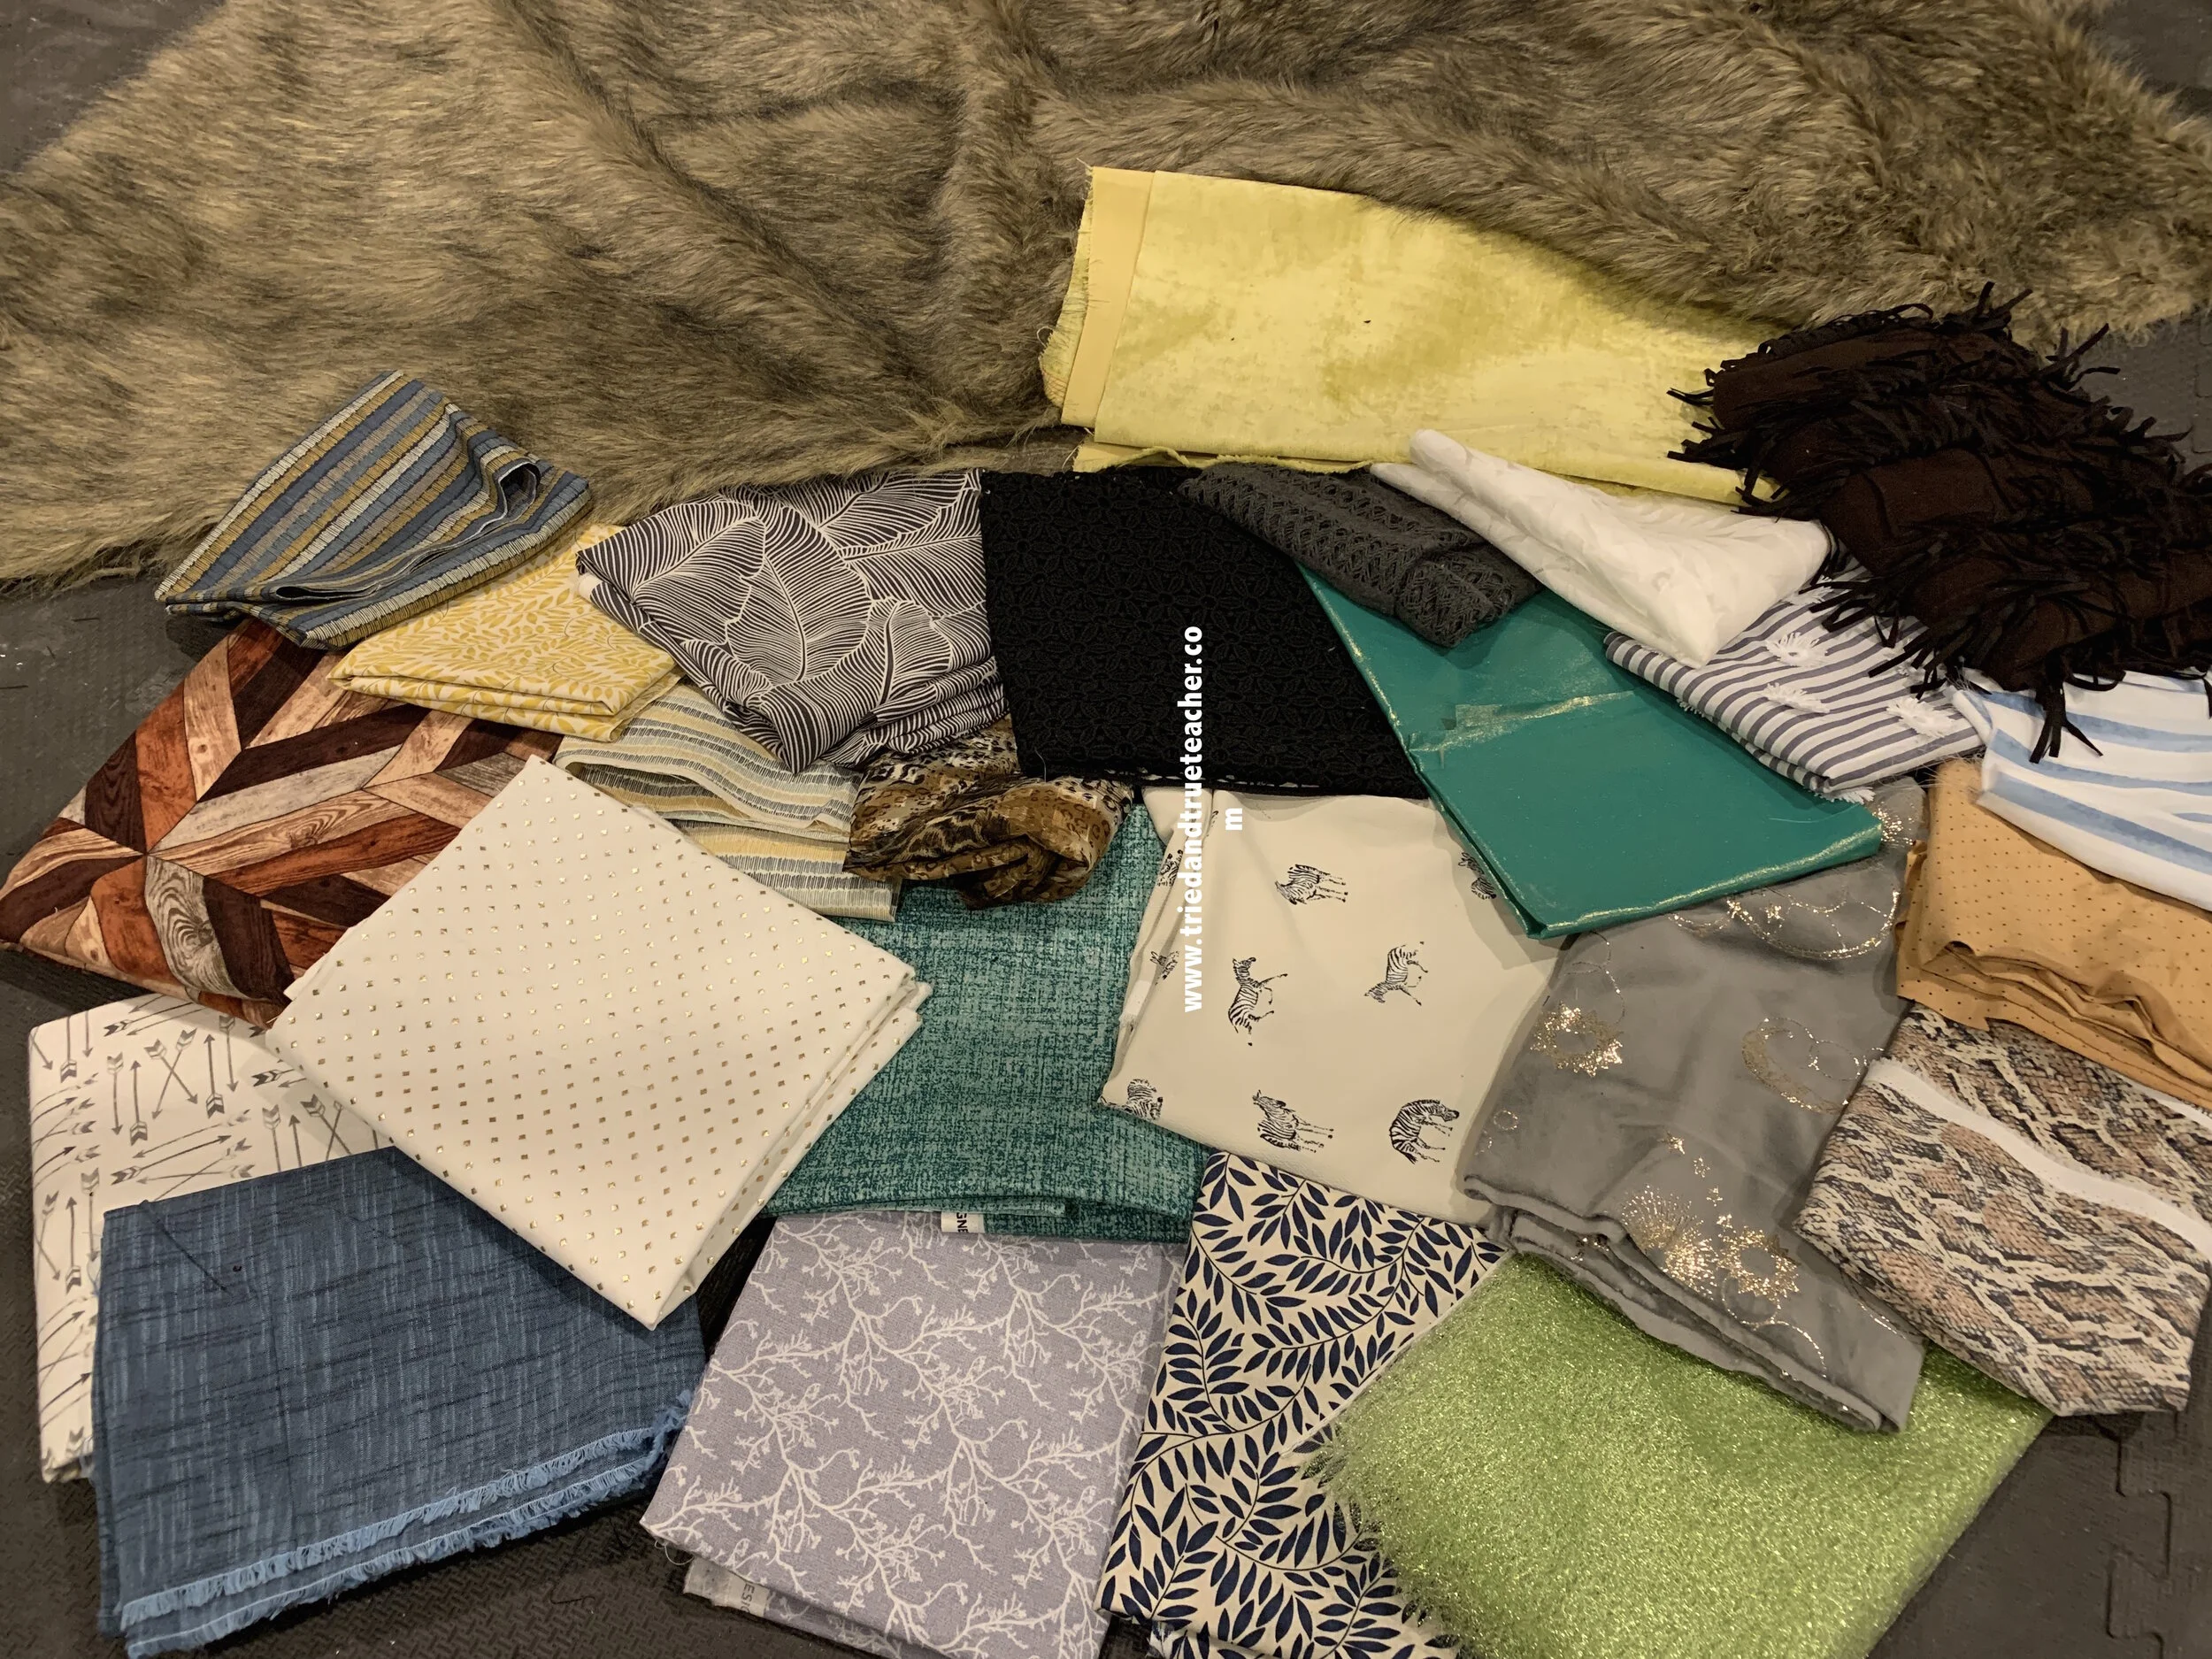
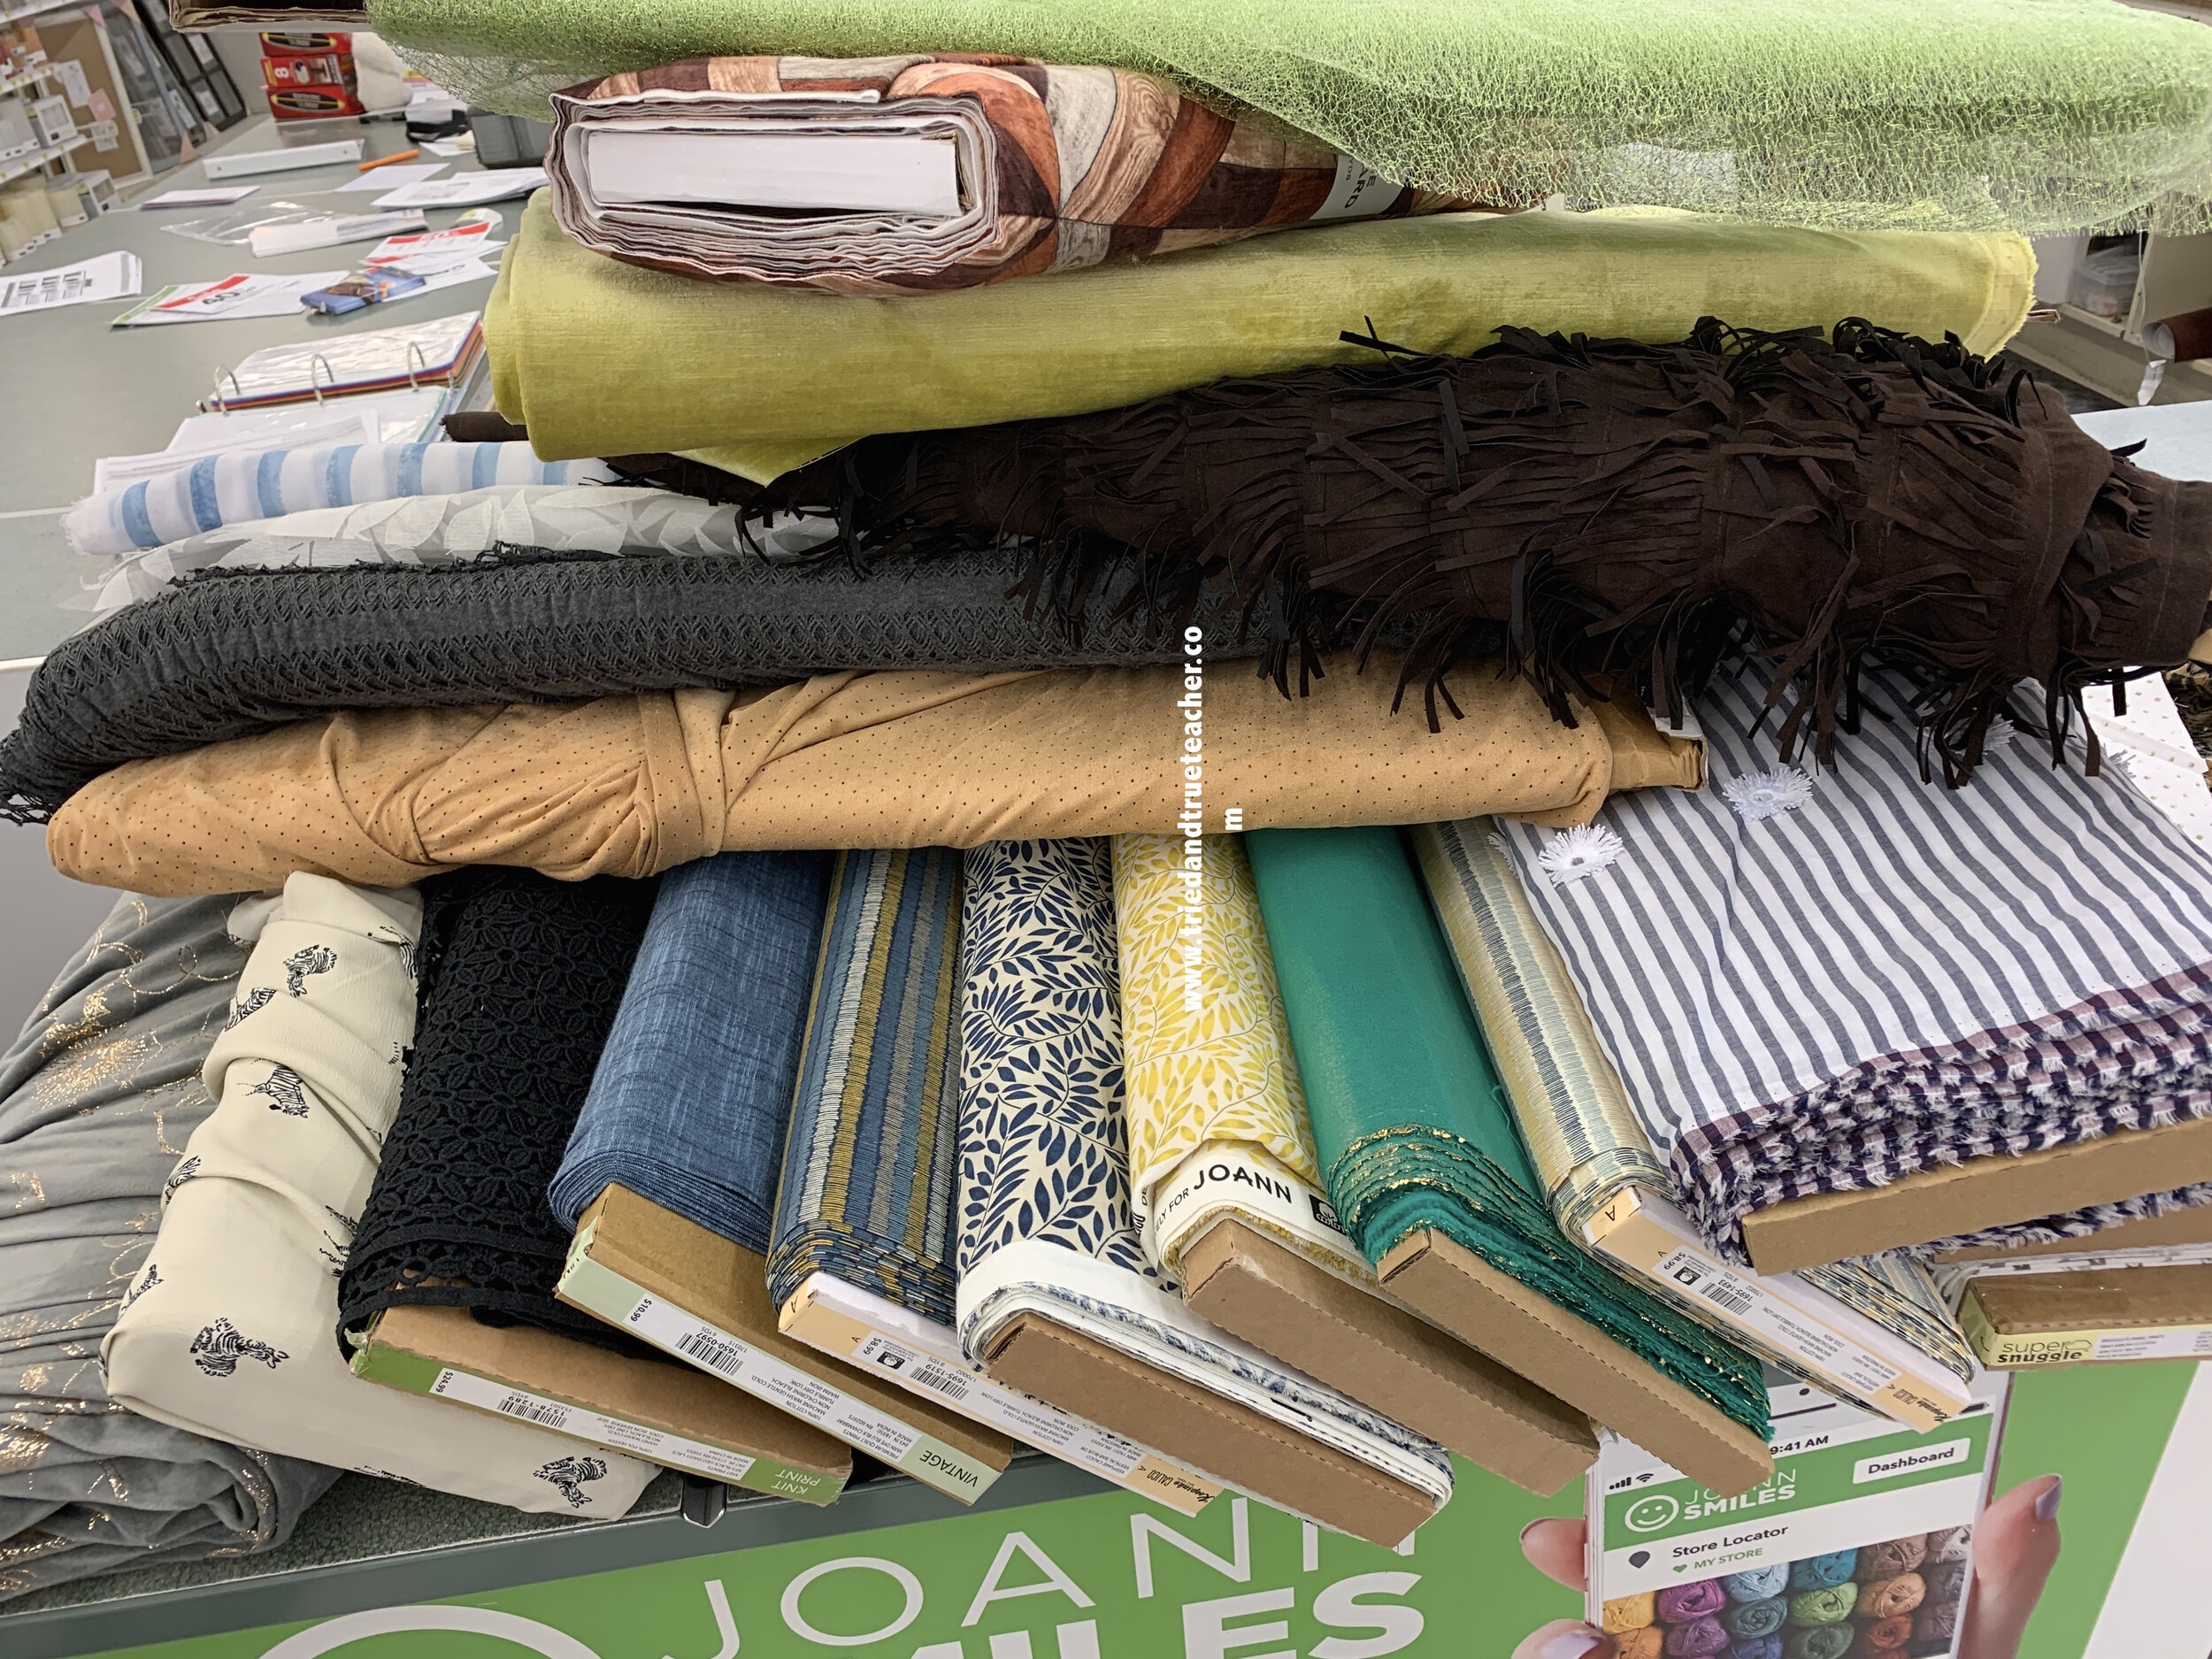
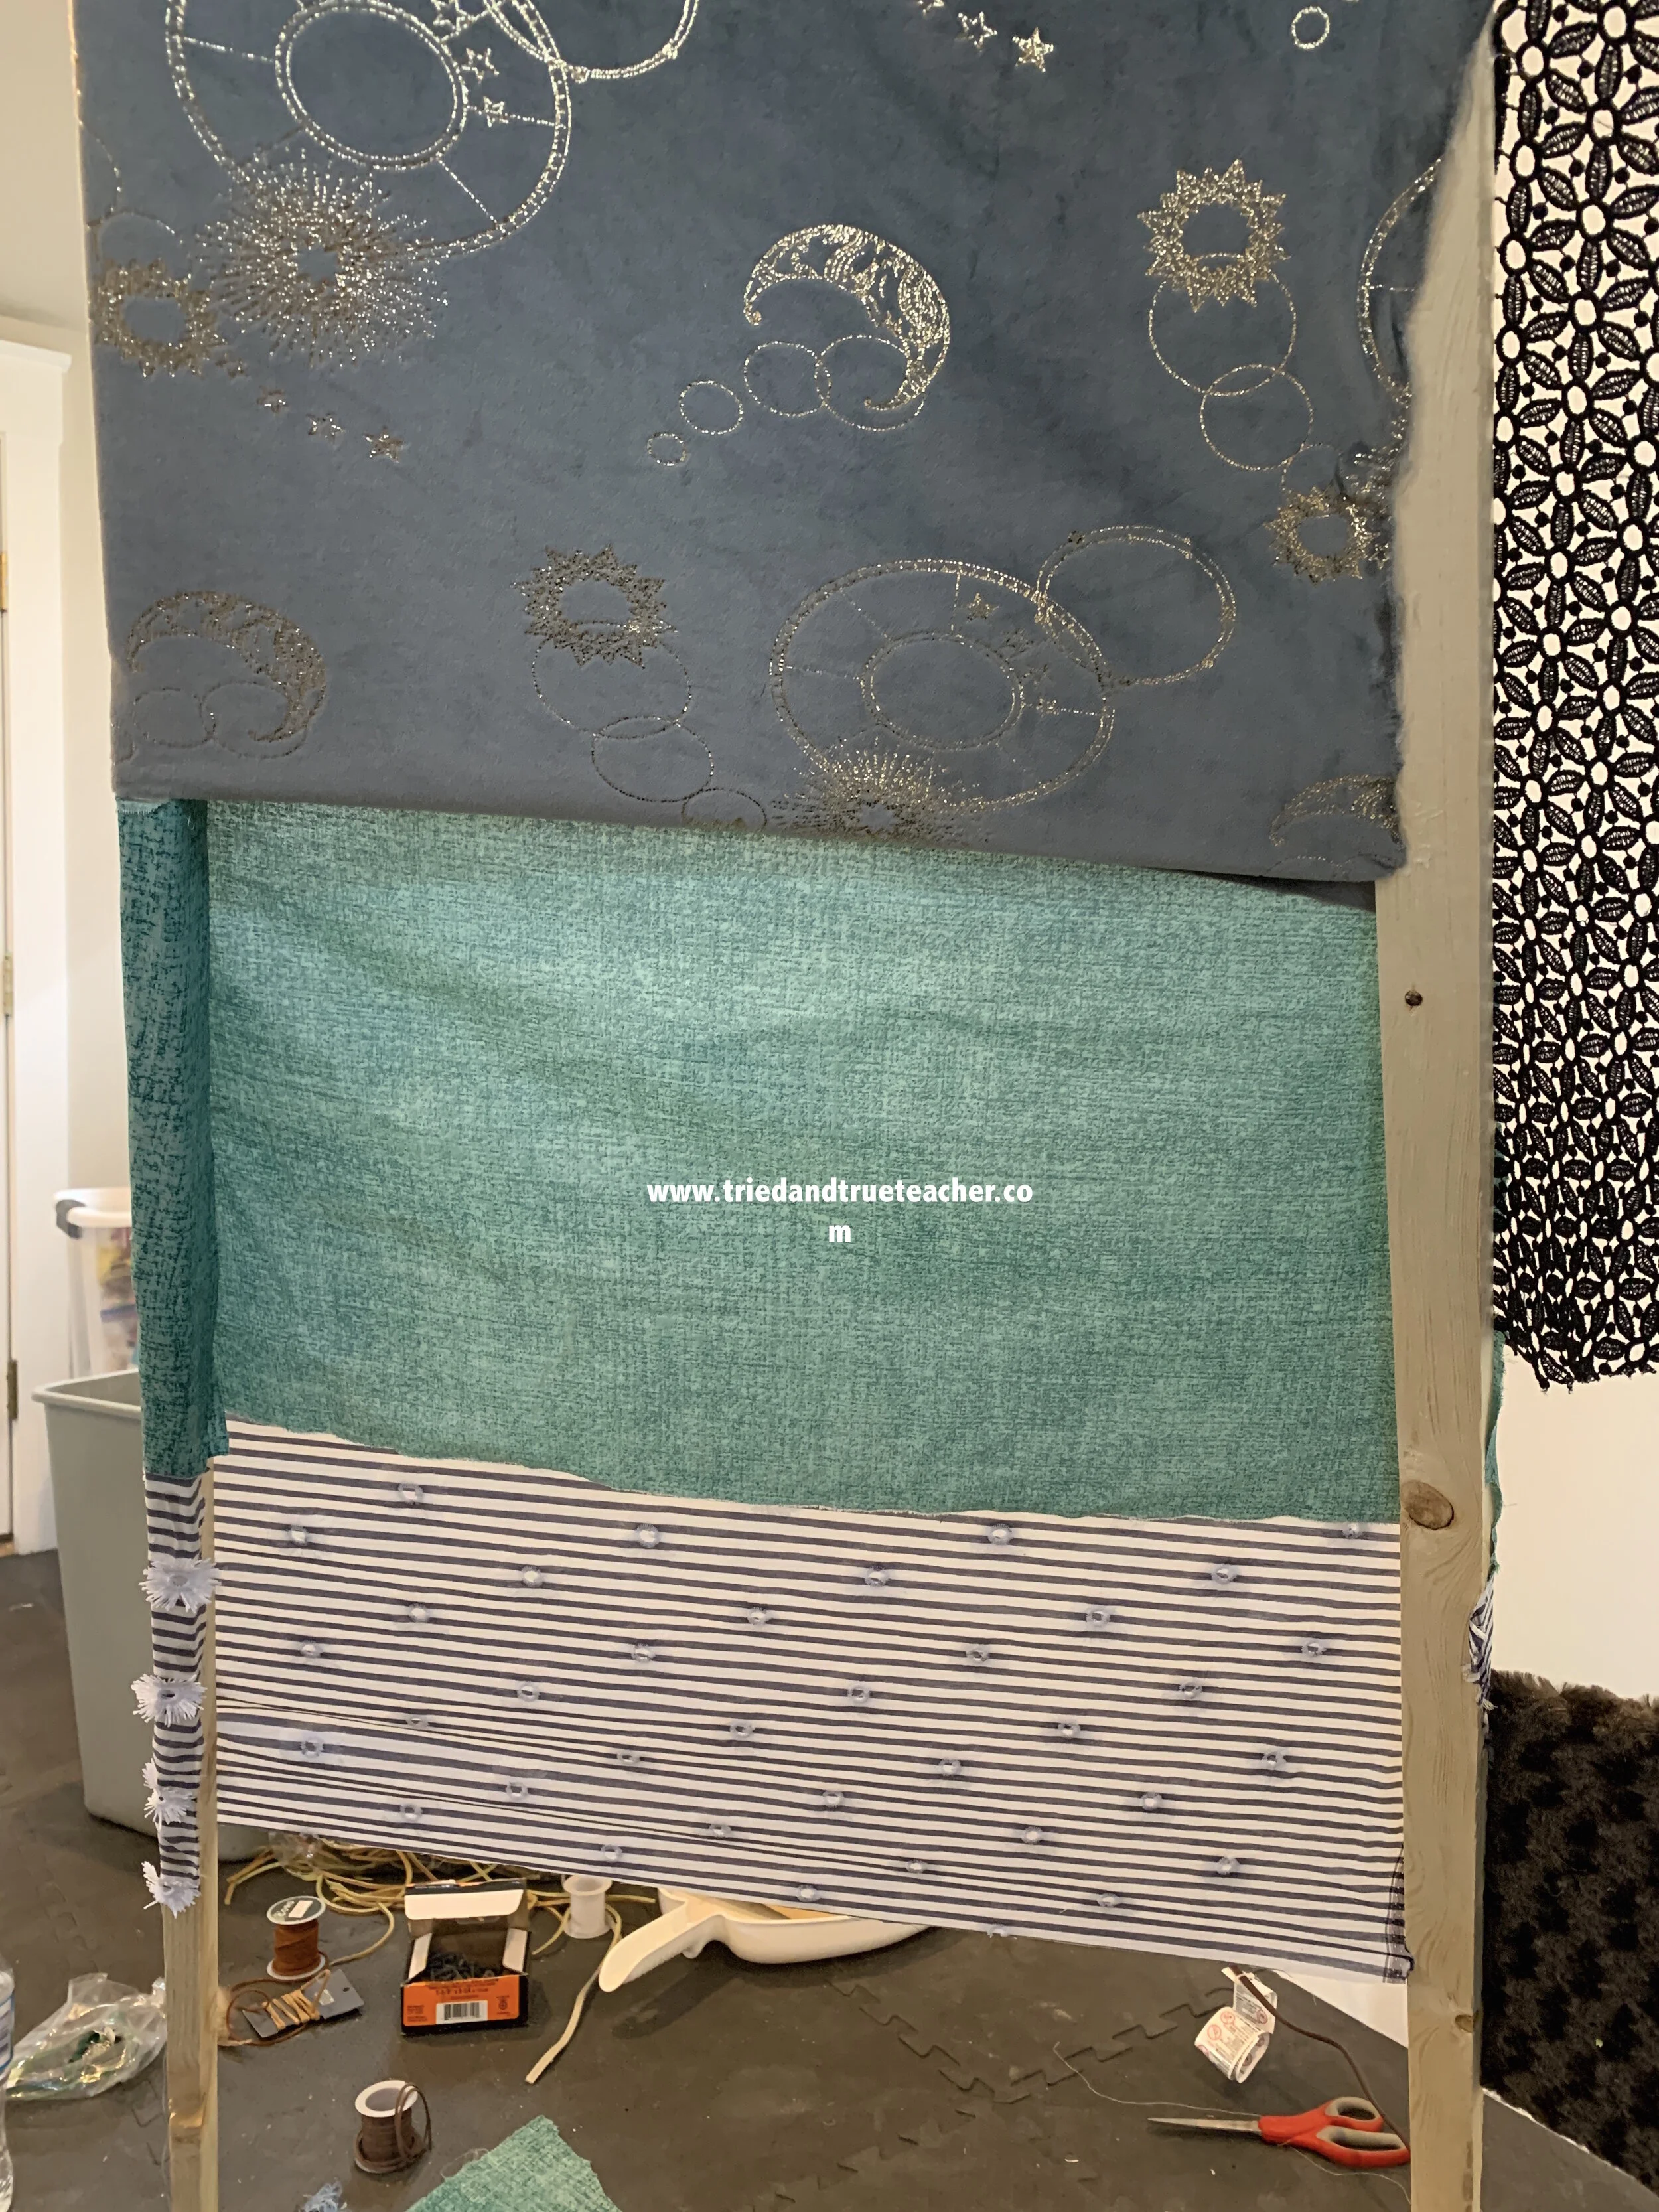
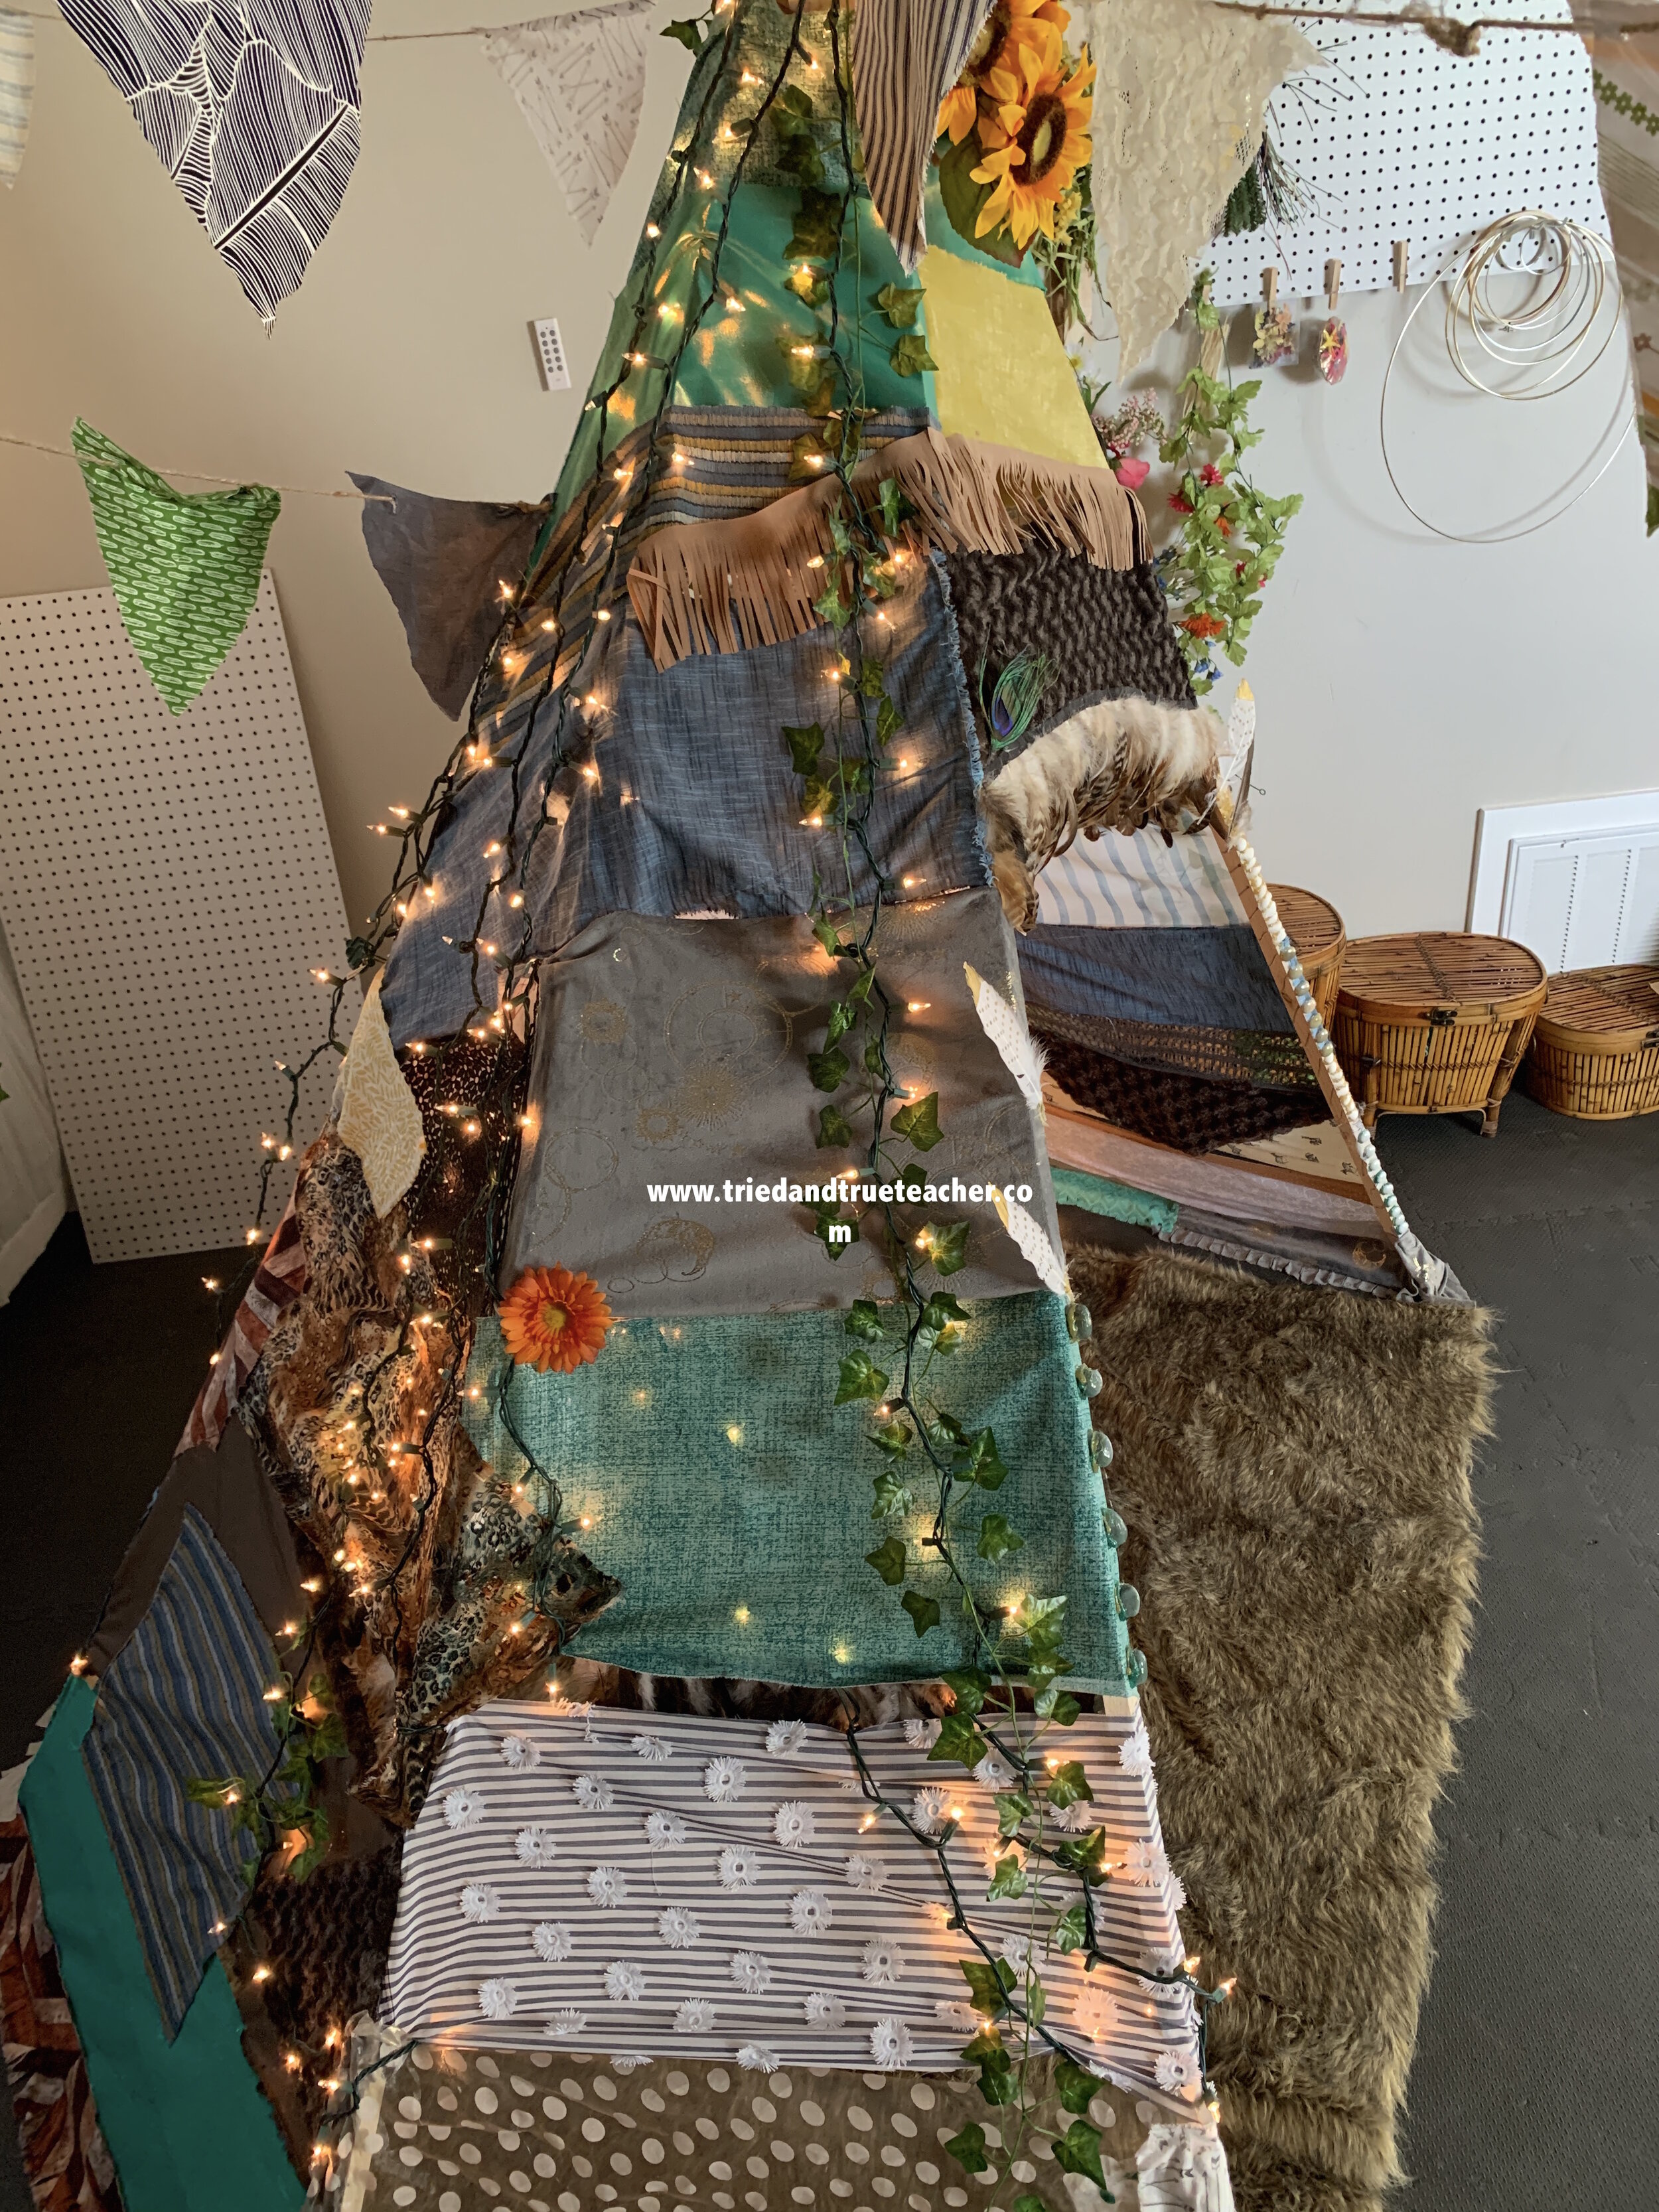
First, you start out collecting the fabric you’d like to use.
When I was making the first one, I went to the fabric store and chose a few fabrics I liked… then, the girl behind the counter said, “Oh, those are pretty…now go find them some friends!” Hehe, I liked thinking about it like that… you just start with one or two and then throw in some more that work with those, and before you know it you’ll have a beautiful theme going!
^^ (Pictured at the top of this photo)
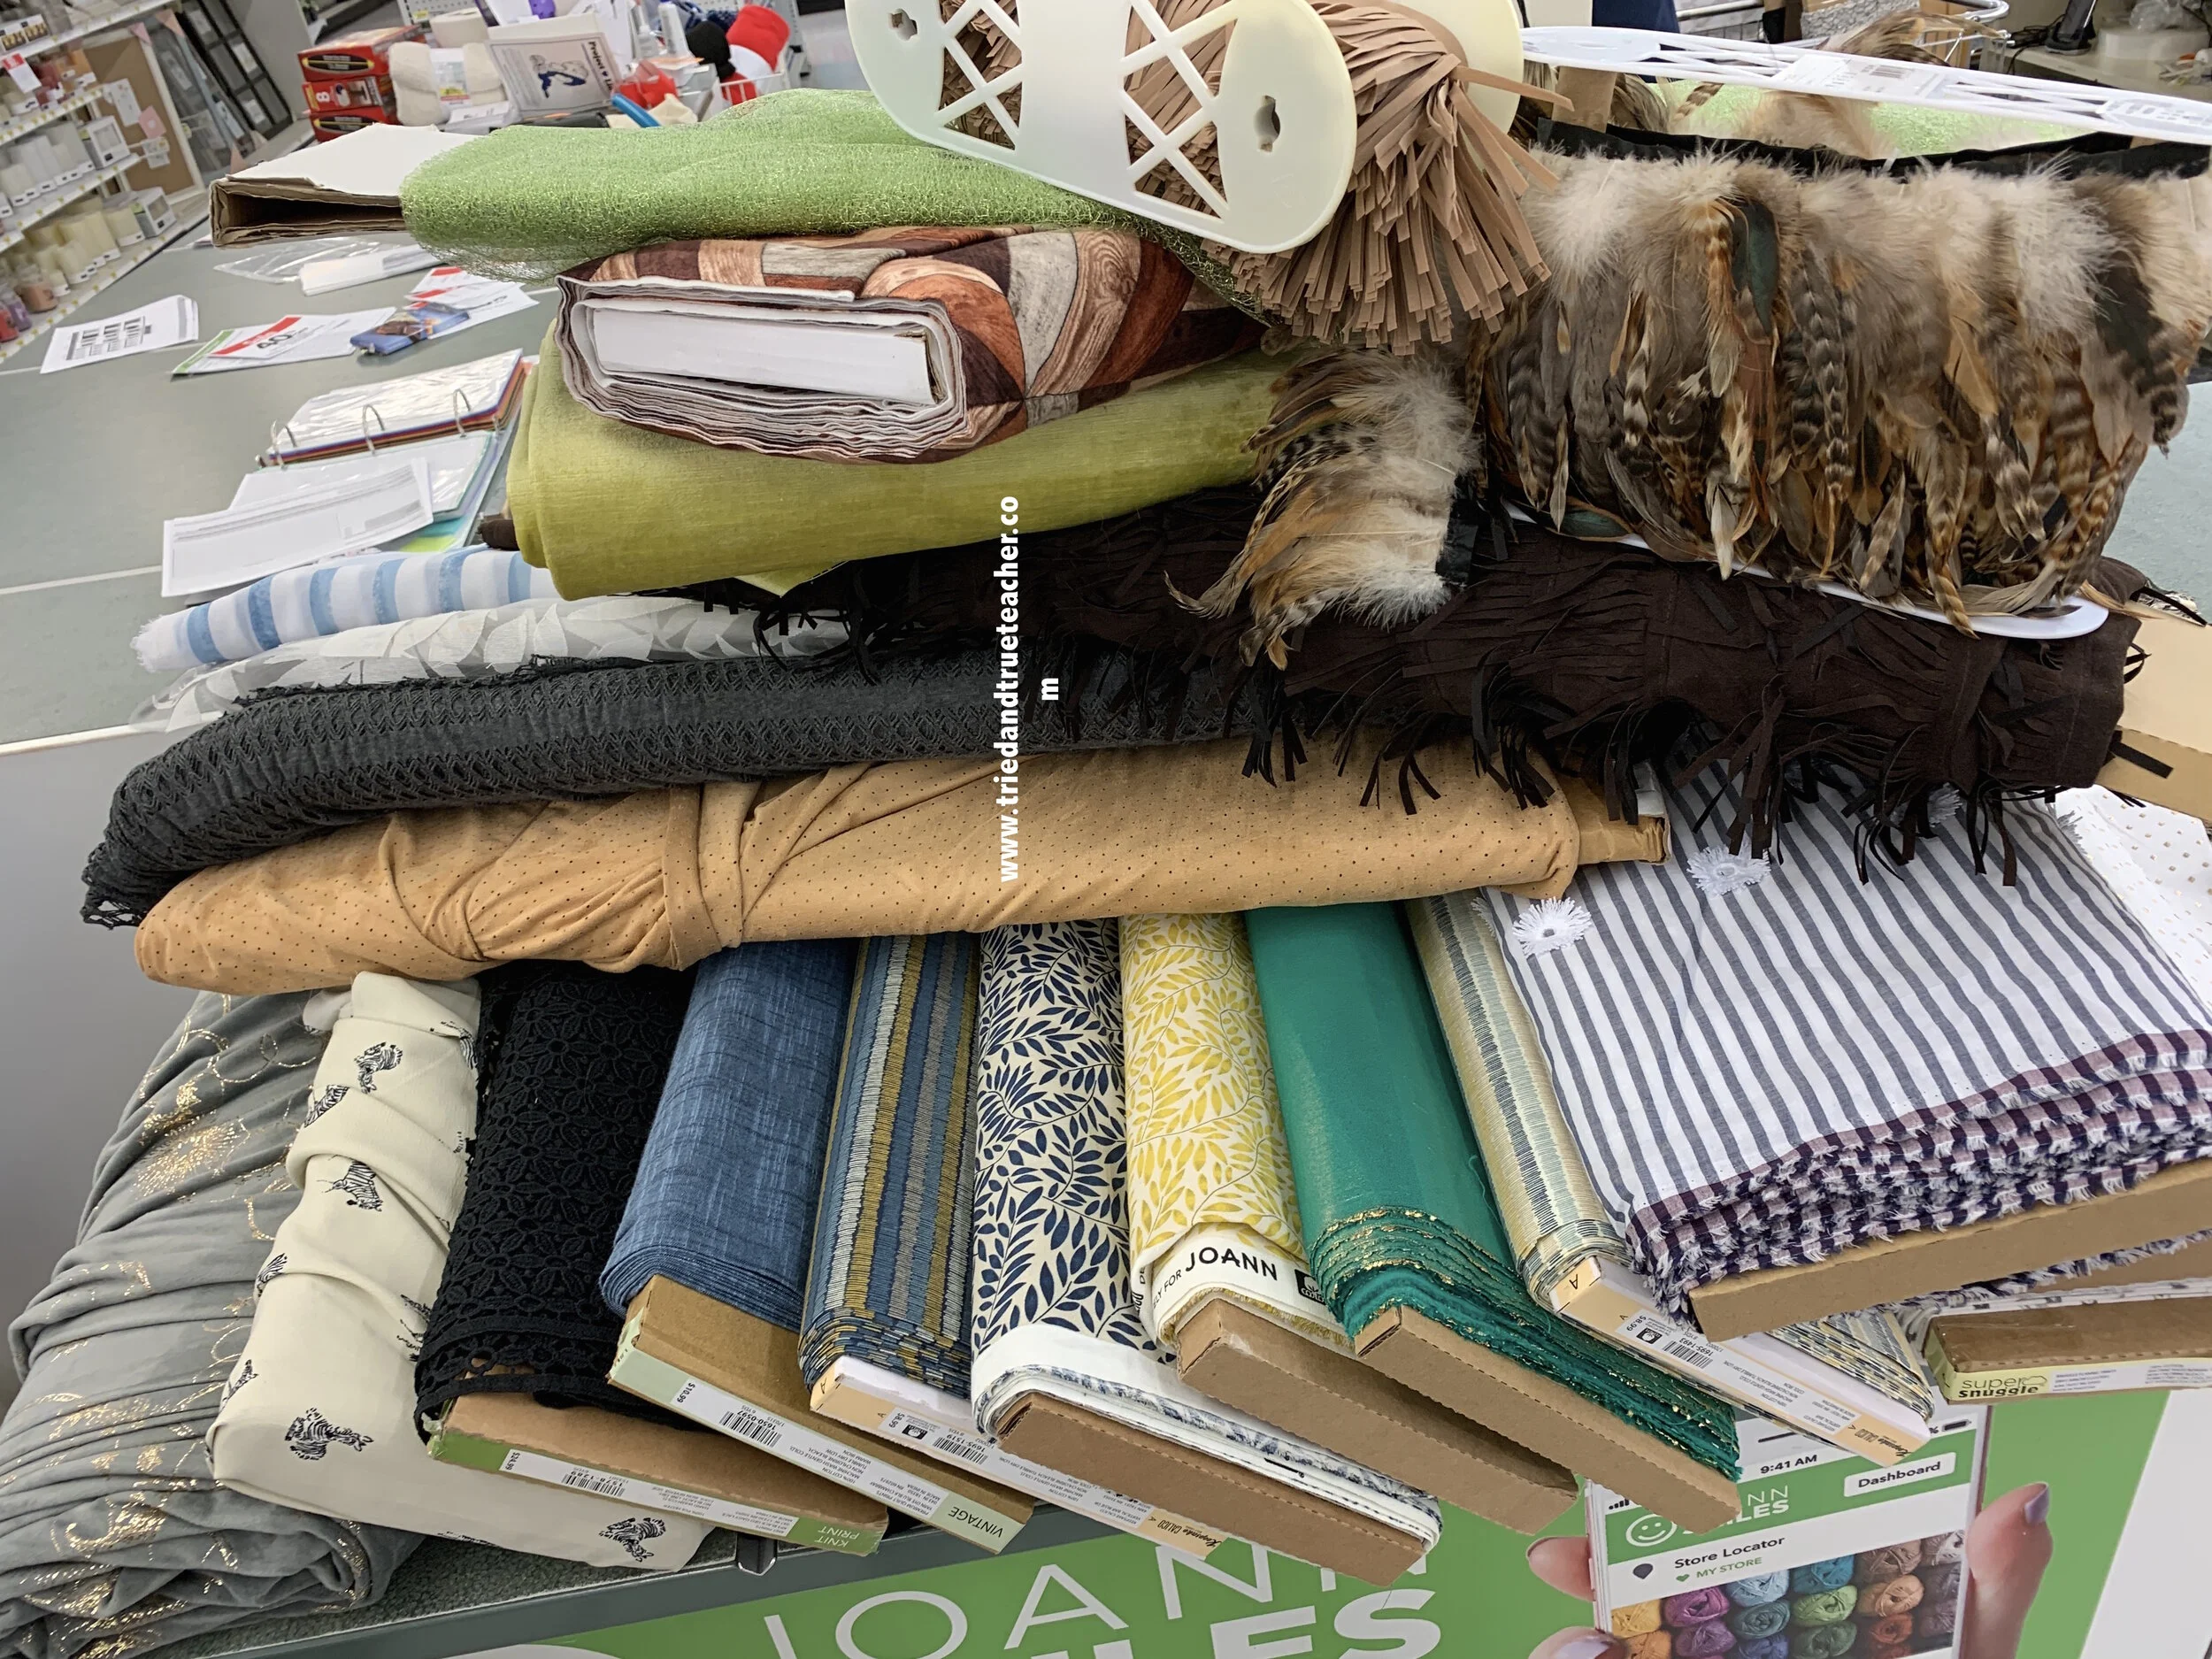
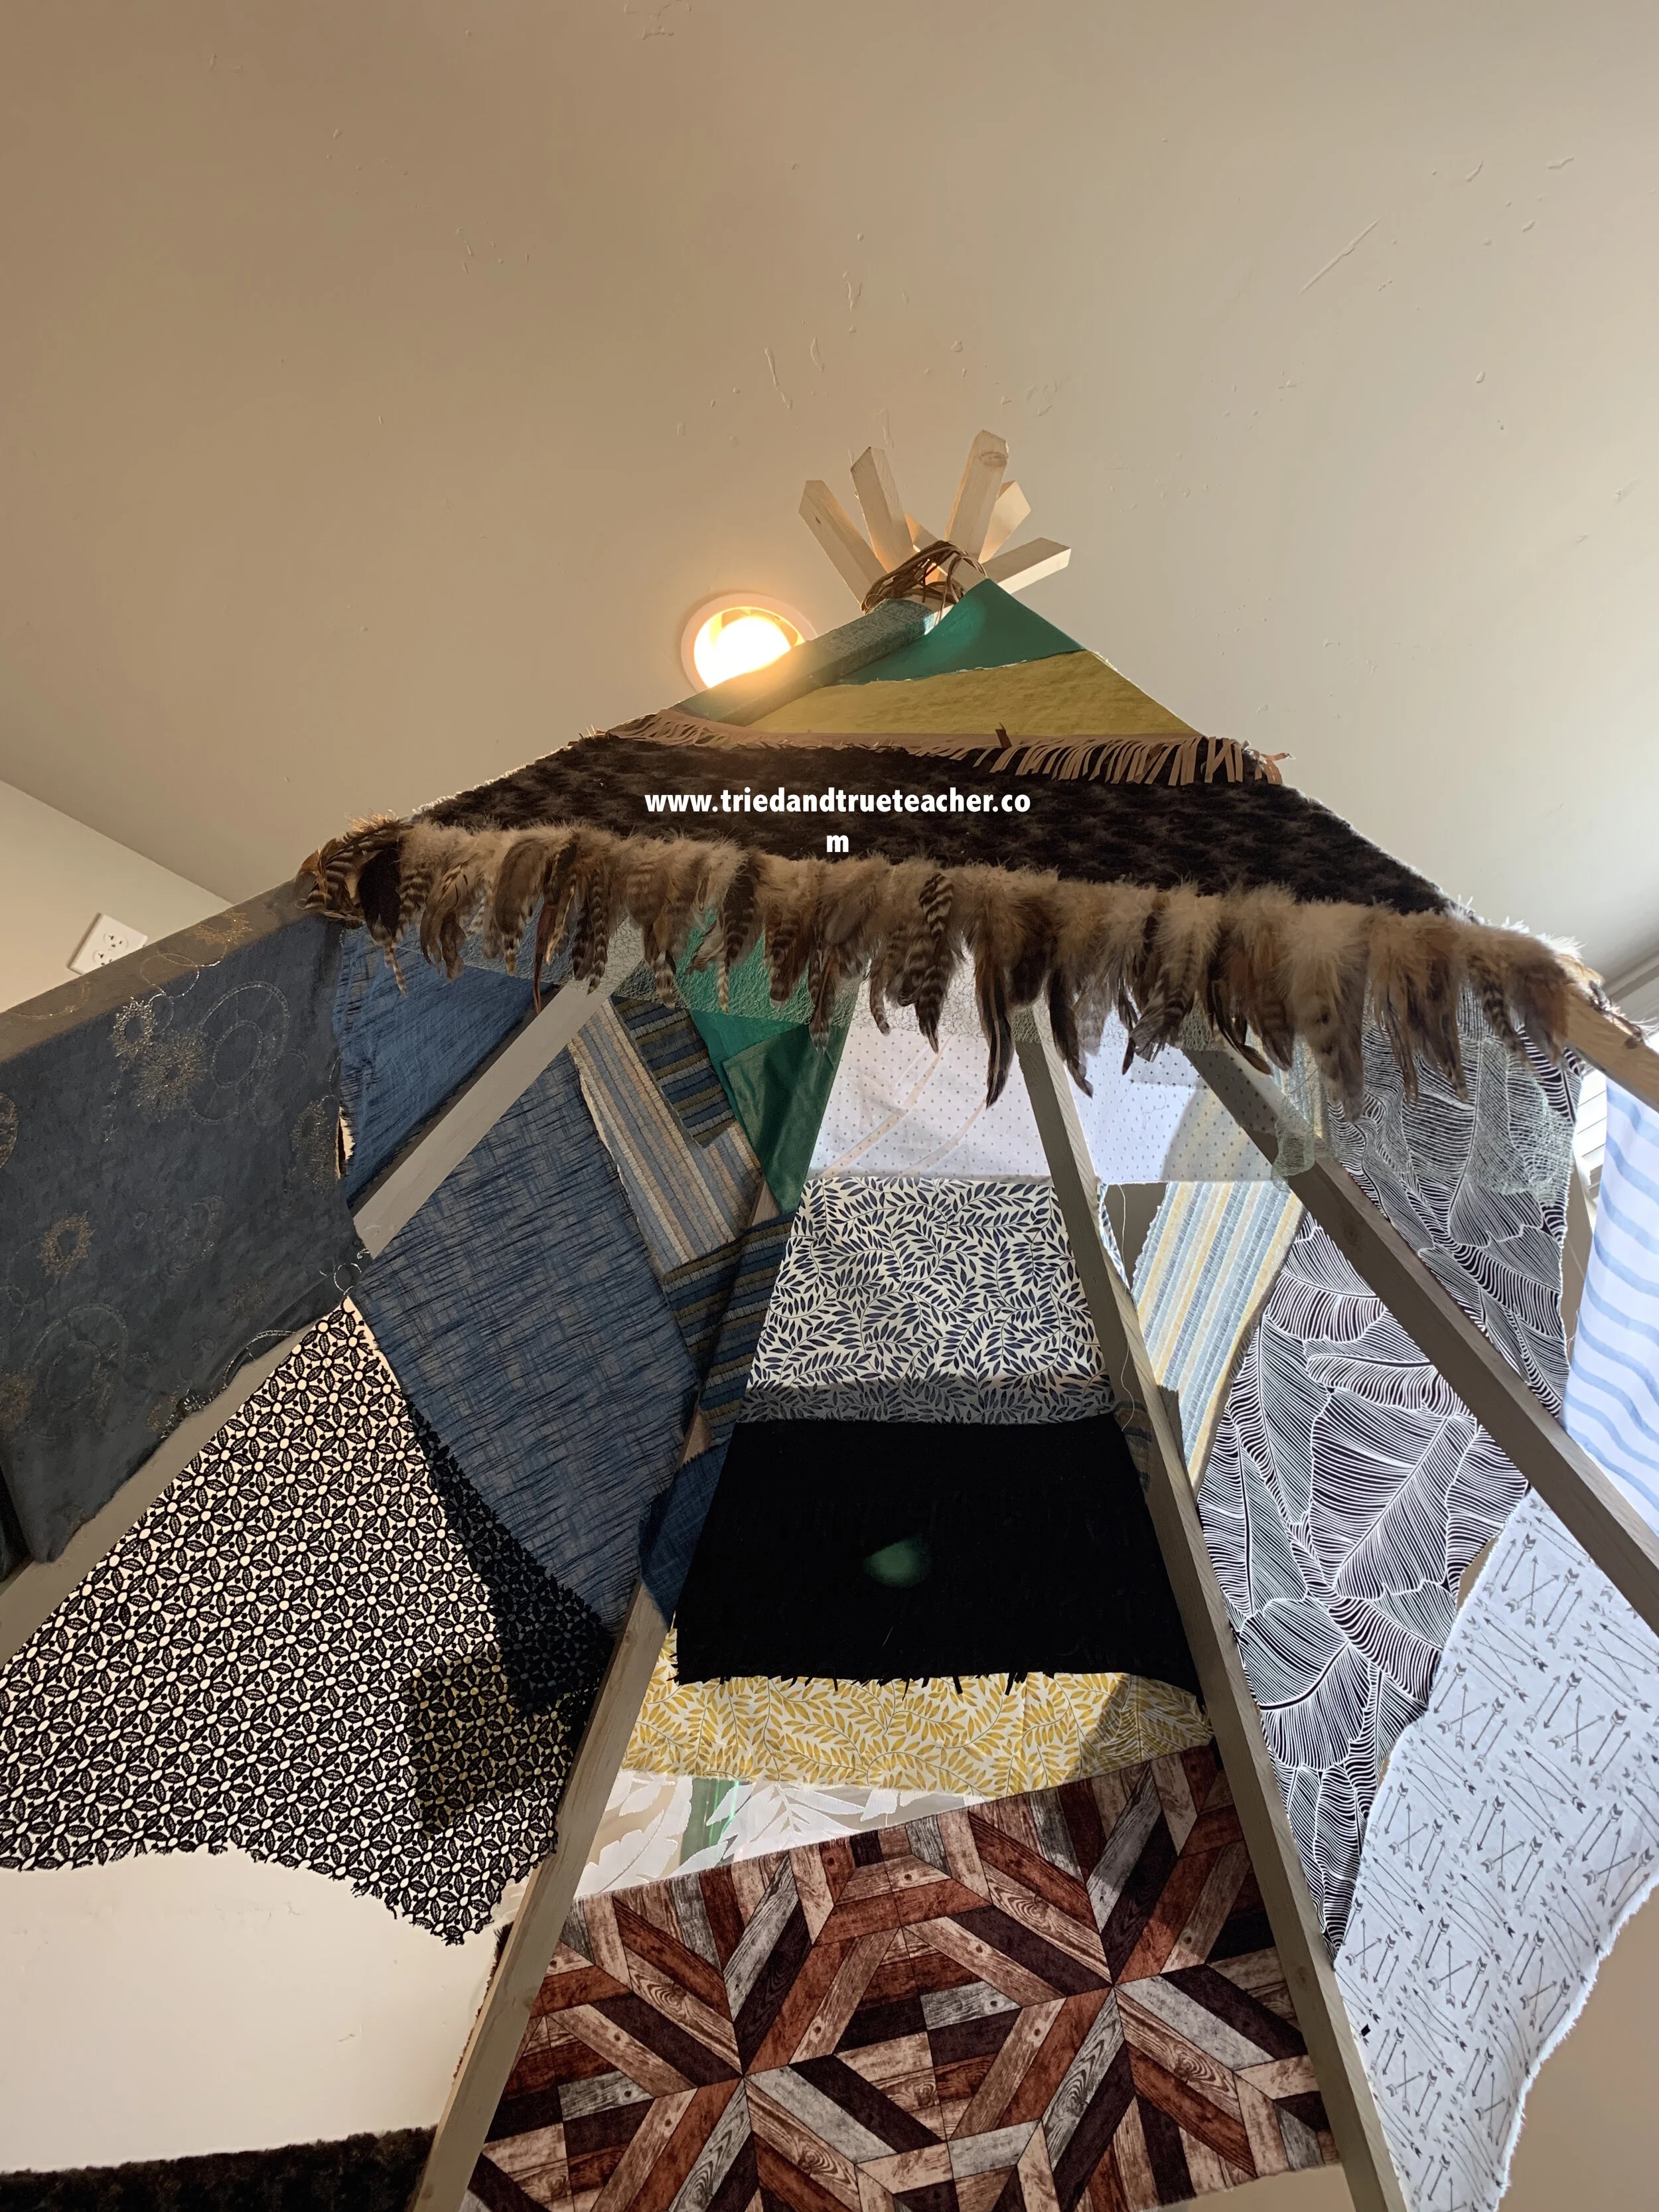
It can be fun to throw in some fringe and tassel fabric to add some flare into your finishing touches.
I did half a yard for most of the ones I picked out.
Think about textures and thickness… you want some that the light will be able to penetrate!
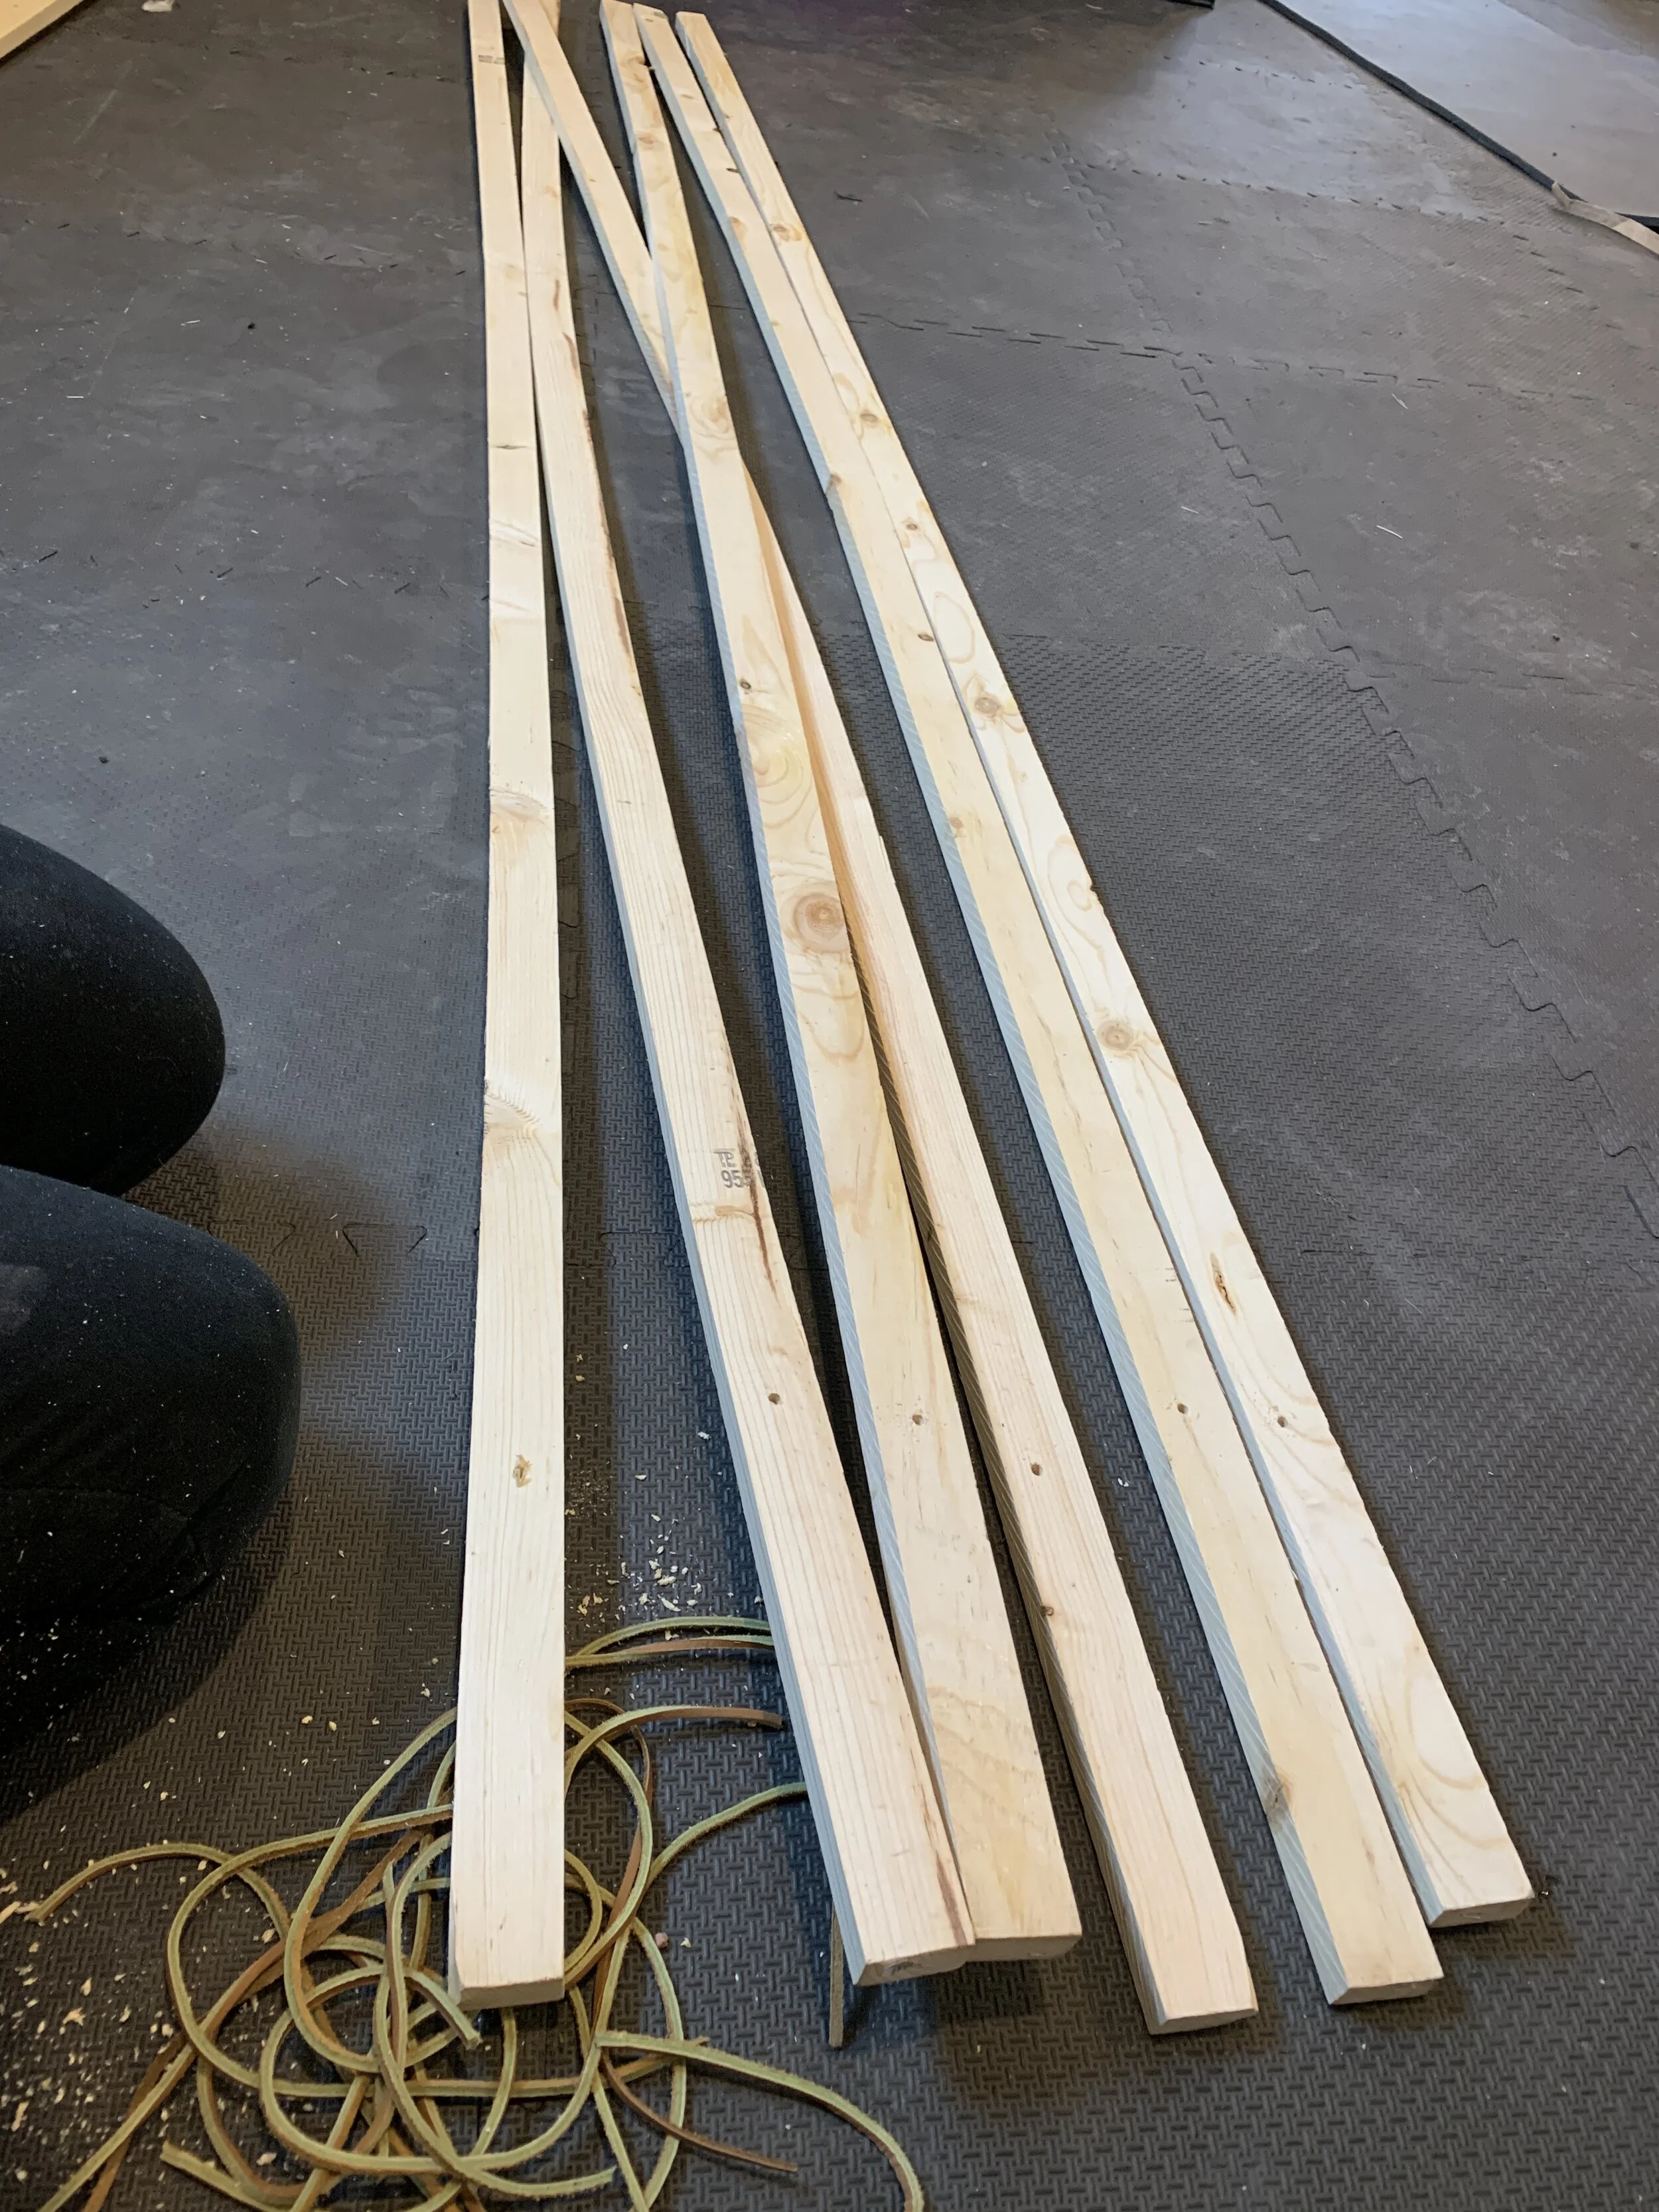
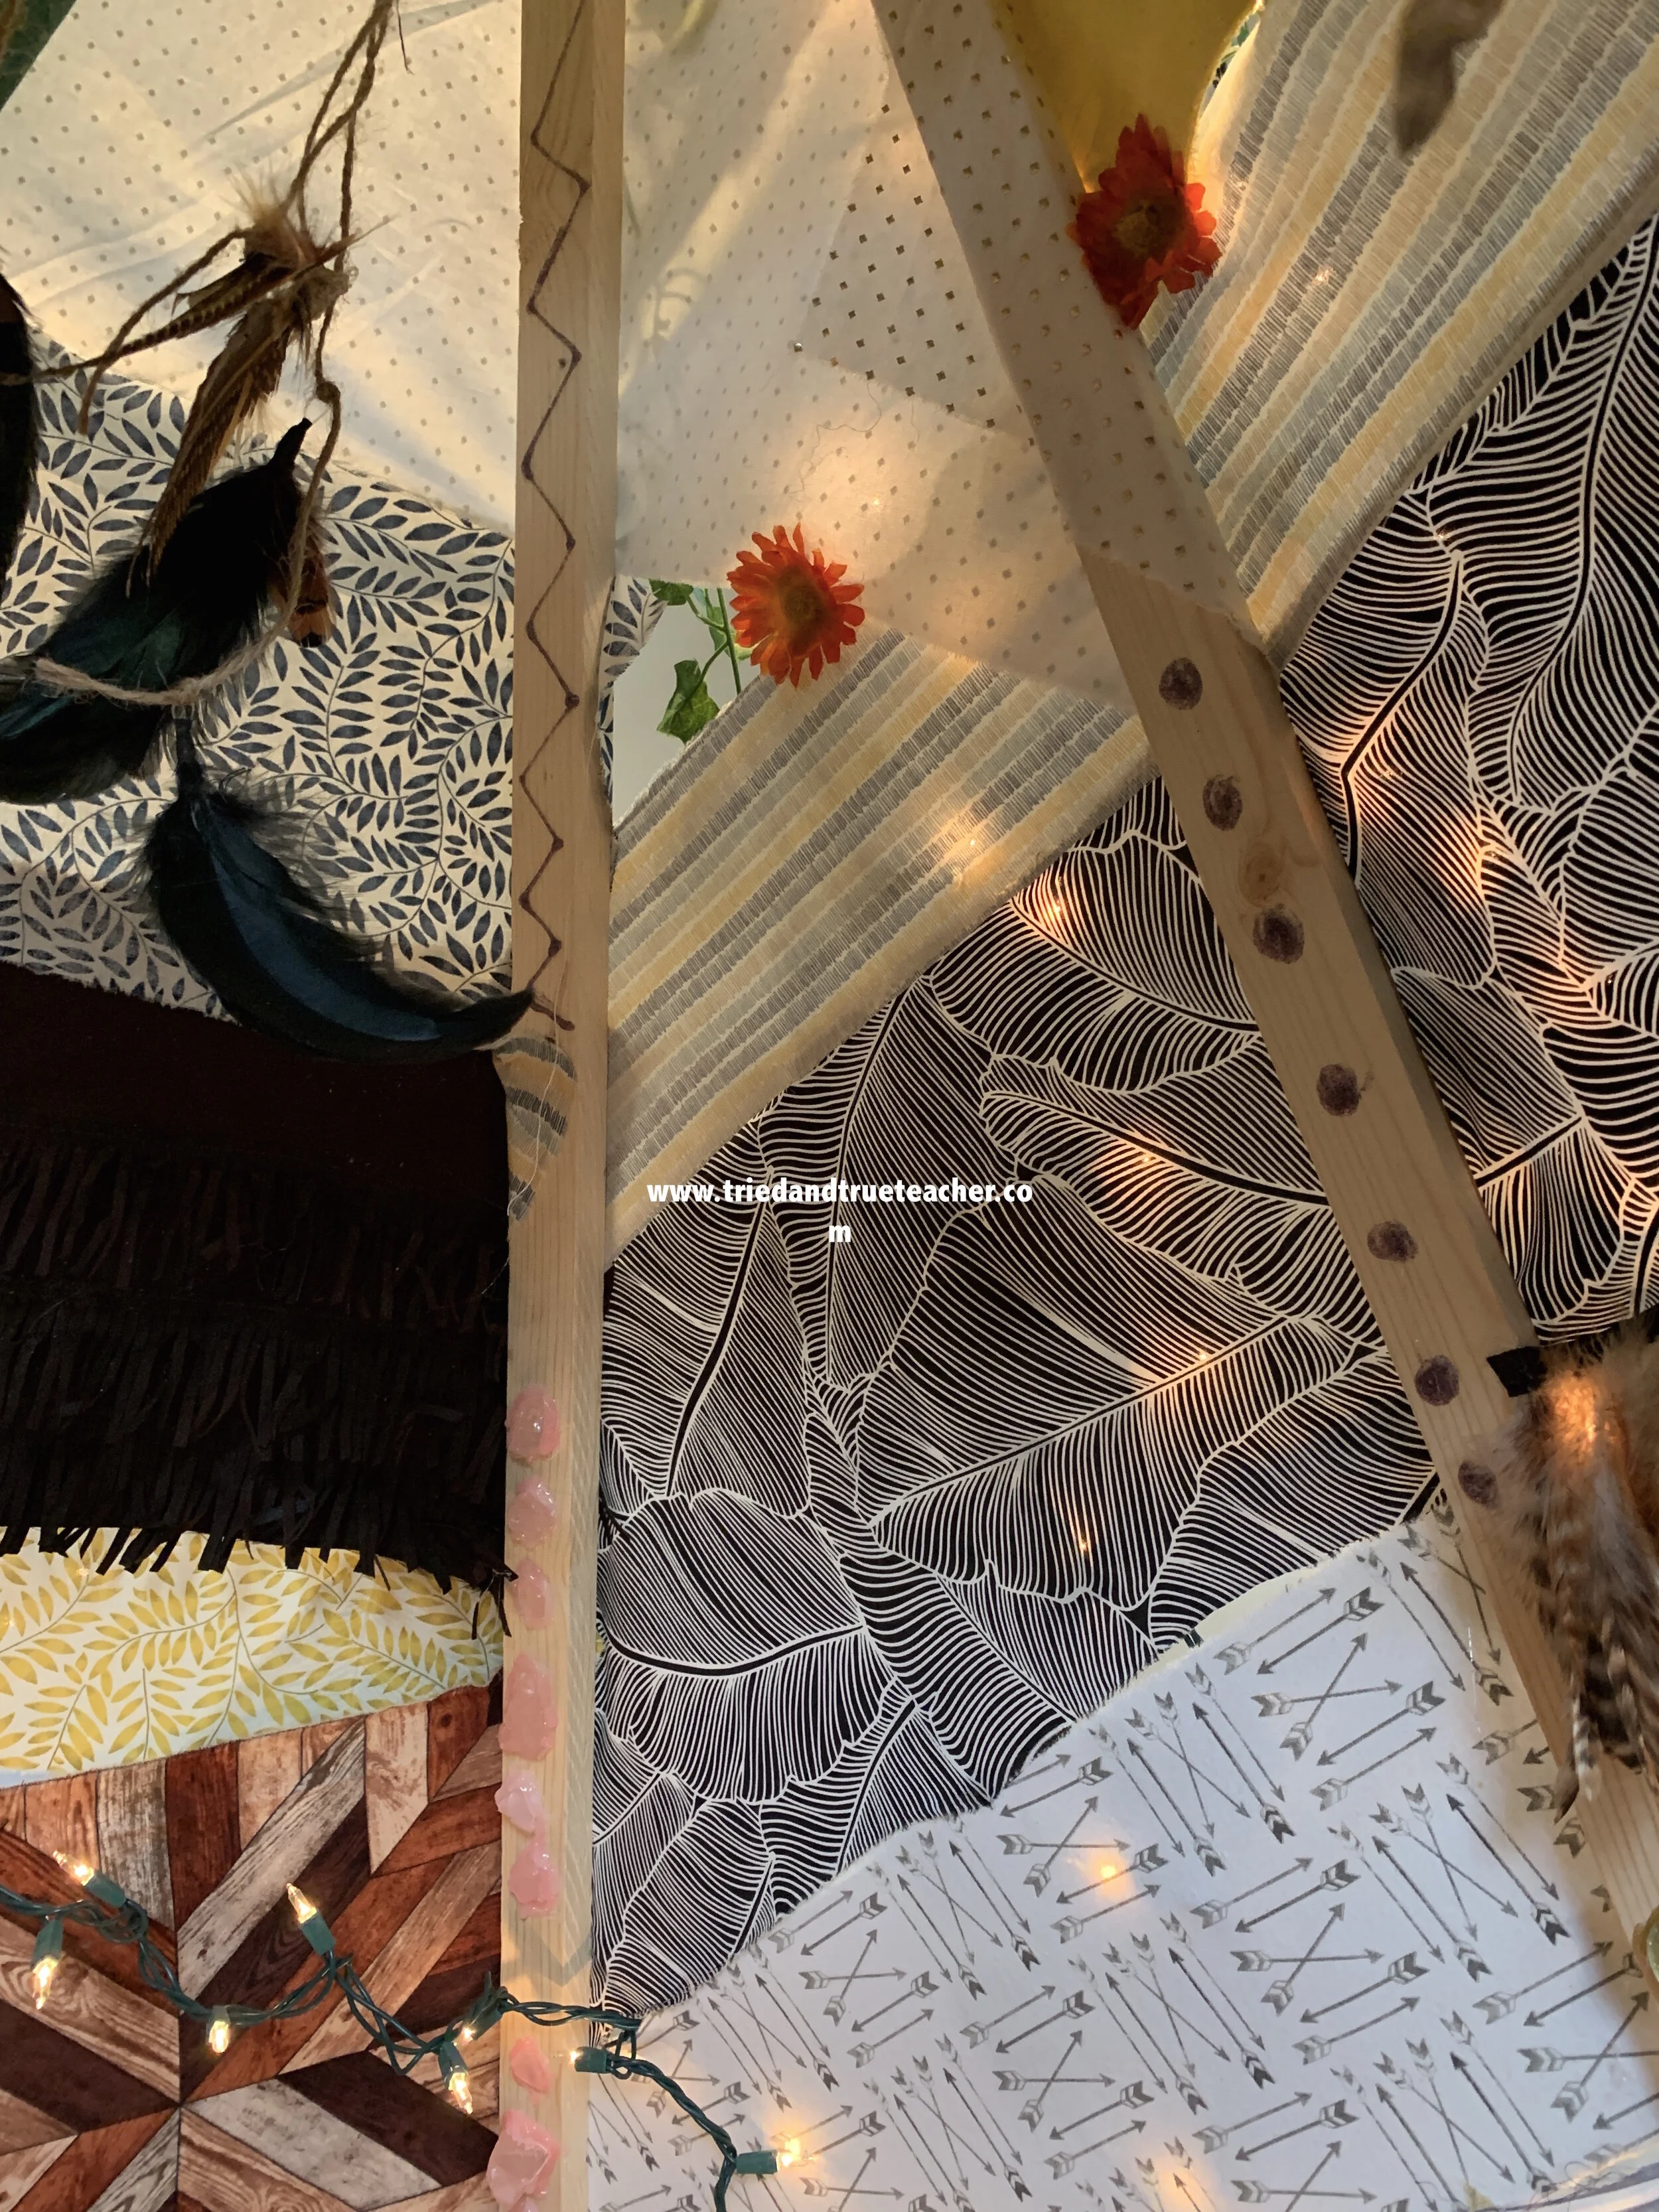
Then, you’re going to get nine 2’’ by 8’’ boards. I got them from Home Depot.
(**You will use 6 for the top part and the other 3 to secure the base boards so the poles can’t move.)
And you use a drill to make a hole in the top of each board:
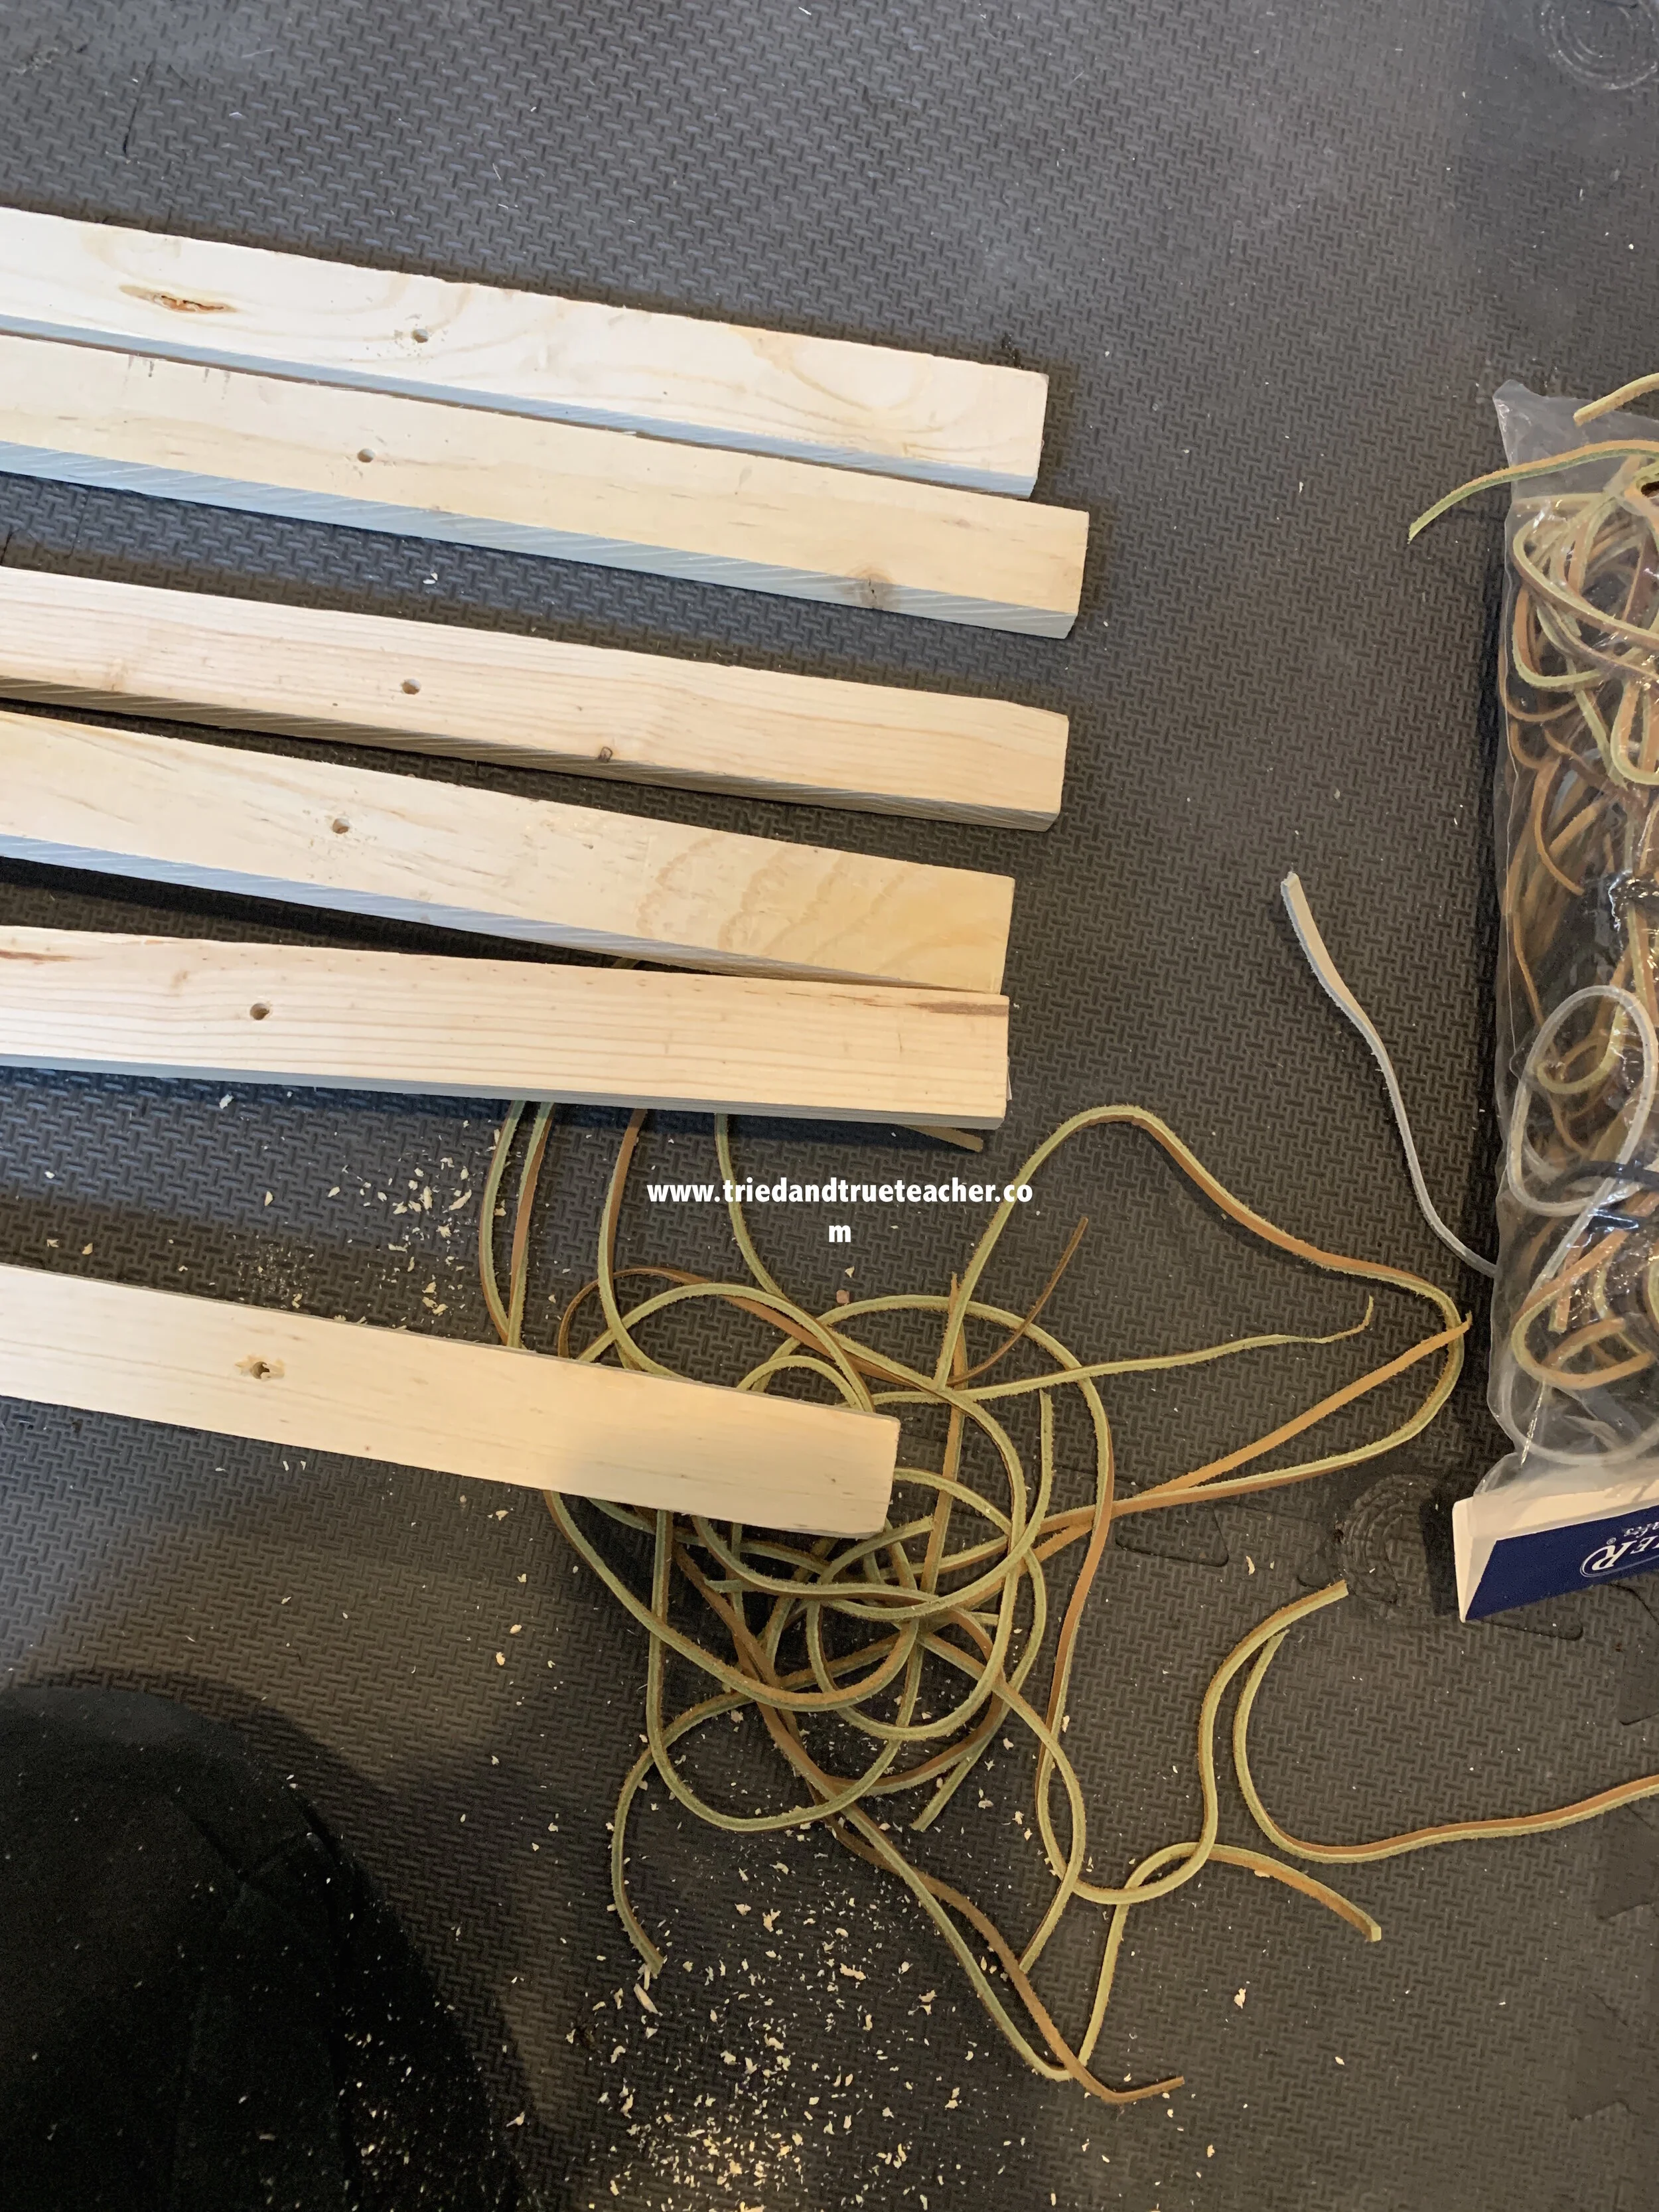
You want to leave about a foot sticking out at the top.
Then you use twine to weave through the holes and hold the structure in place.

As you can see, I doubled up on the holes for some of the boards because of the rope I was using… I could only fit it through the hole one time so I went back to make more holes to be able to sufficiently wrap the boards to hold them in place.
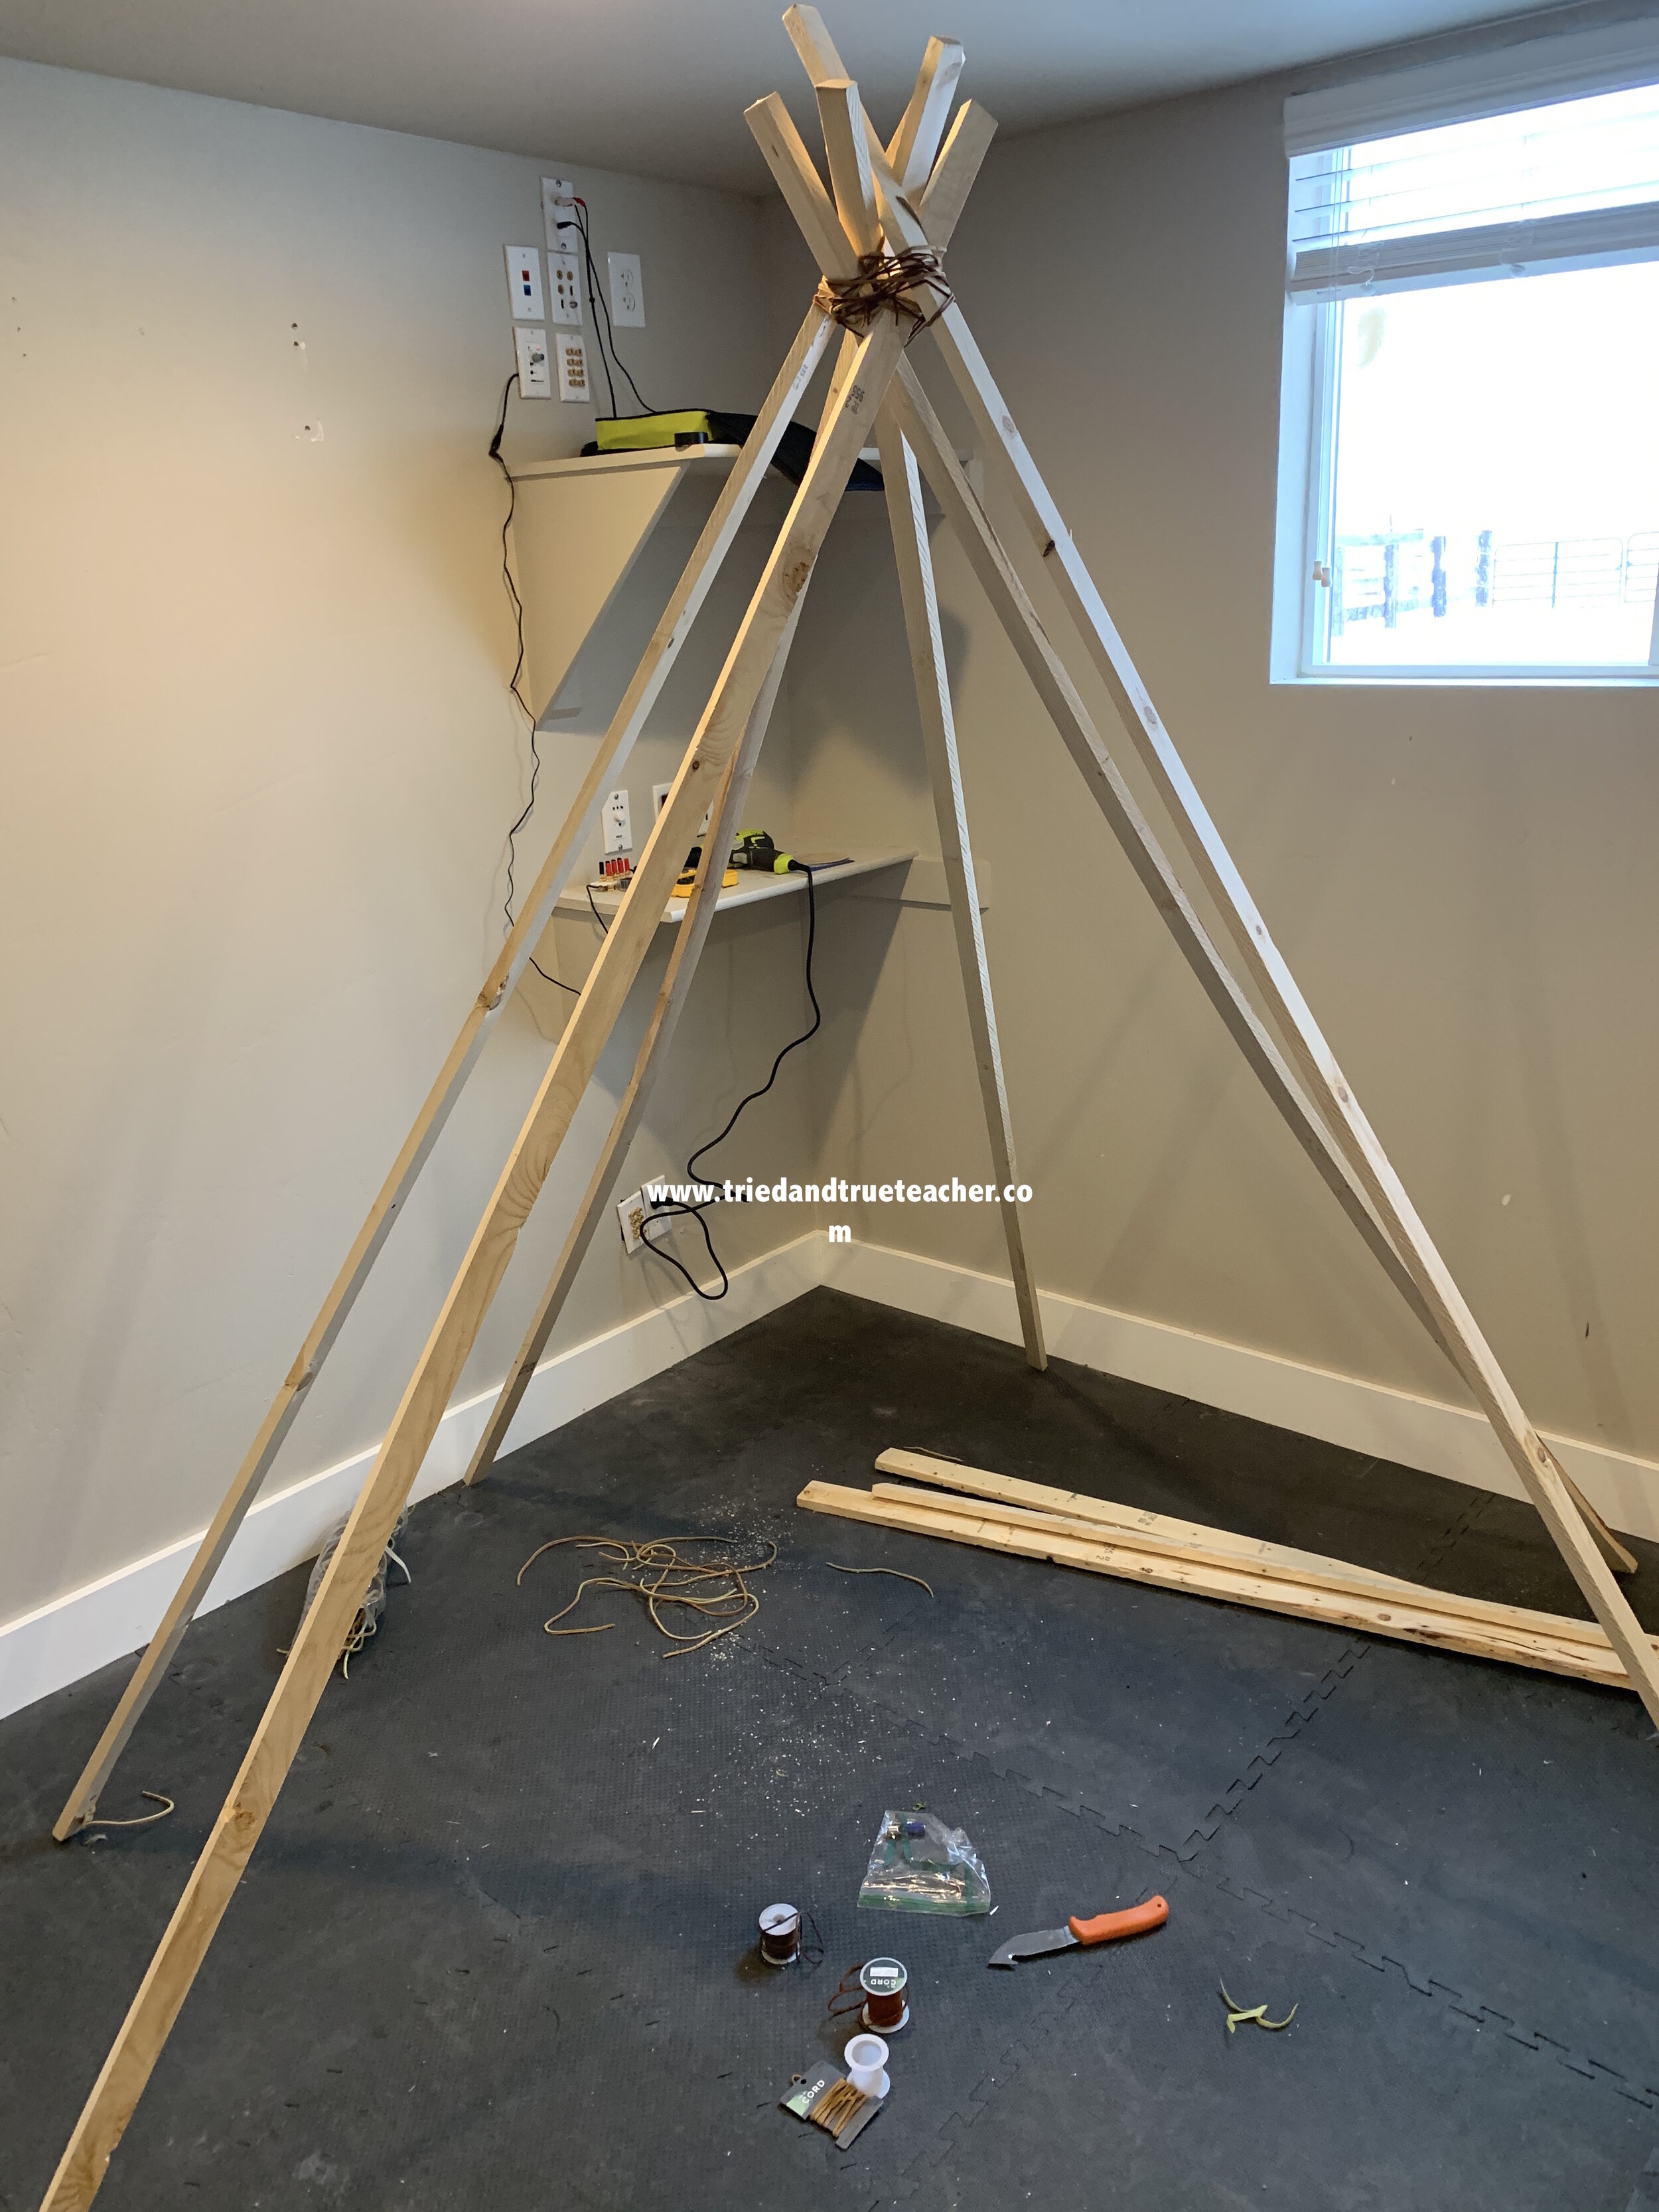
You will be able to move the boards and adjust the spacing even when they are tied.
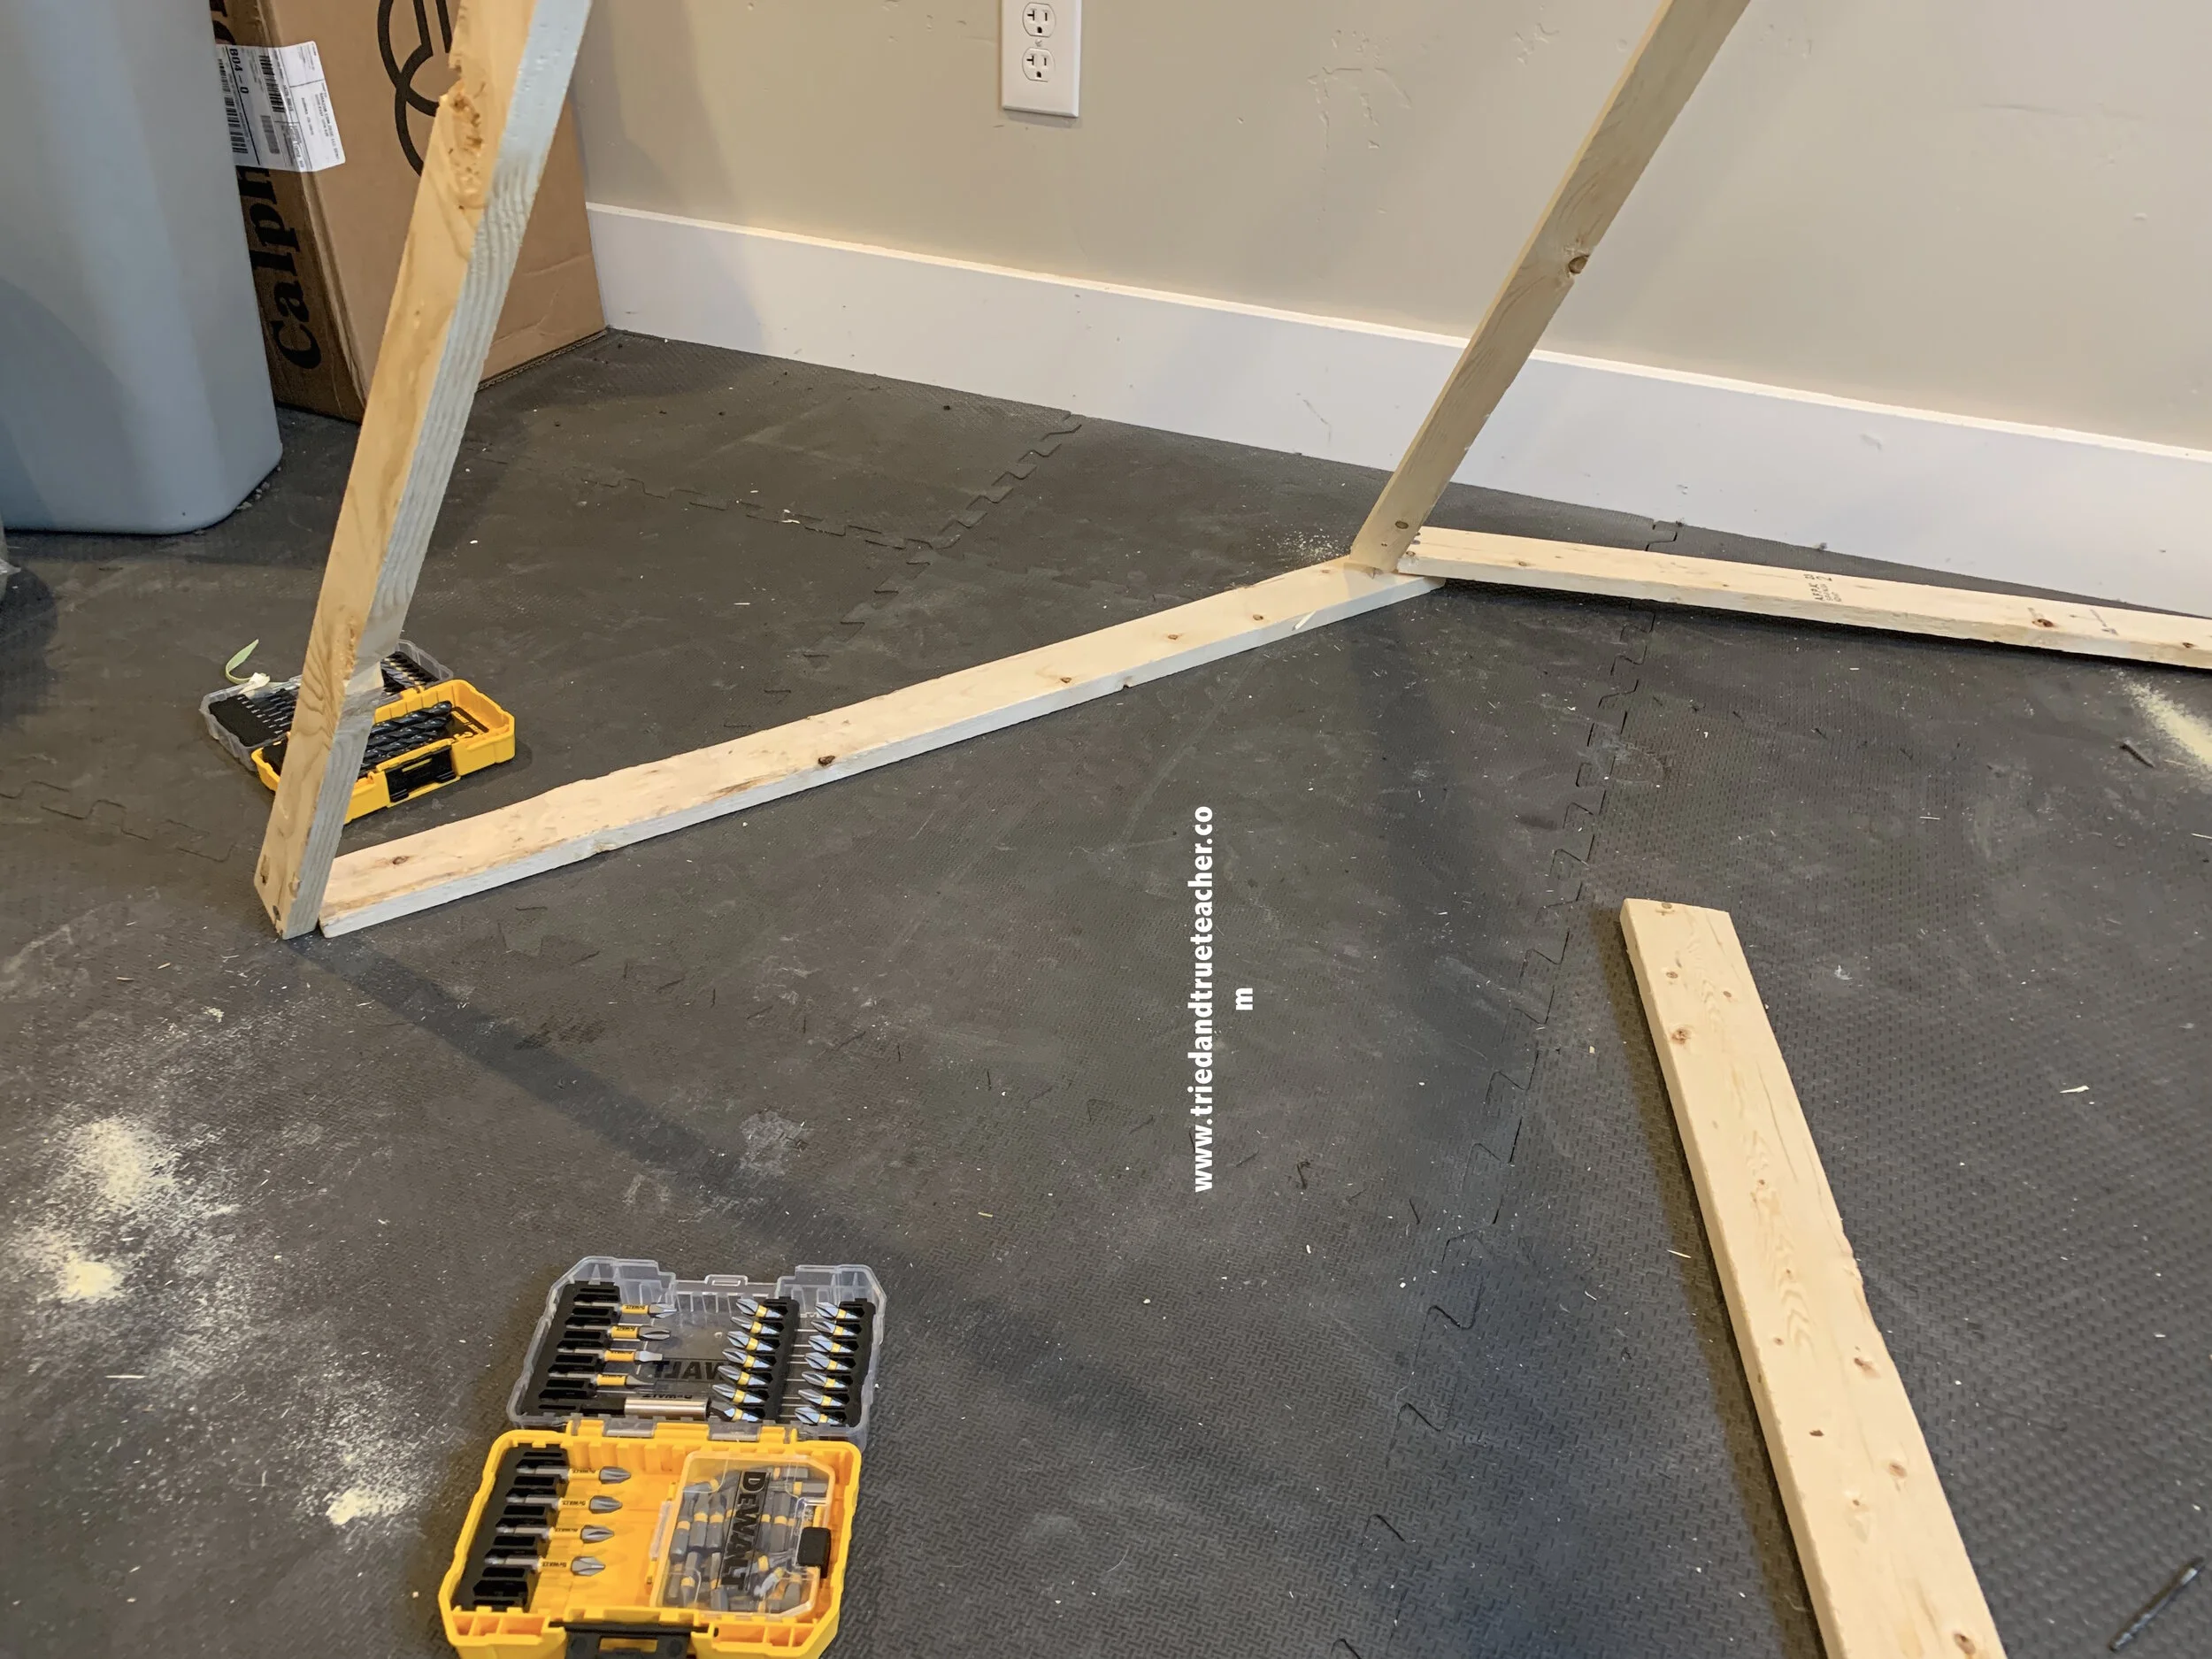
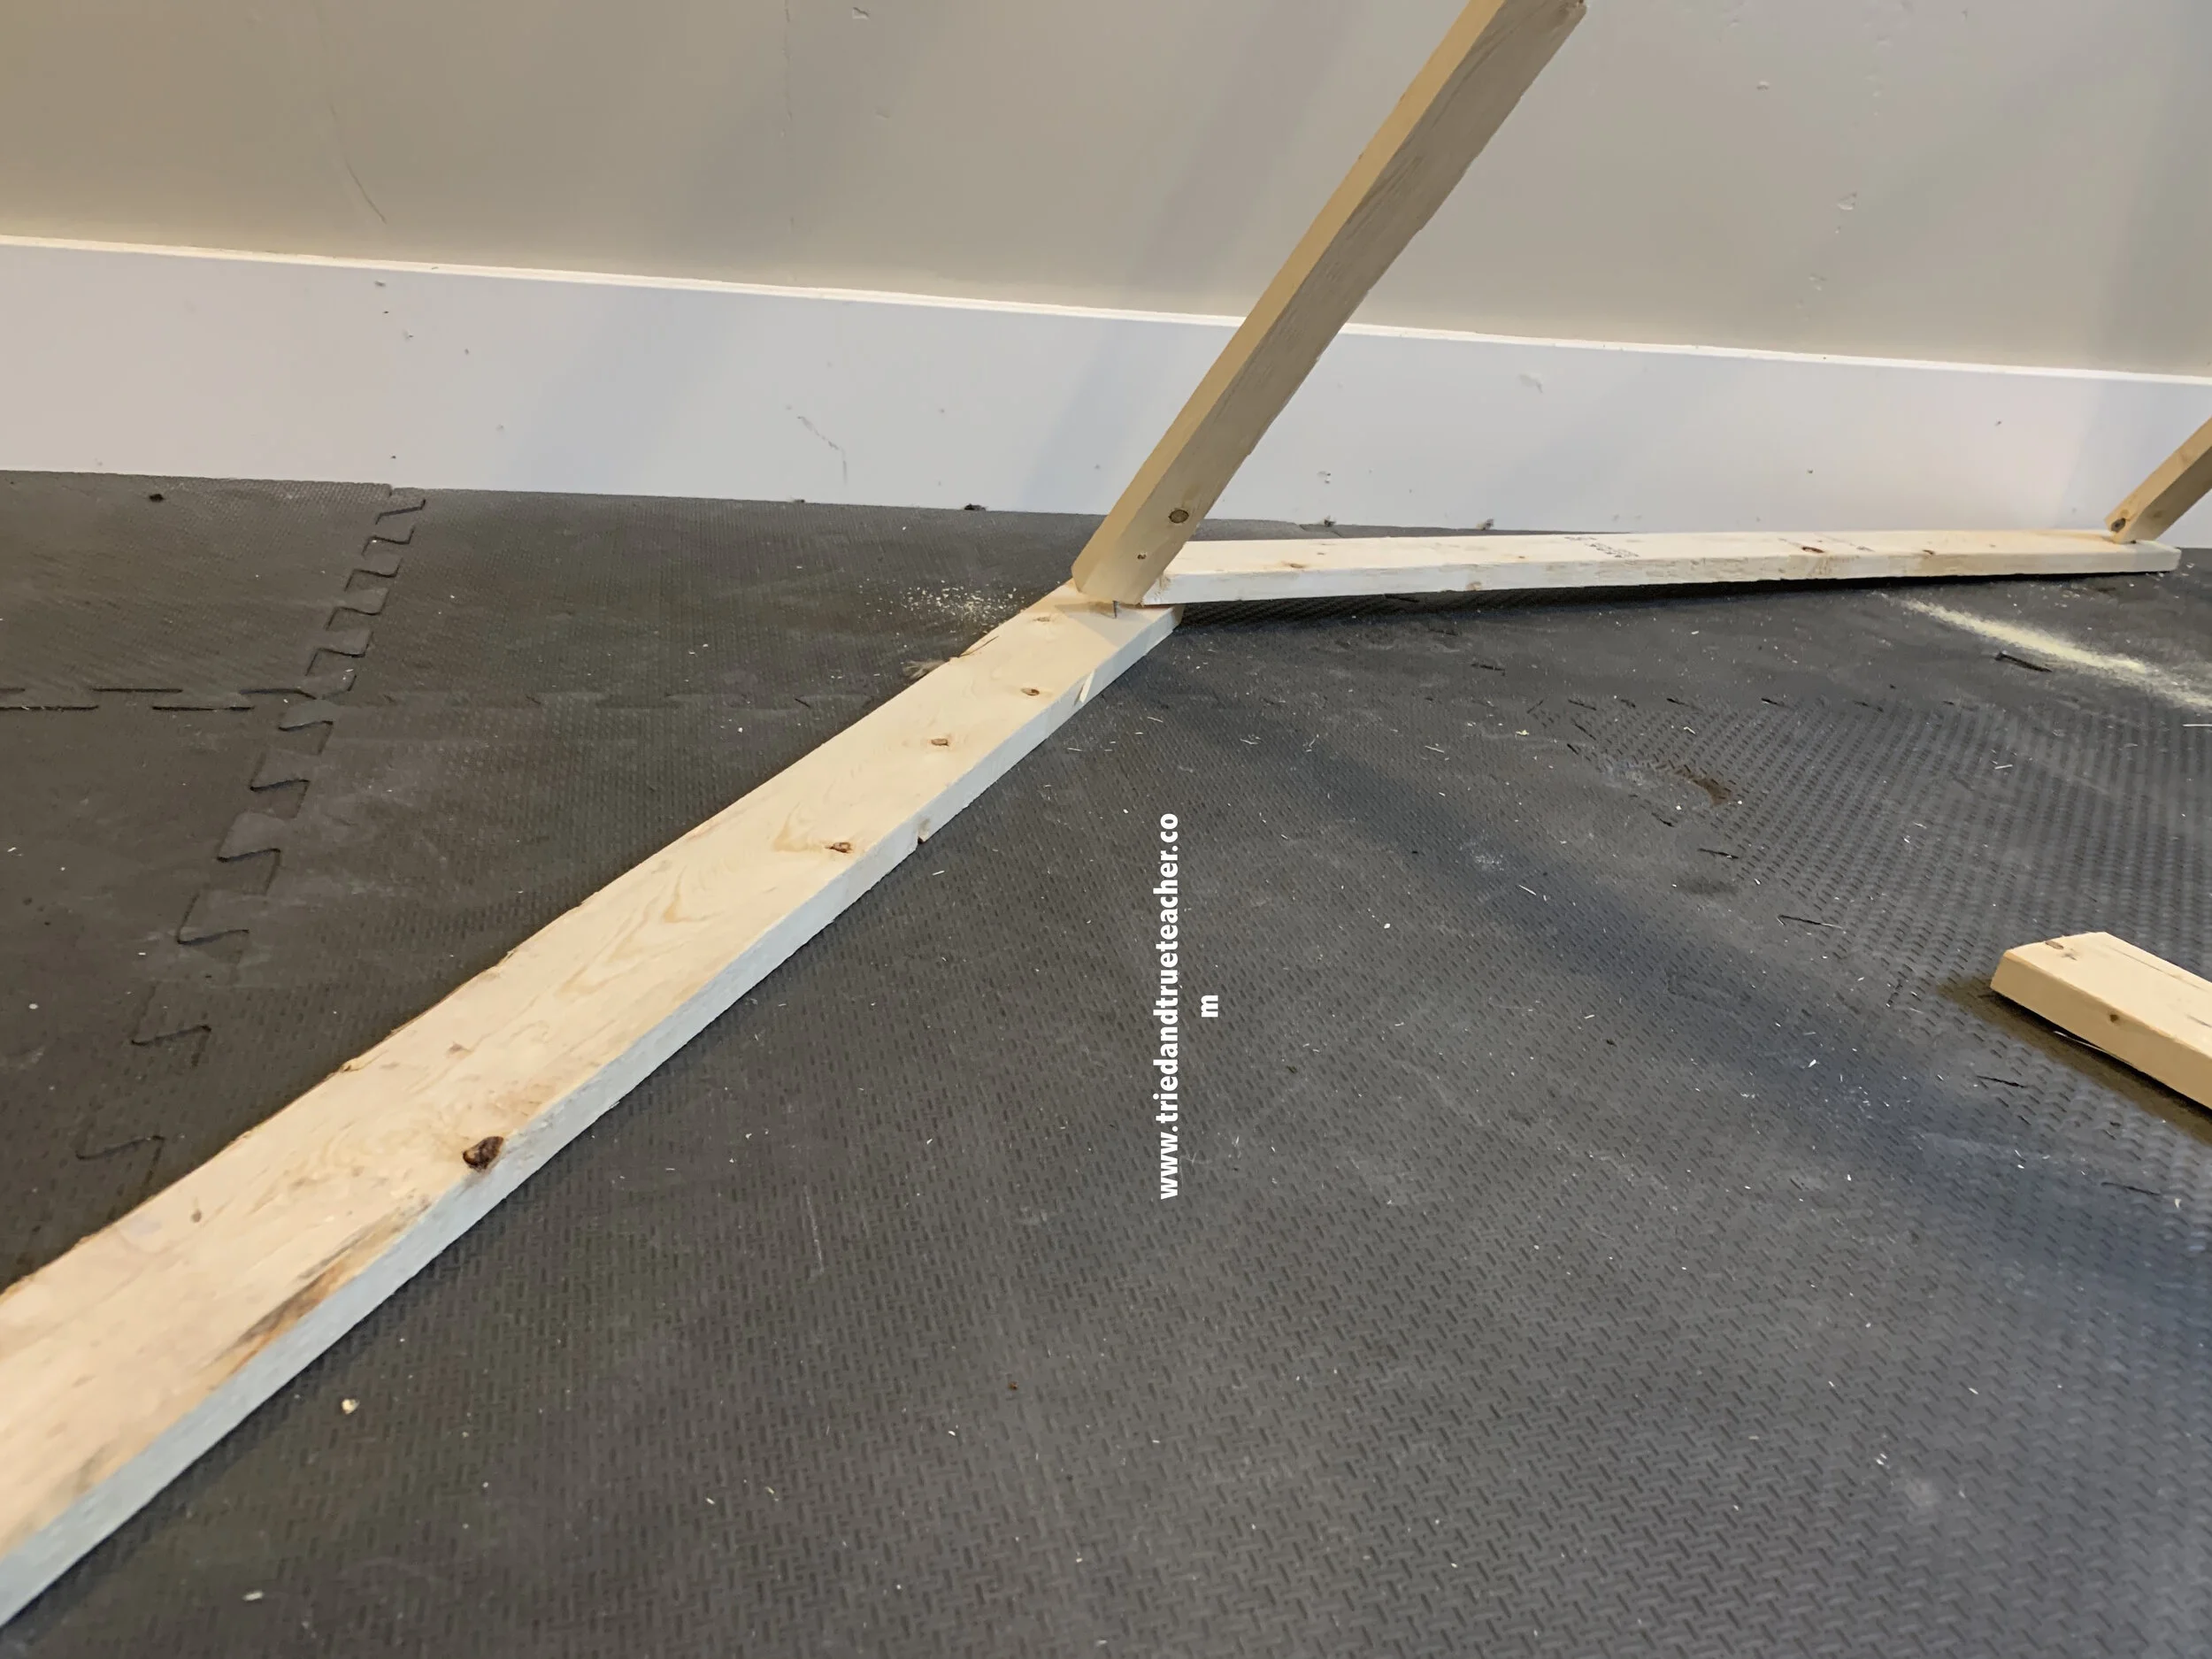
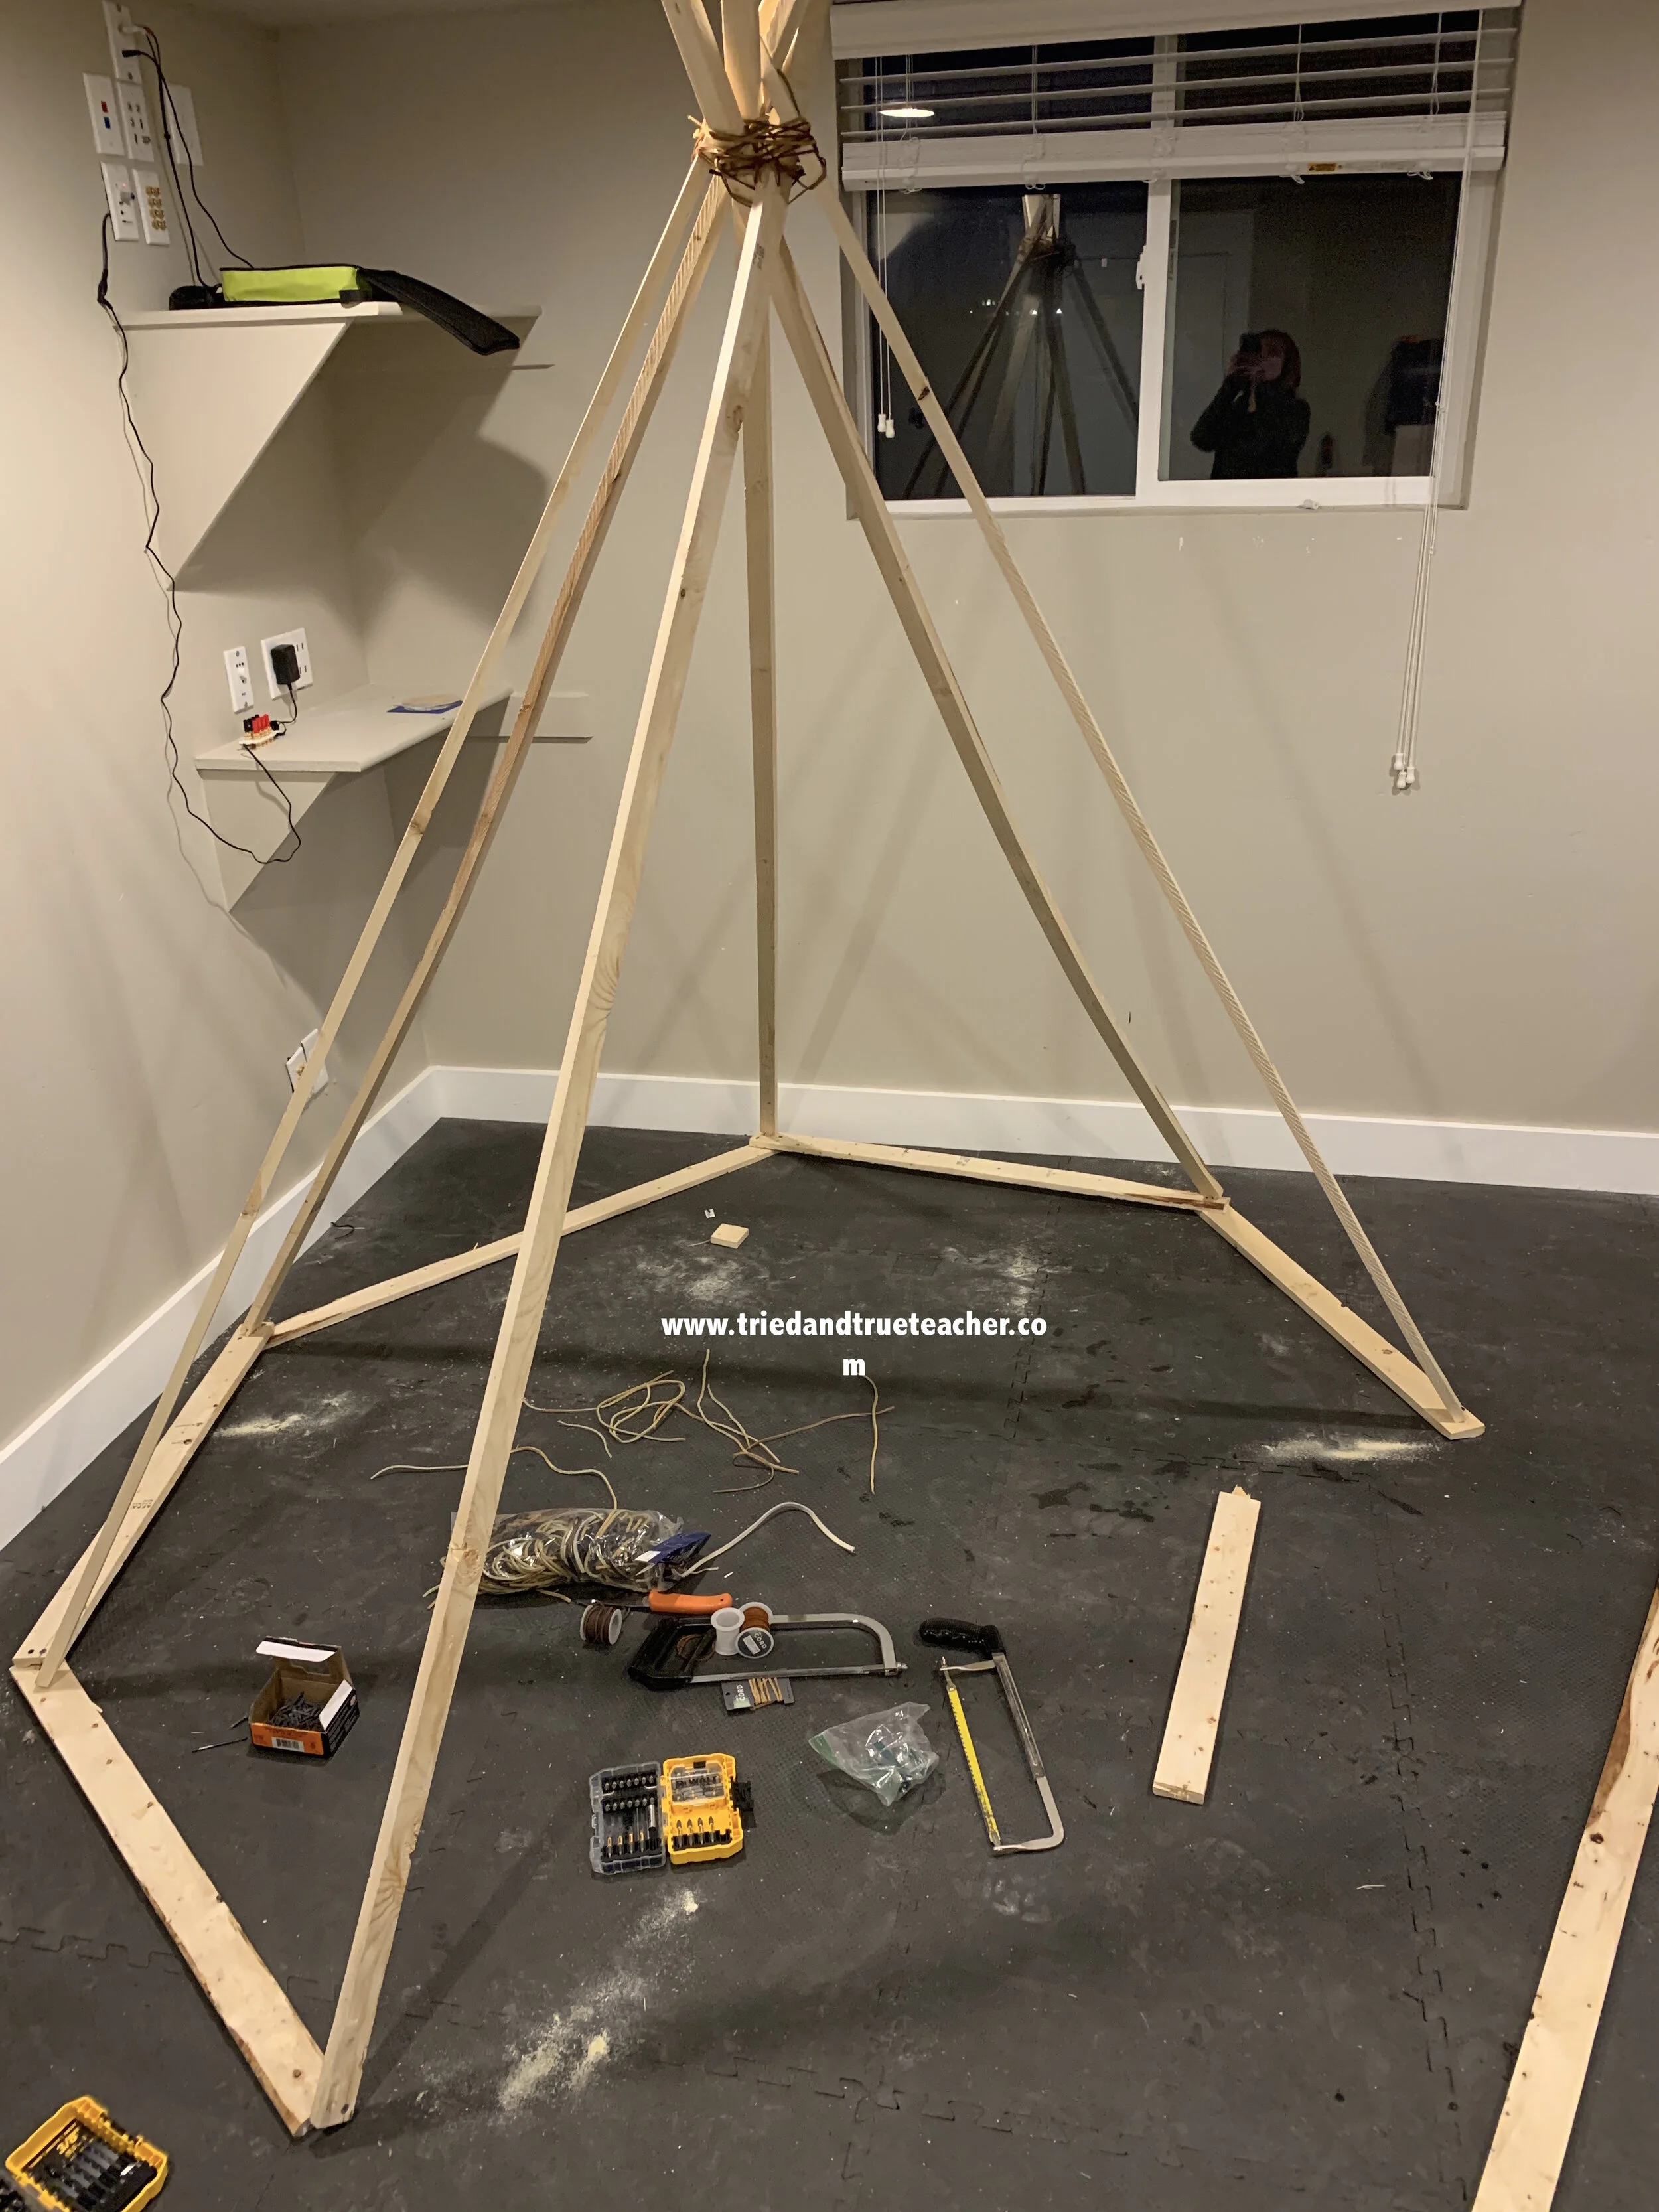
You can see I have my 6 poles tied up in place, and now I’m going to use the other 3 boards I got to secure the spacing and fix the poles so they can no longer move.
I just put a few screws into the bottom of each pole to connect it to the base supports.
Once you’ve secured the boards, it’s time to get your fabric out!
(And plug in your hot glue gun!)
You want to start at the top… wrapping and gluing the fabric onto the poles.
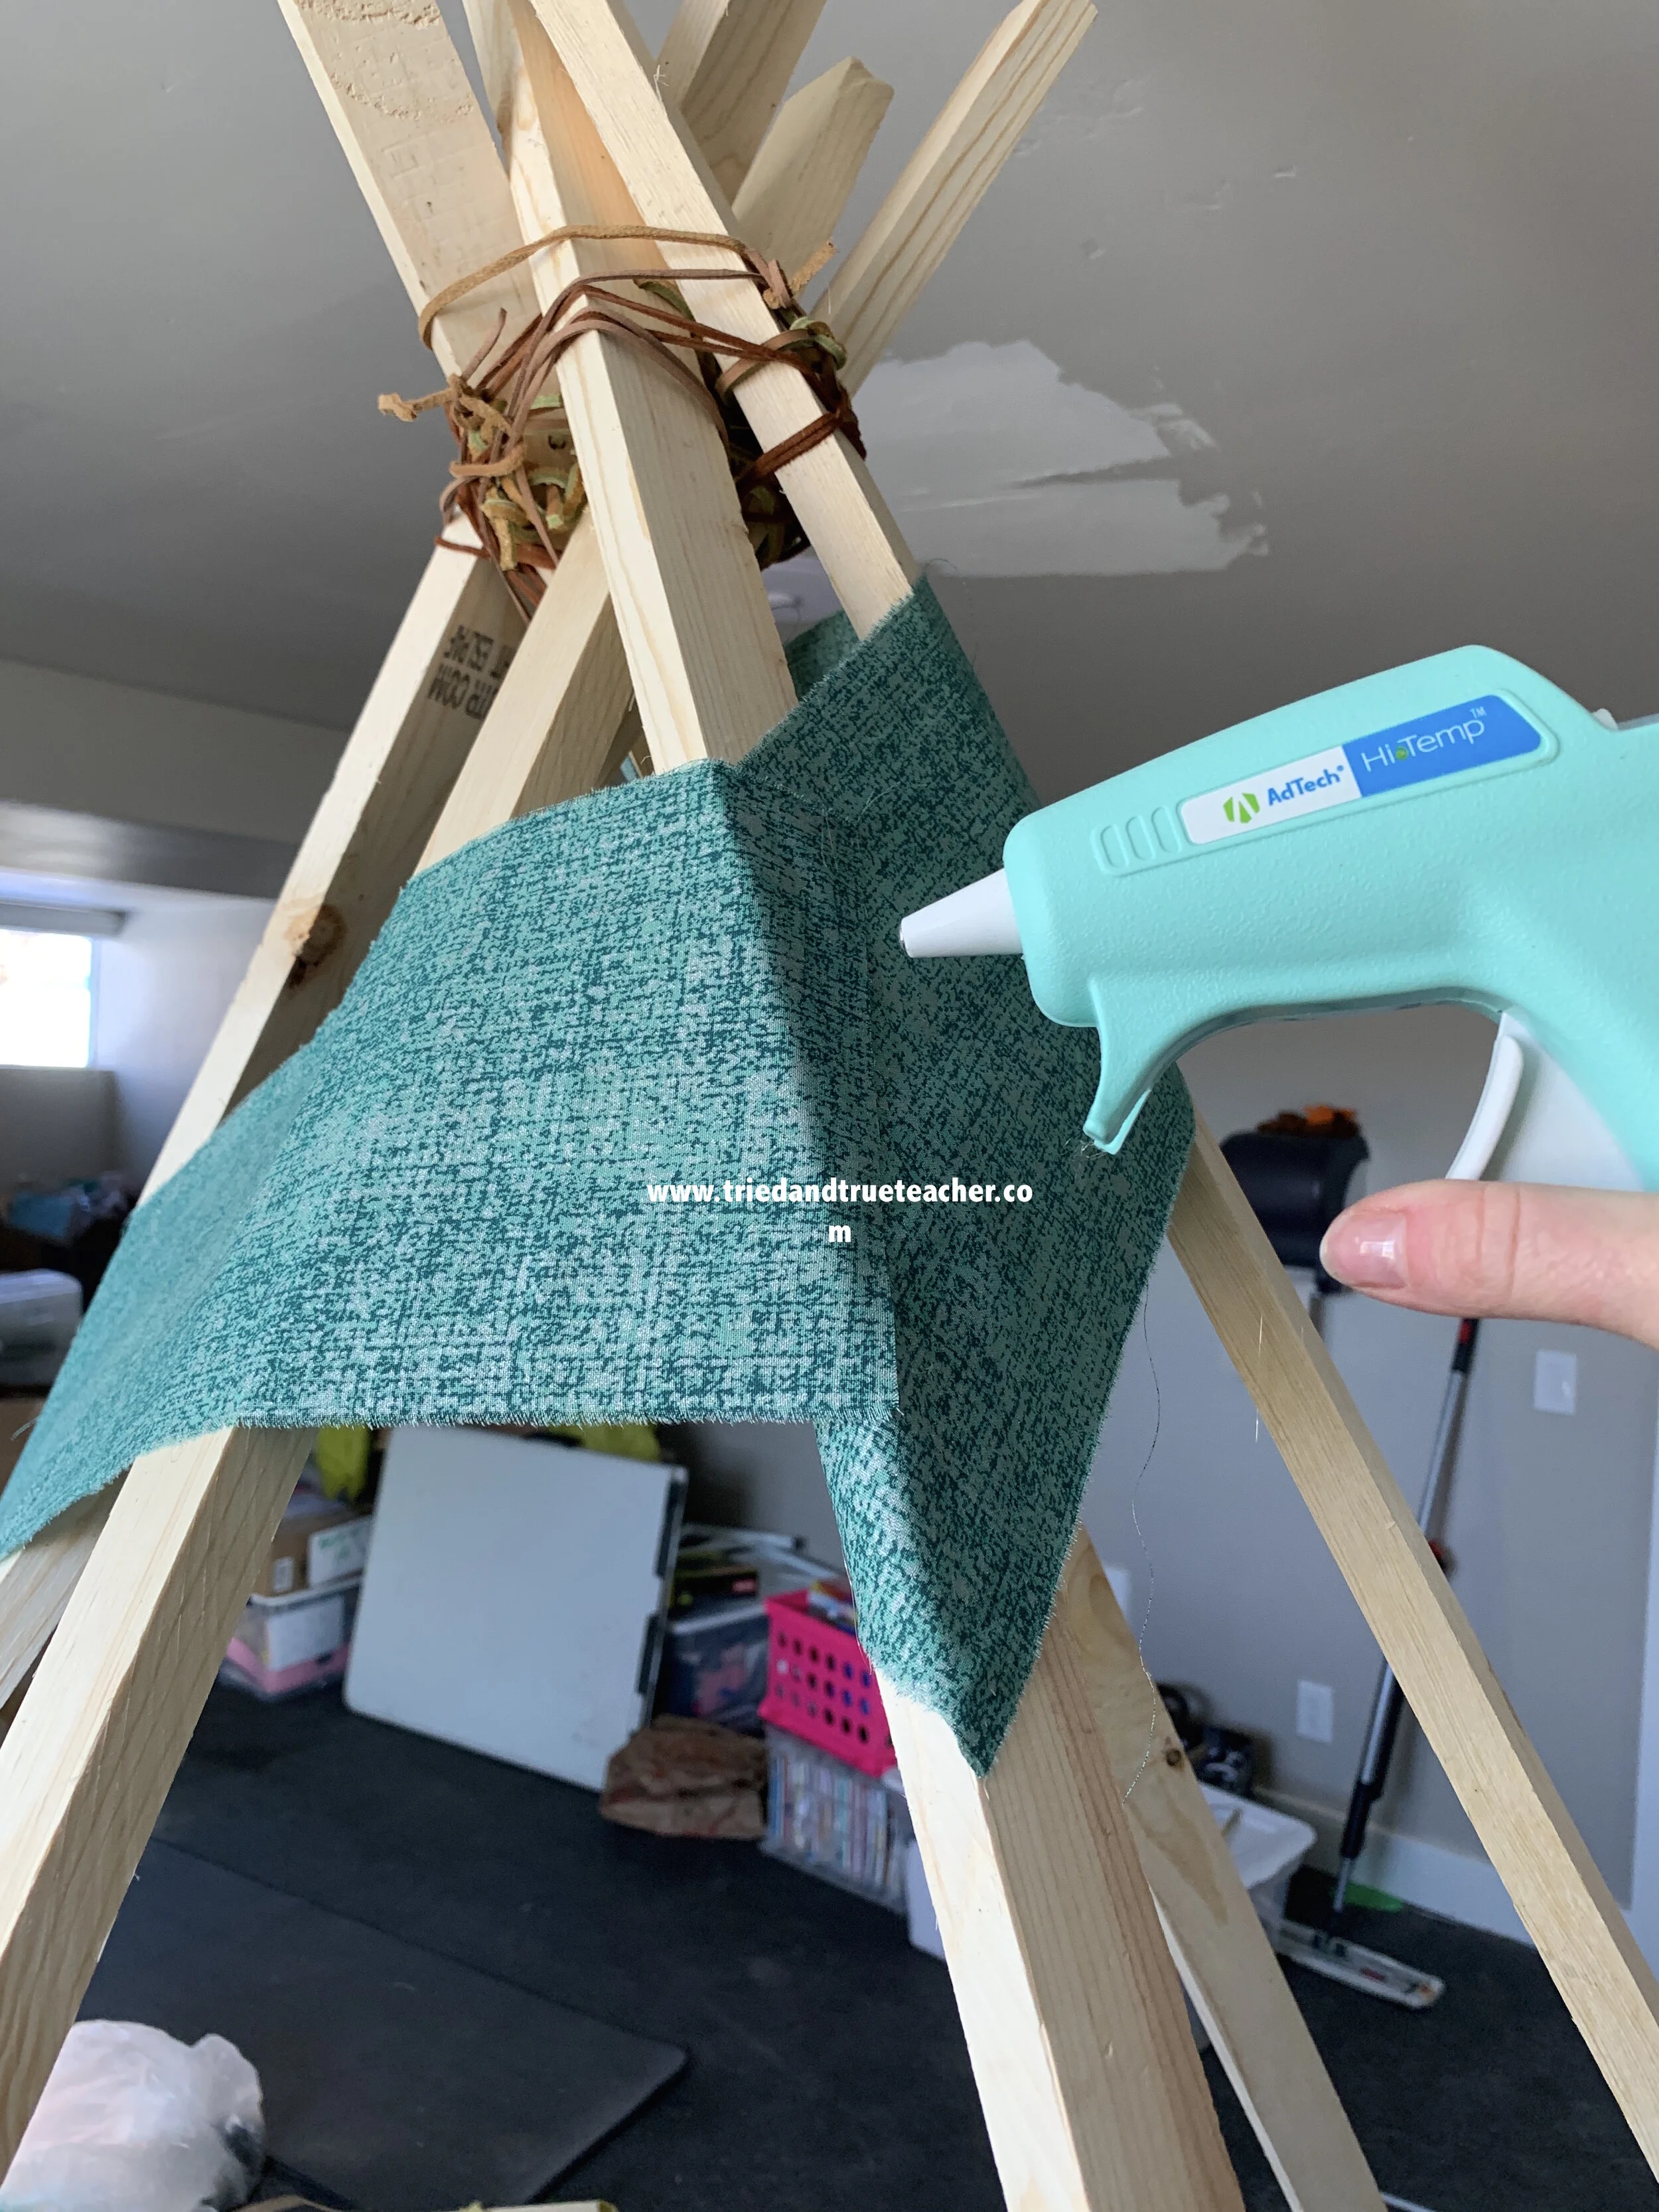
Don’t overthink it!
Just start and as it takes shape you will get into a groove!

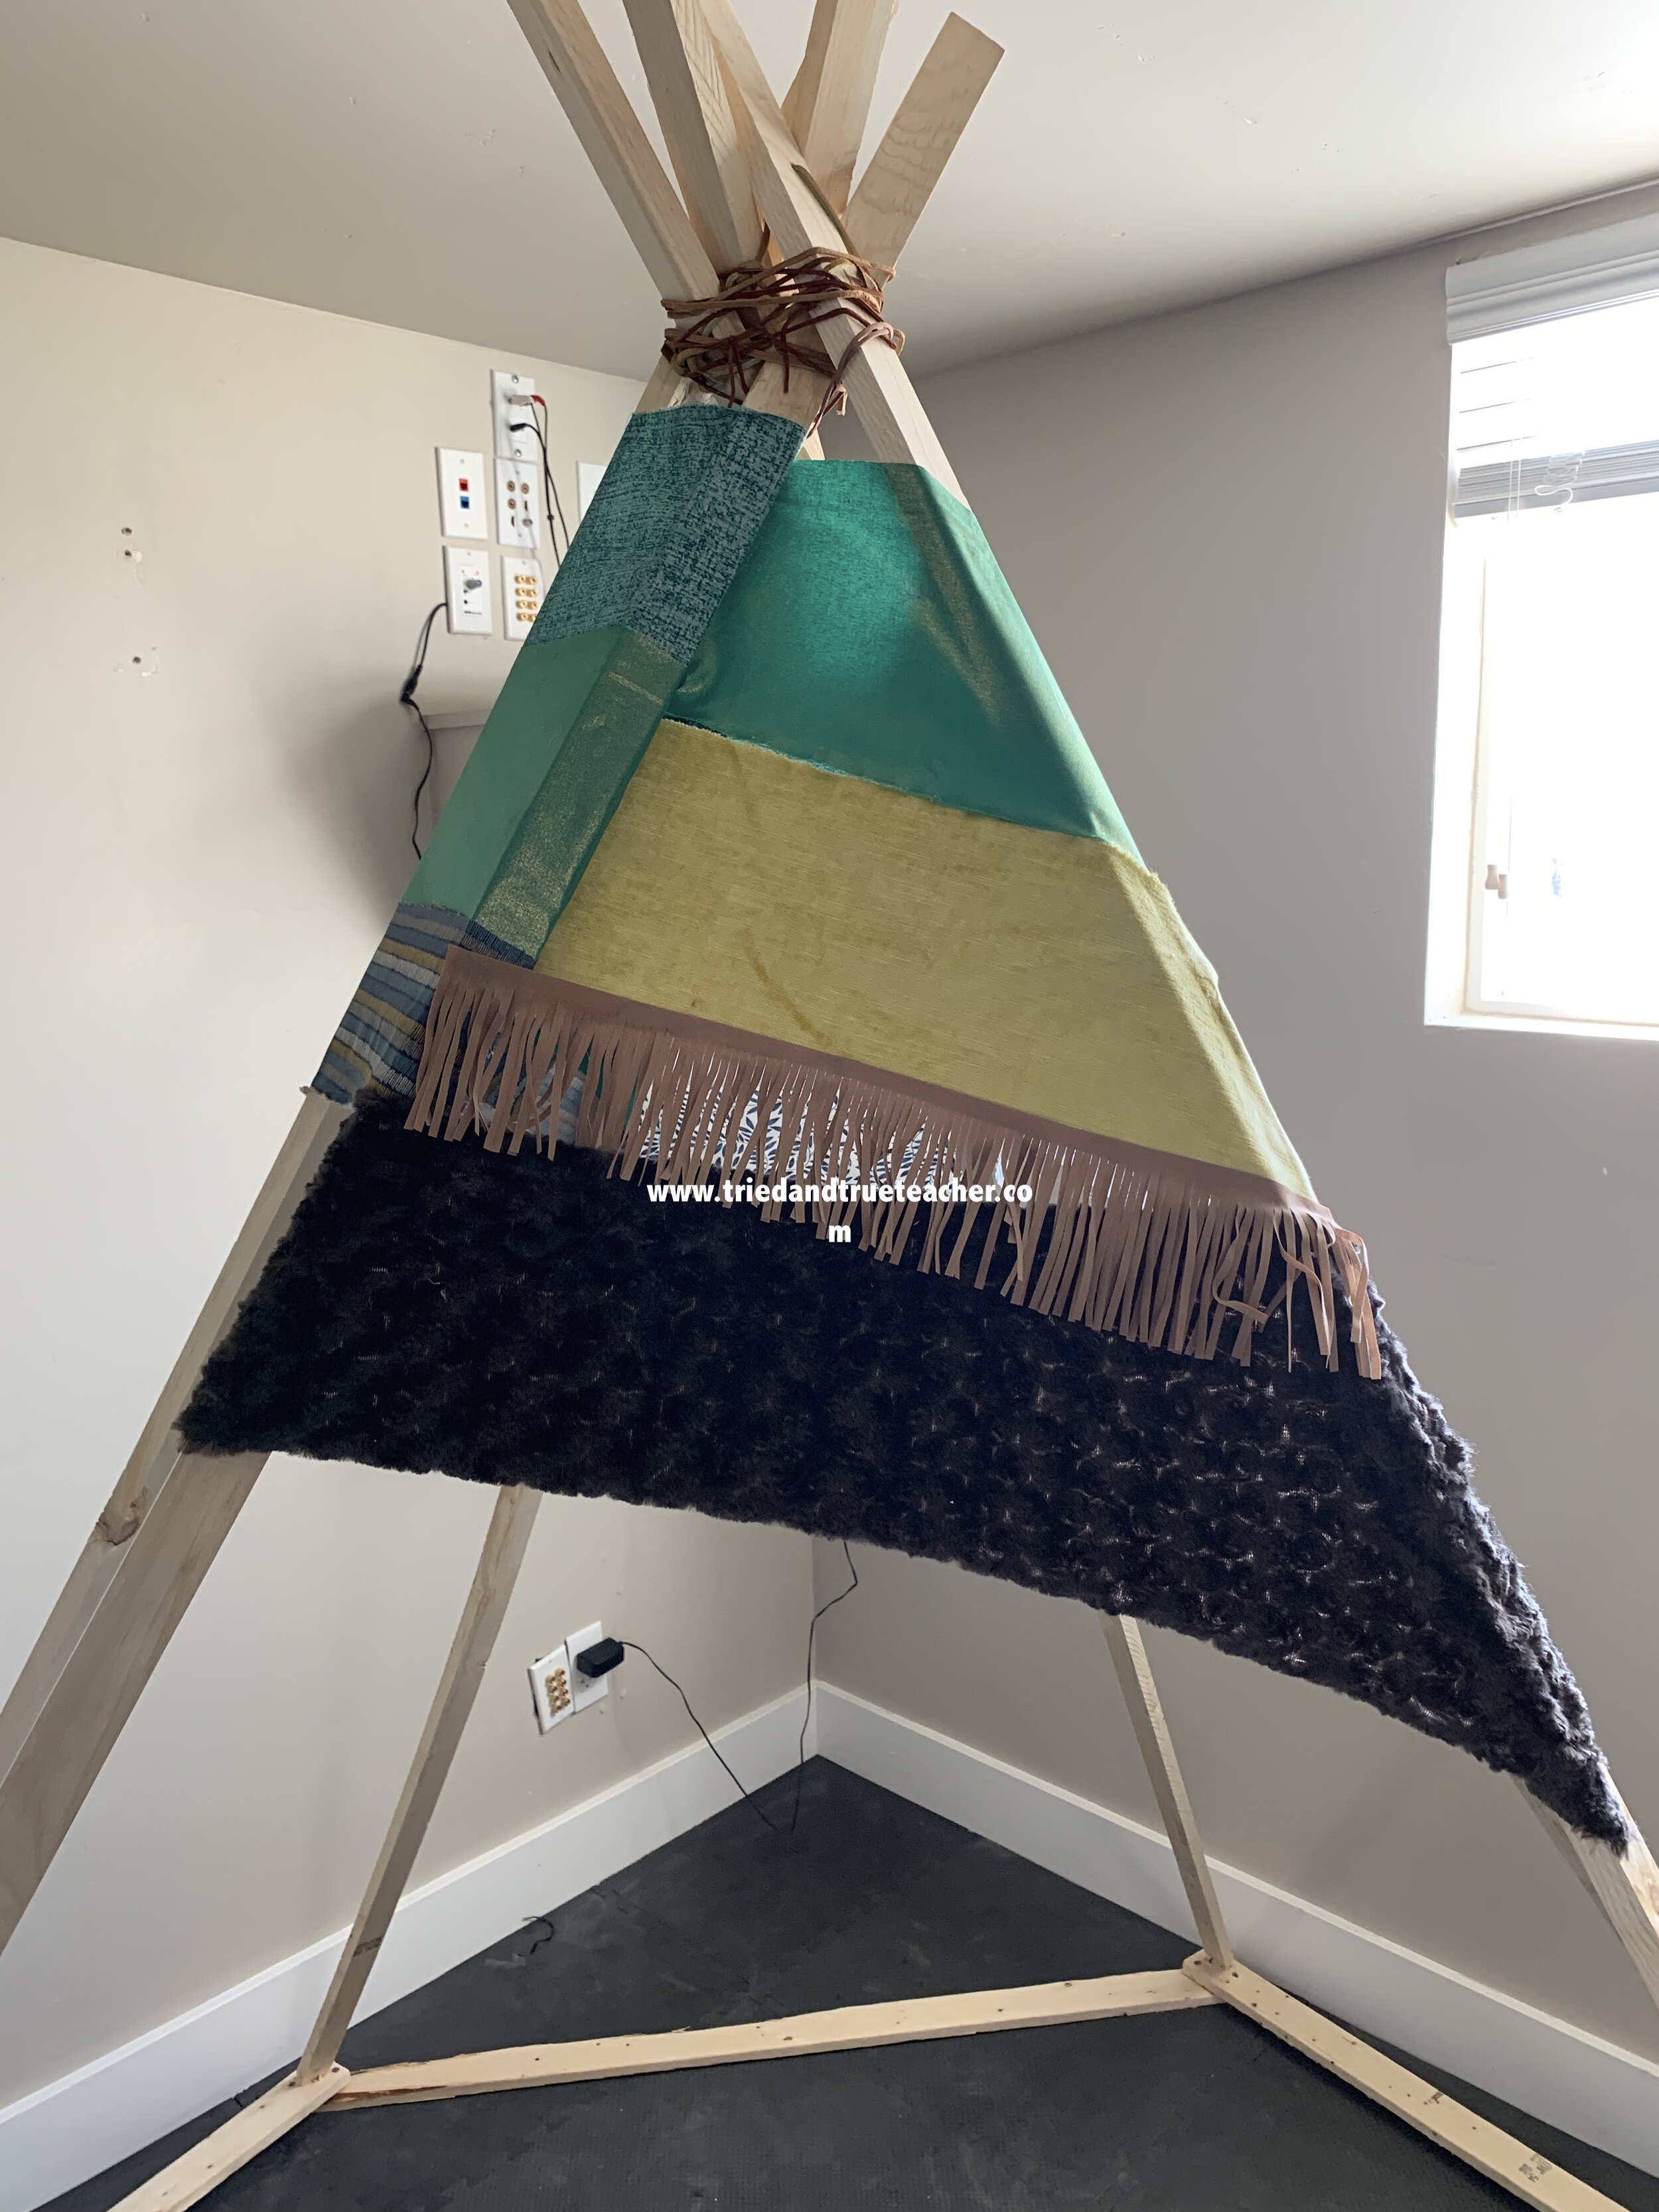
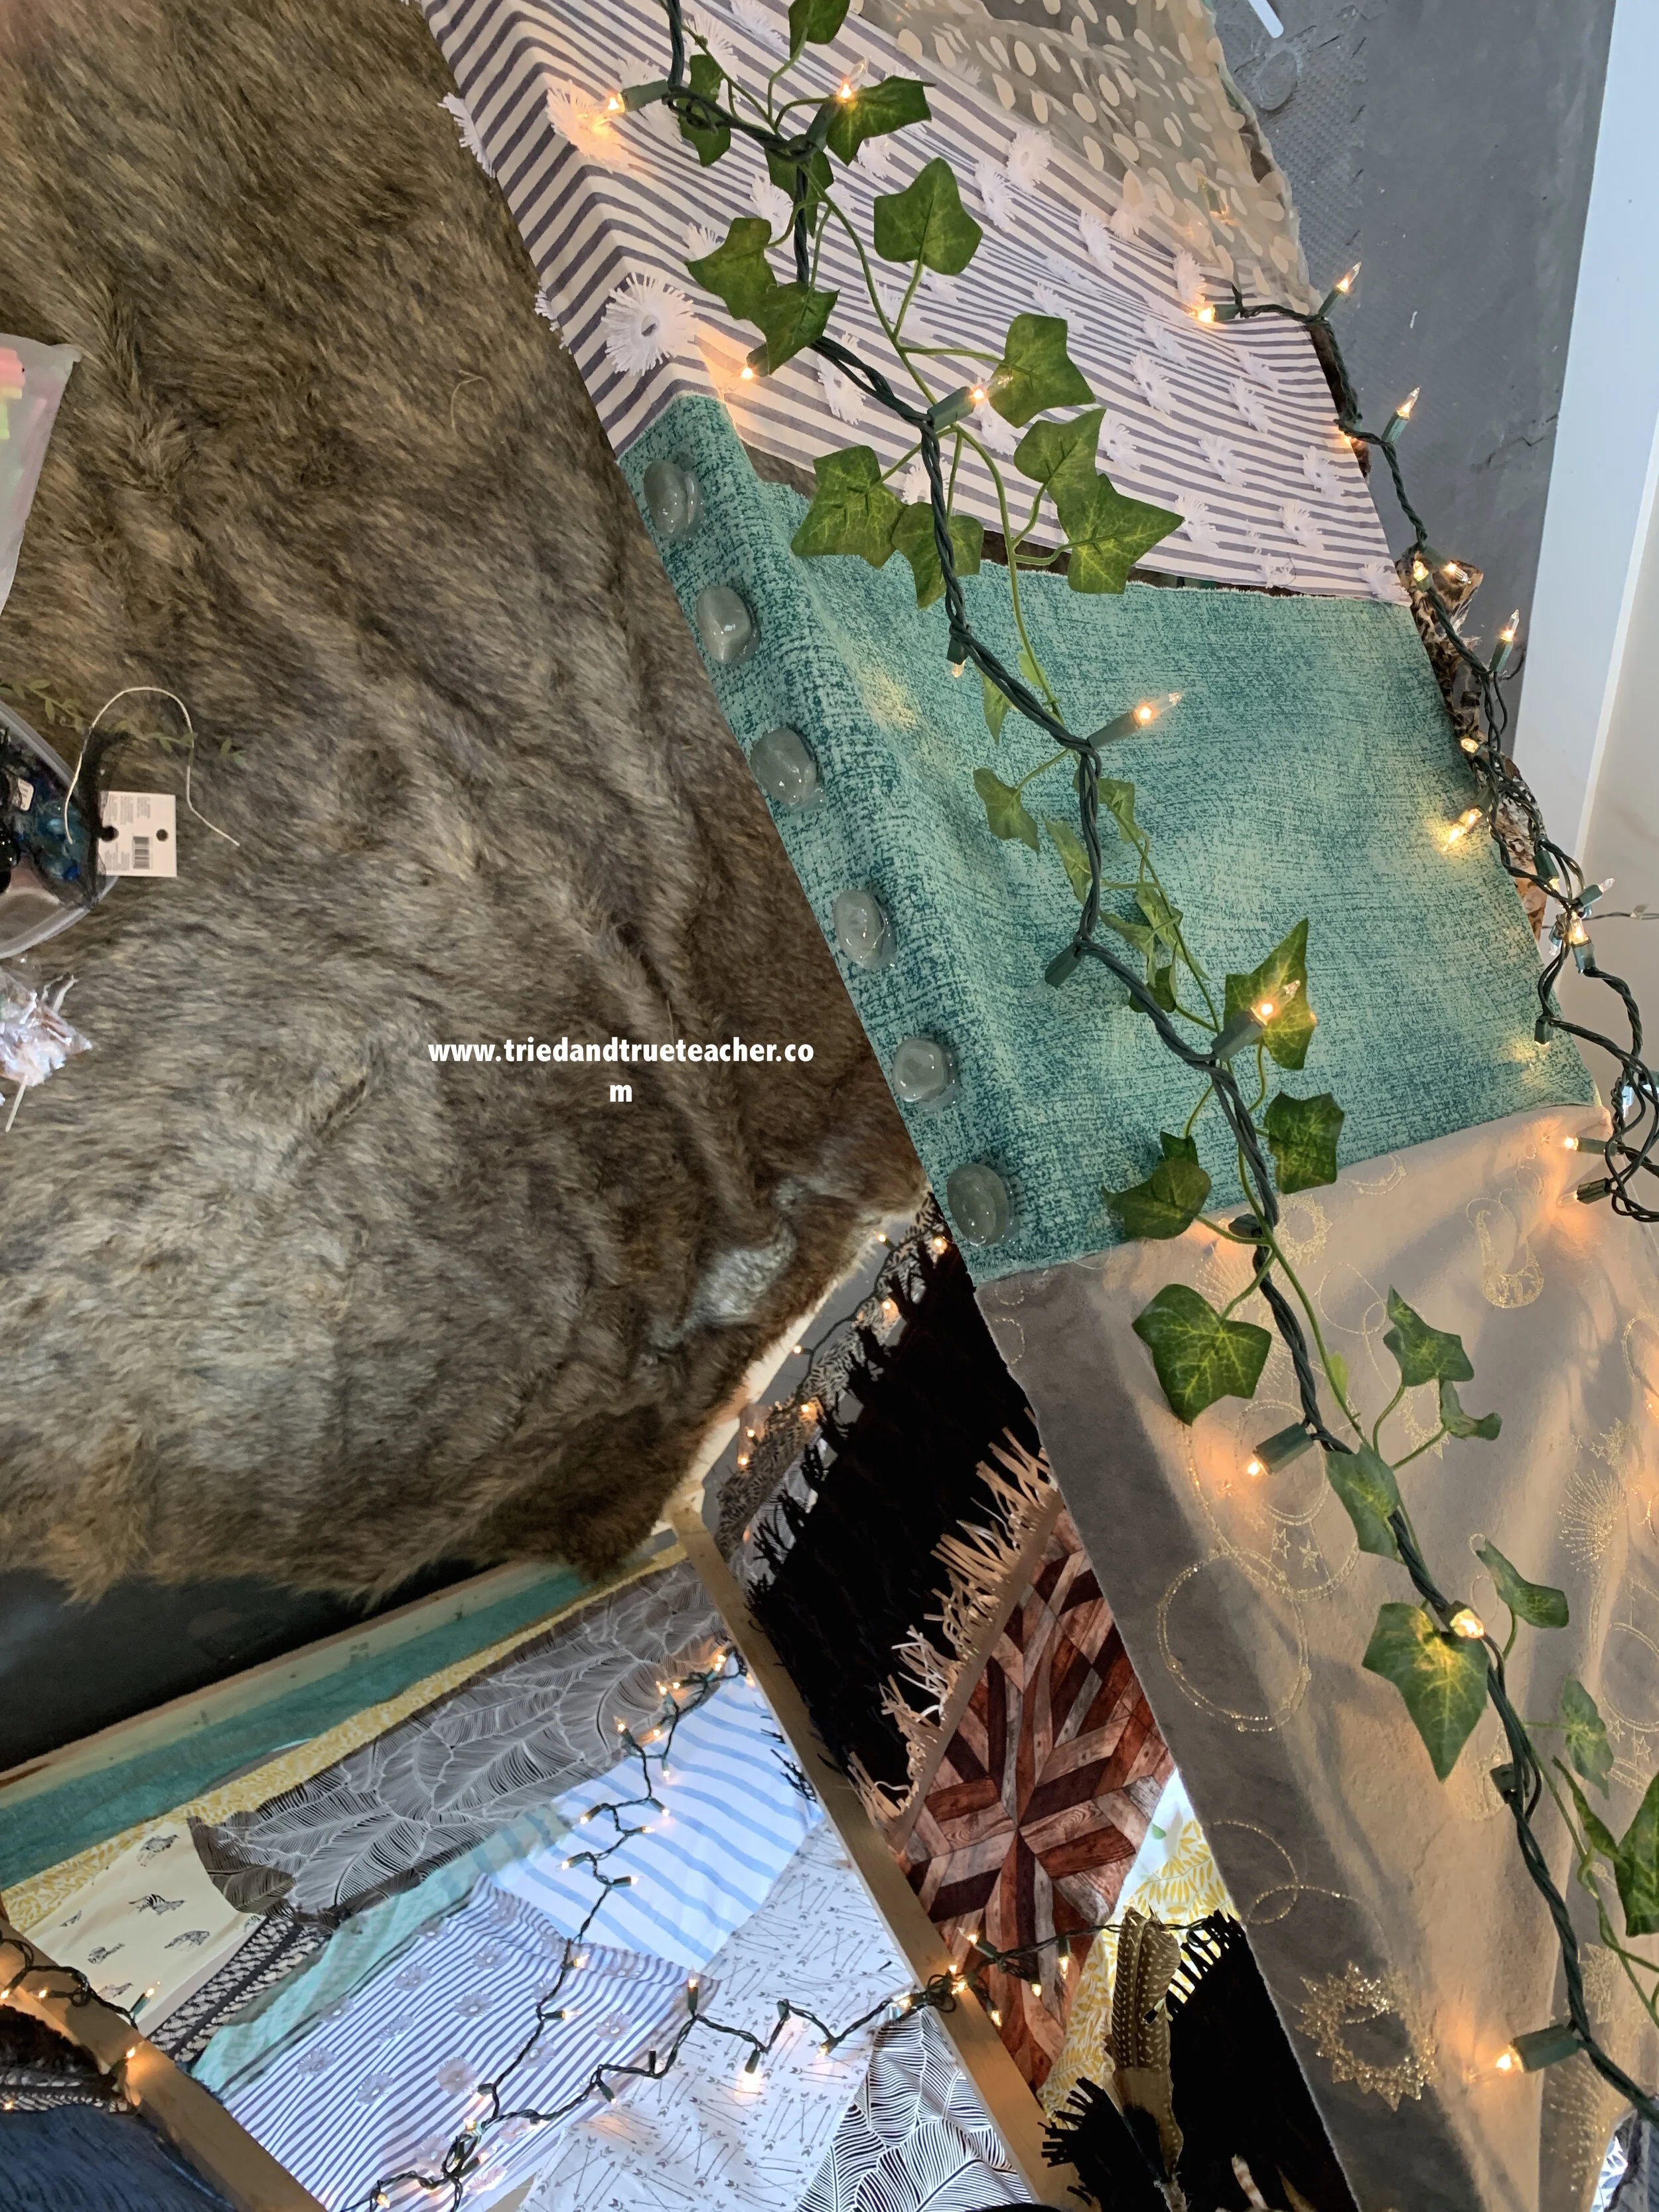
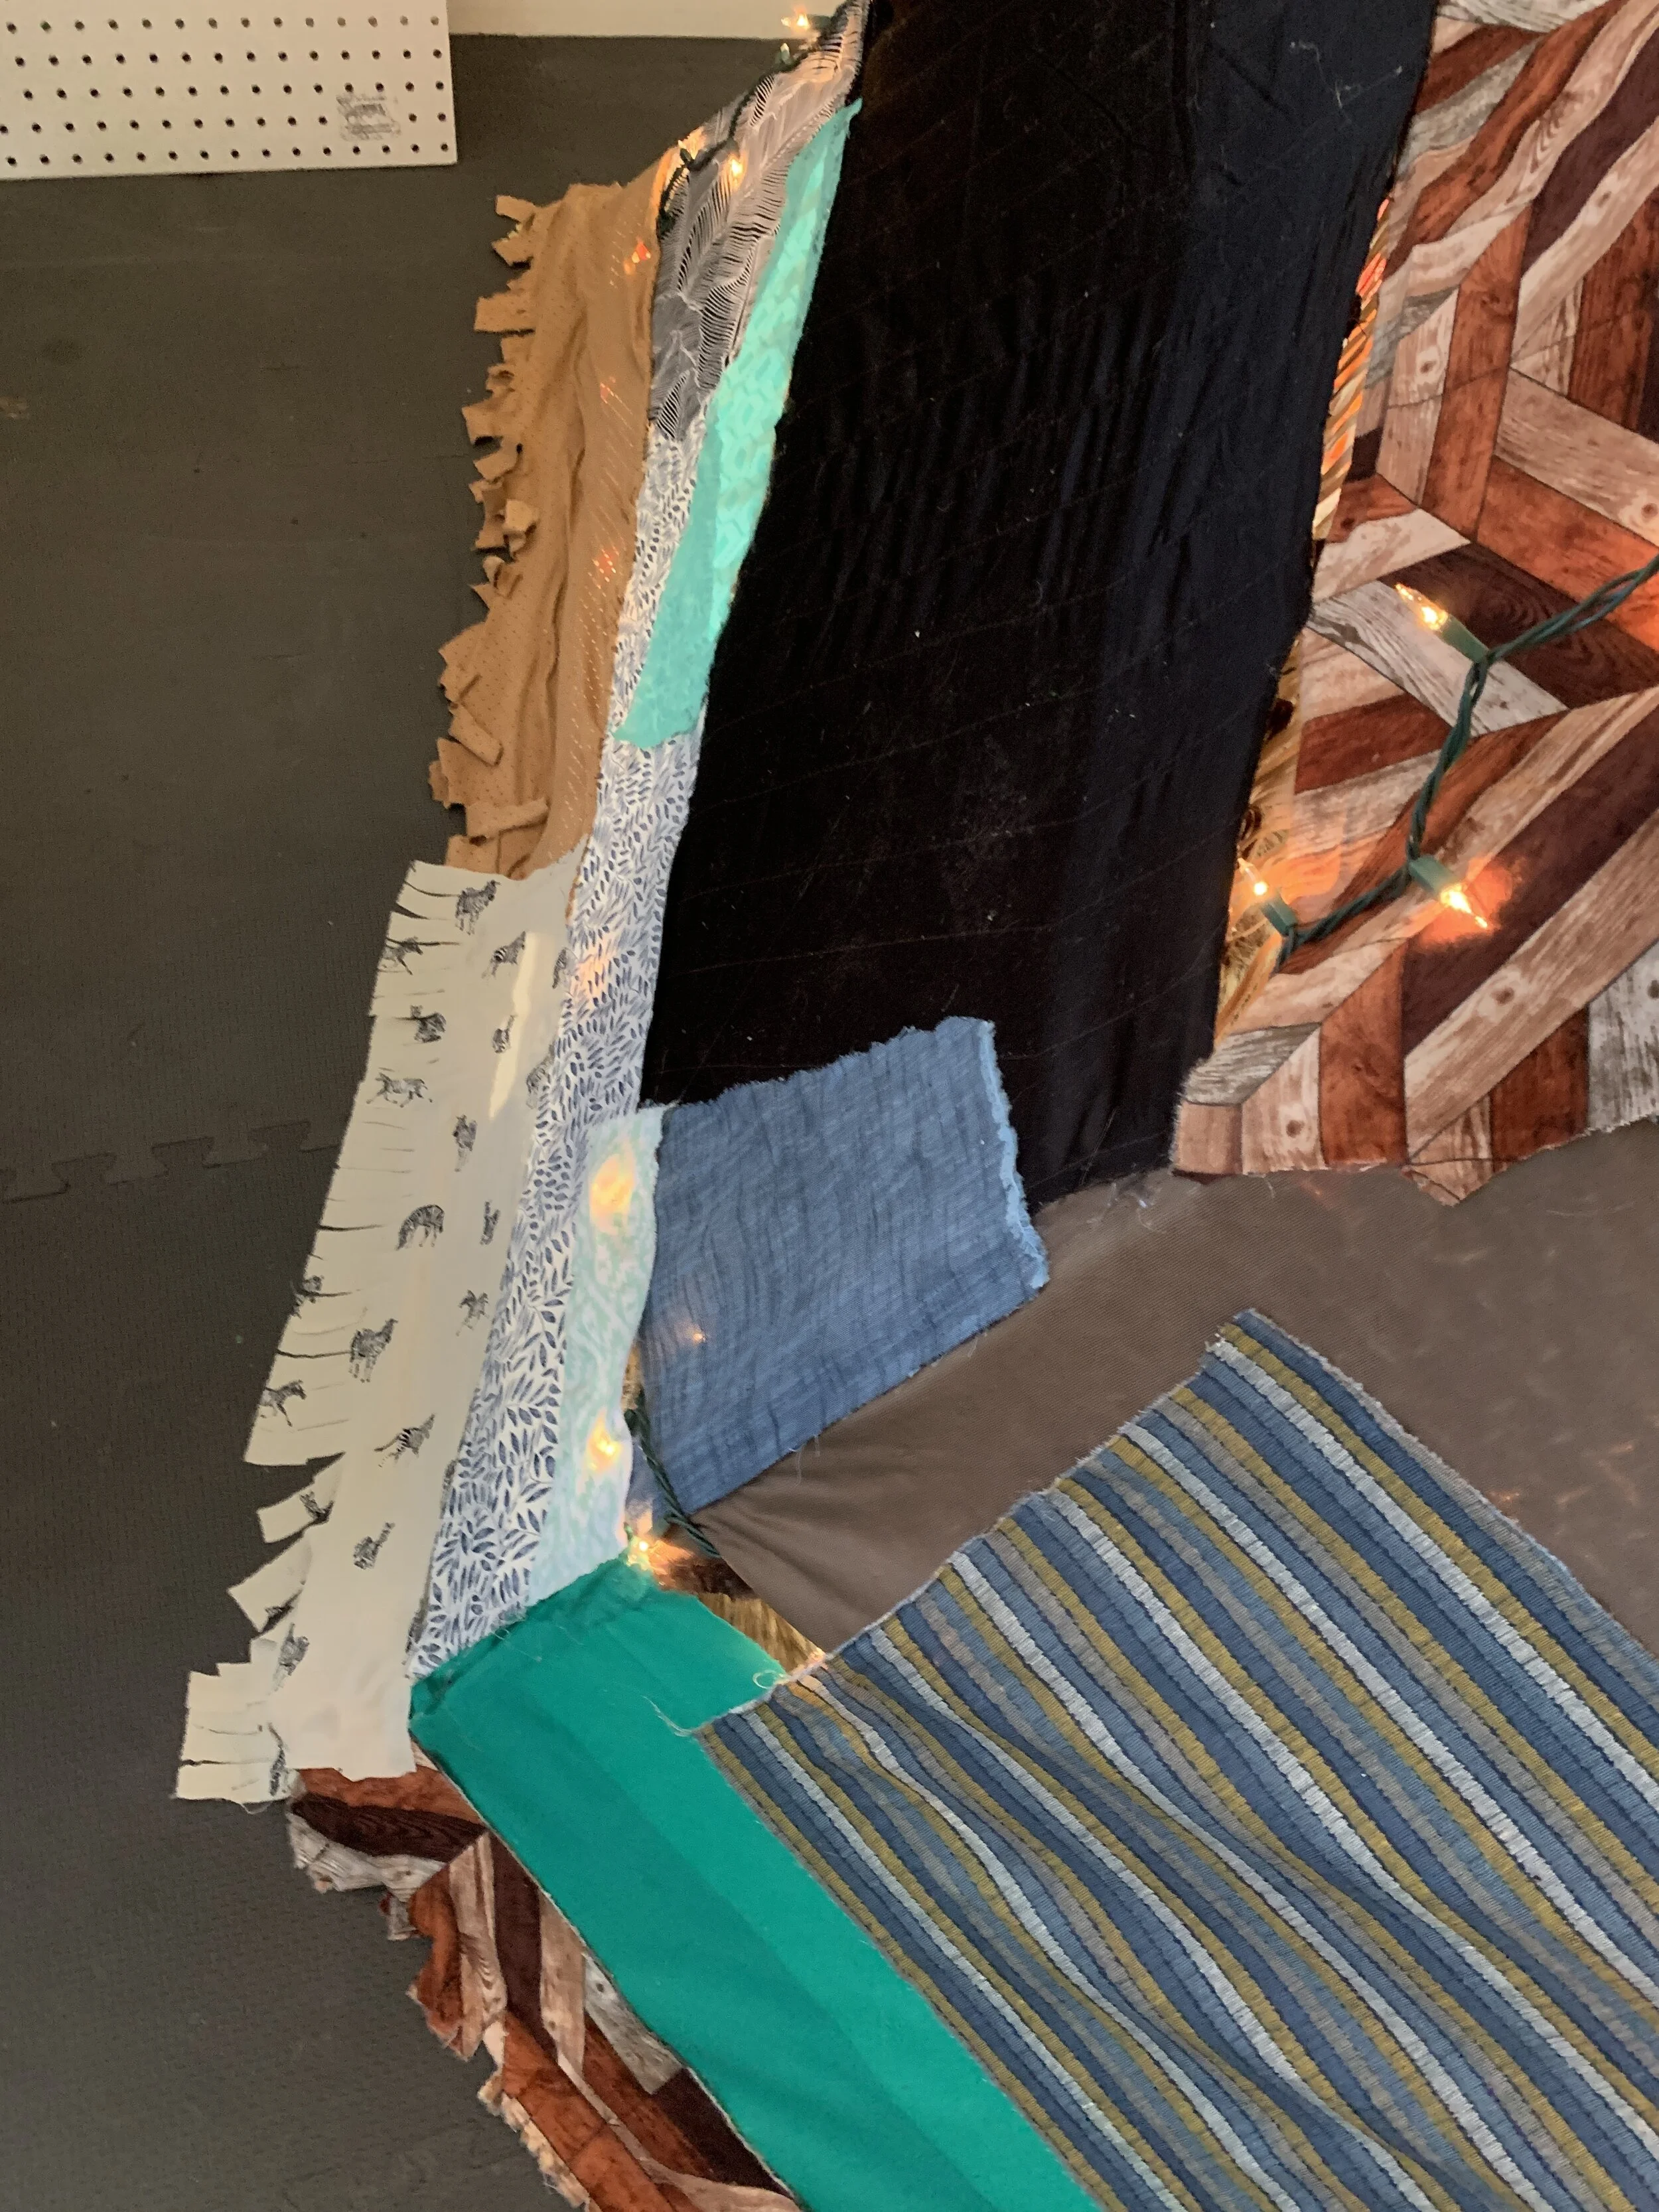
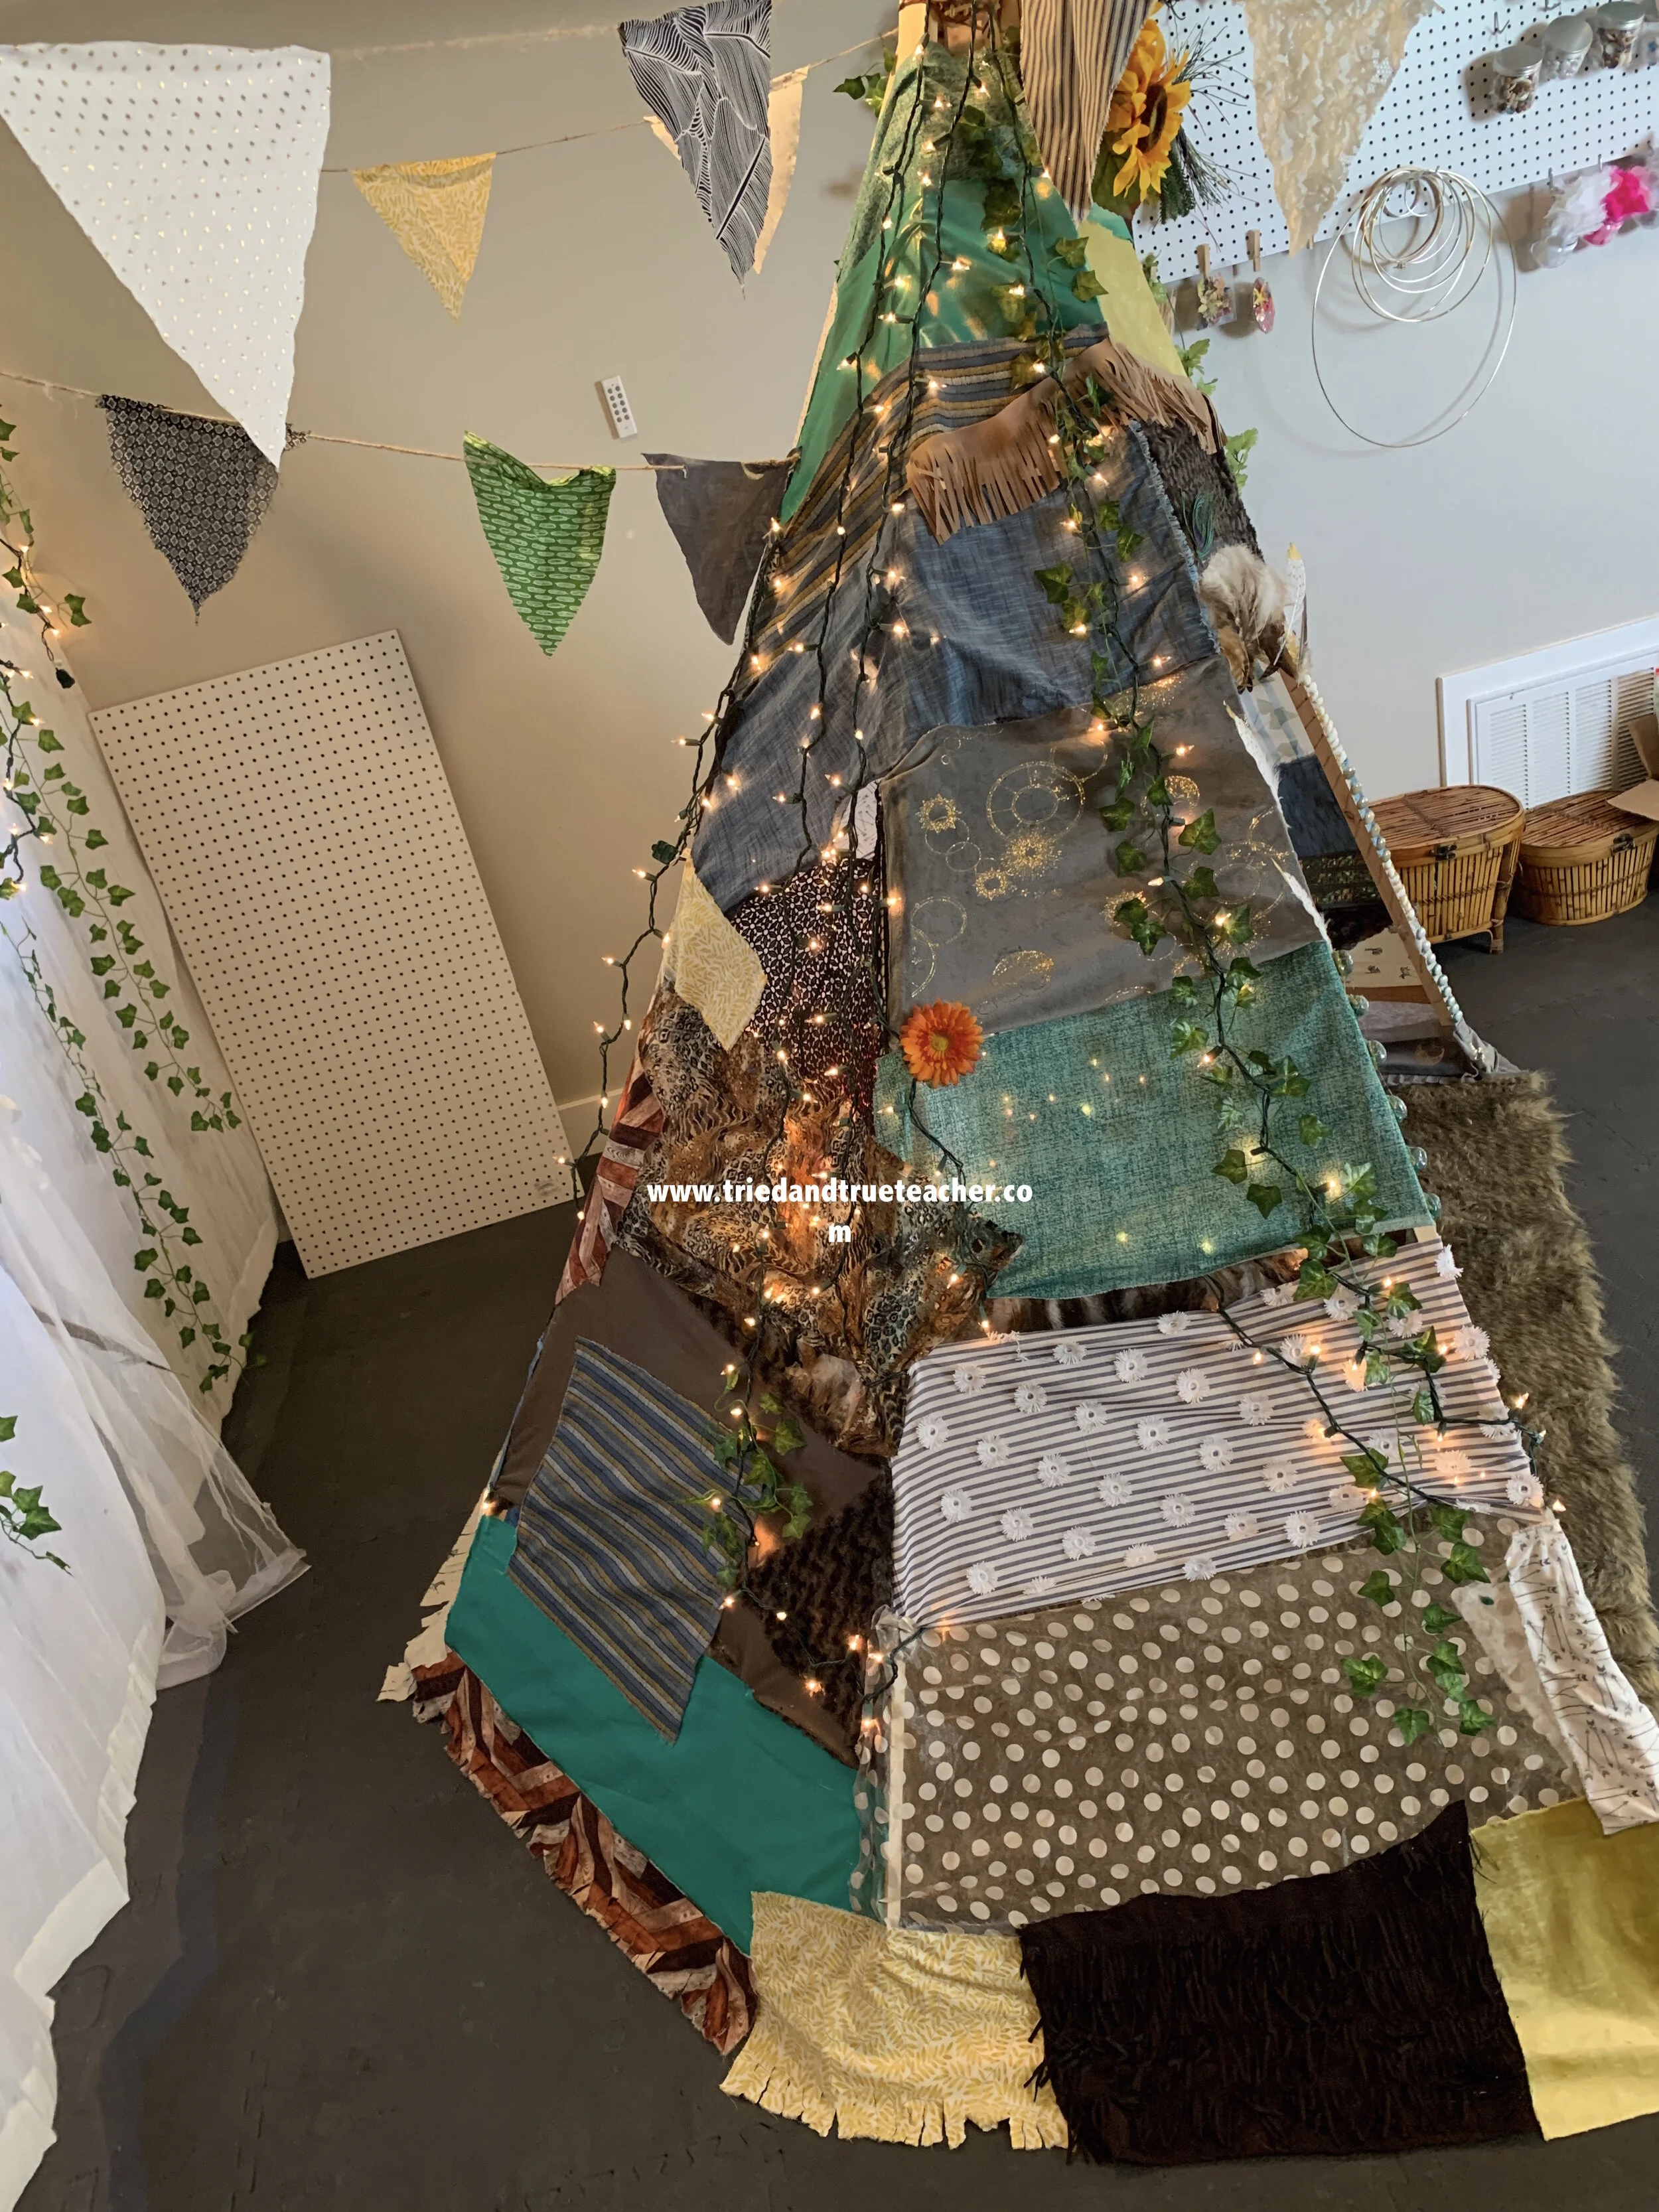
Then, you can add all kinds of flare wherever you’d like:

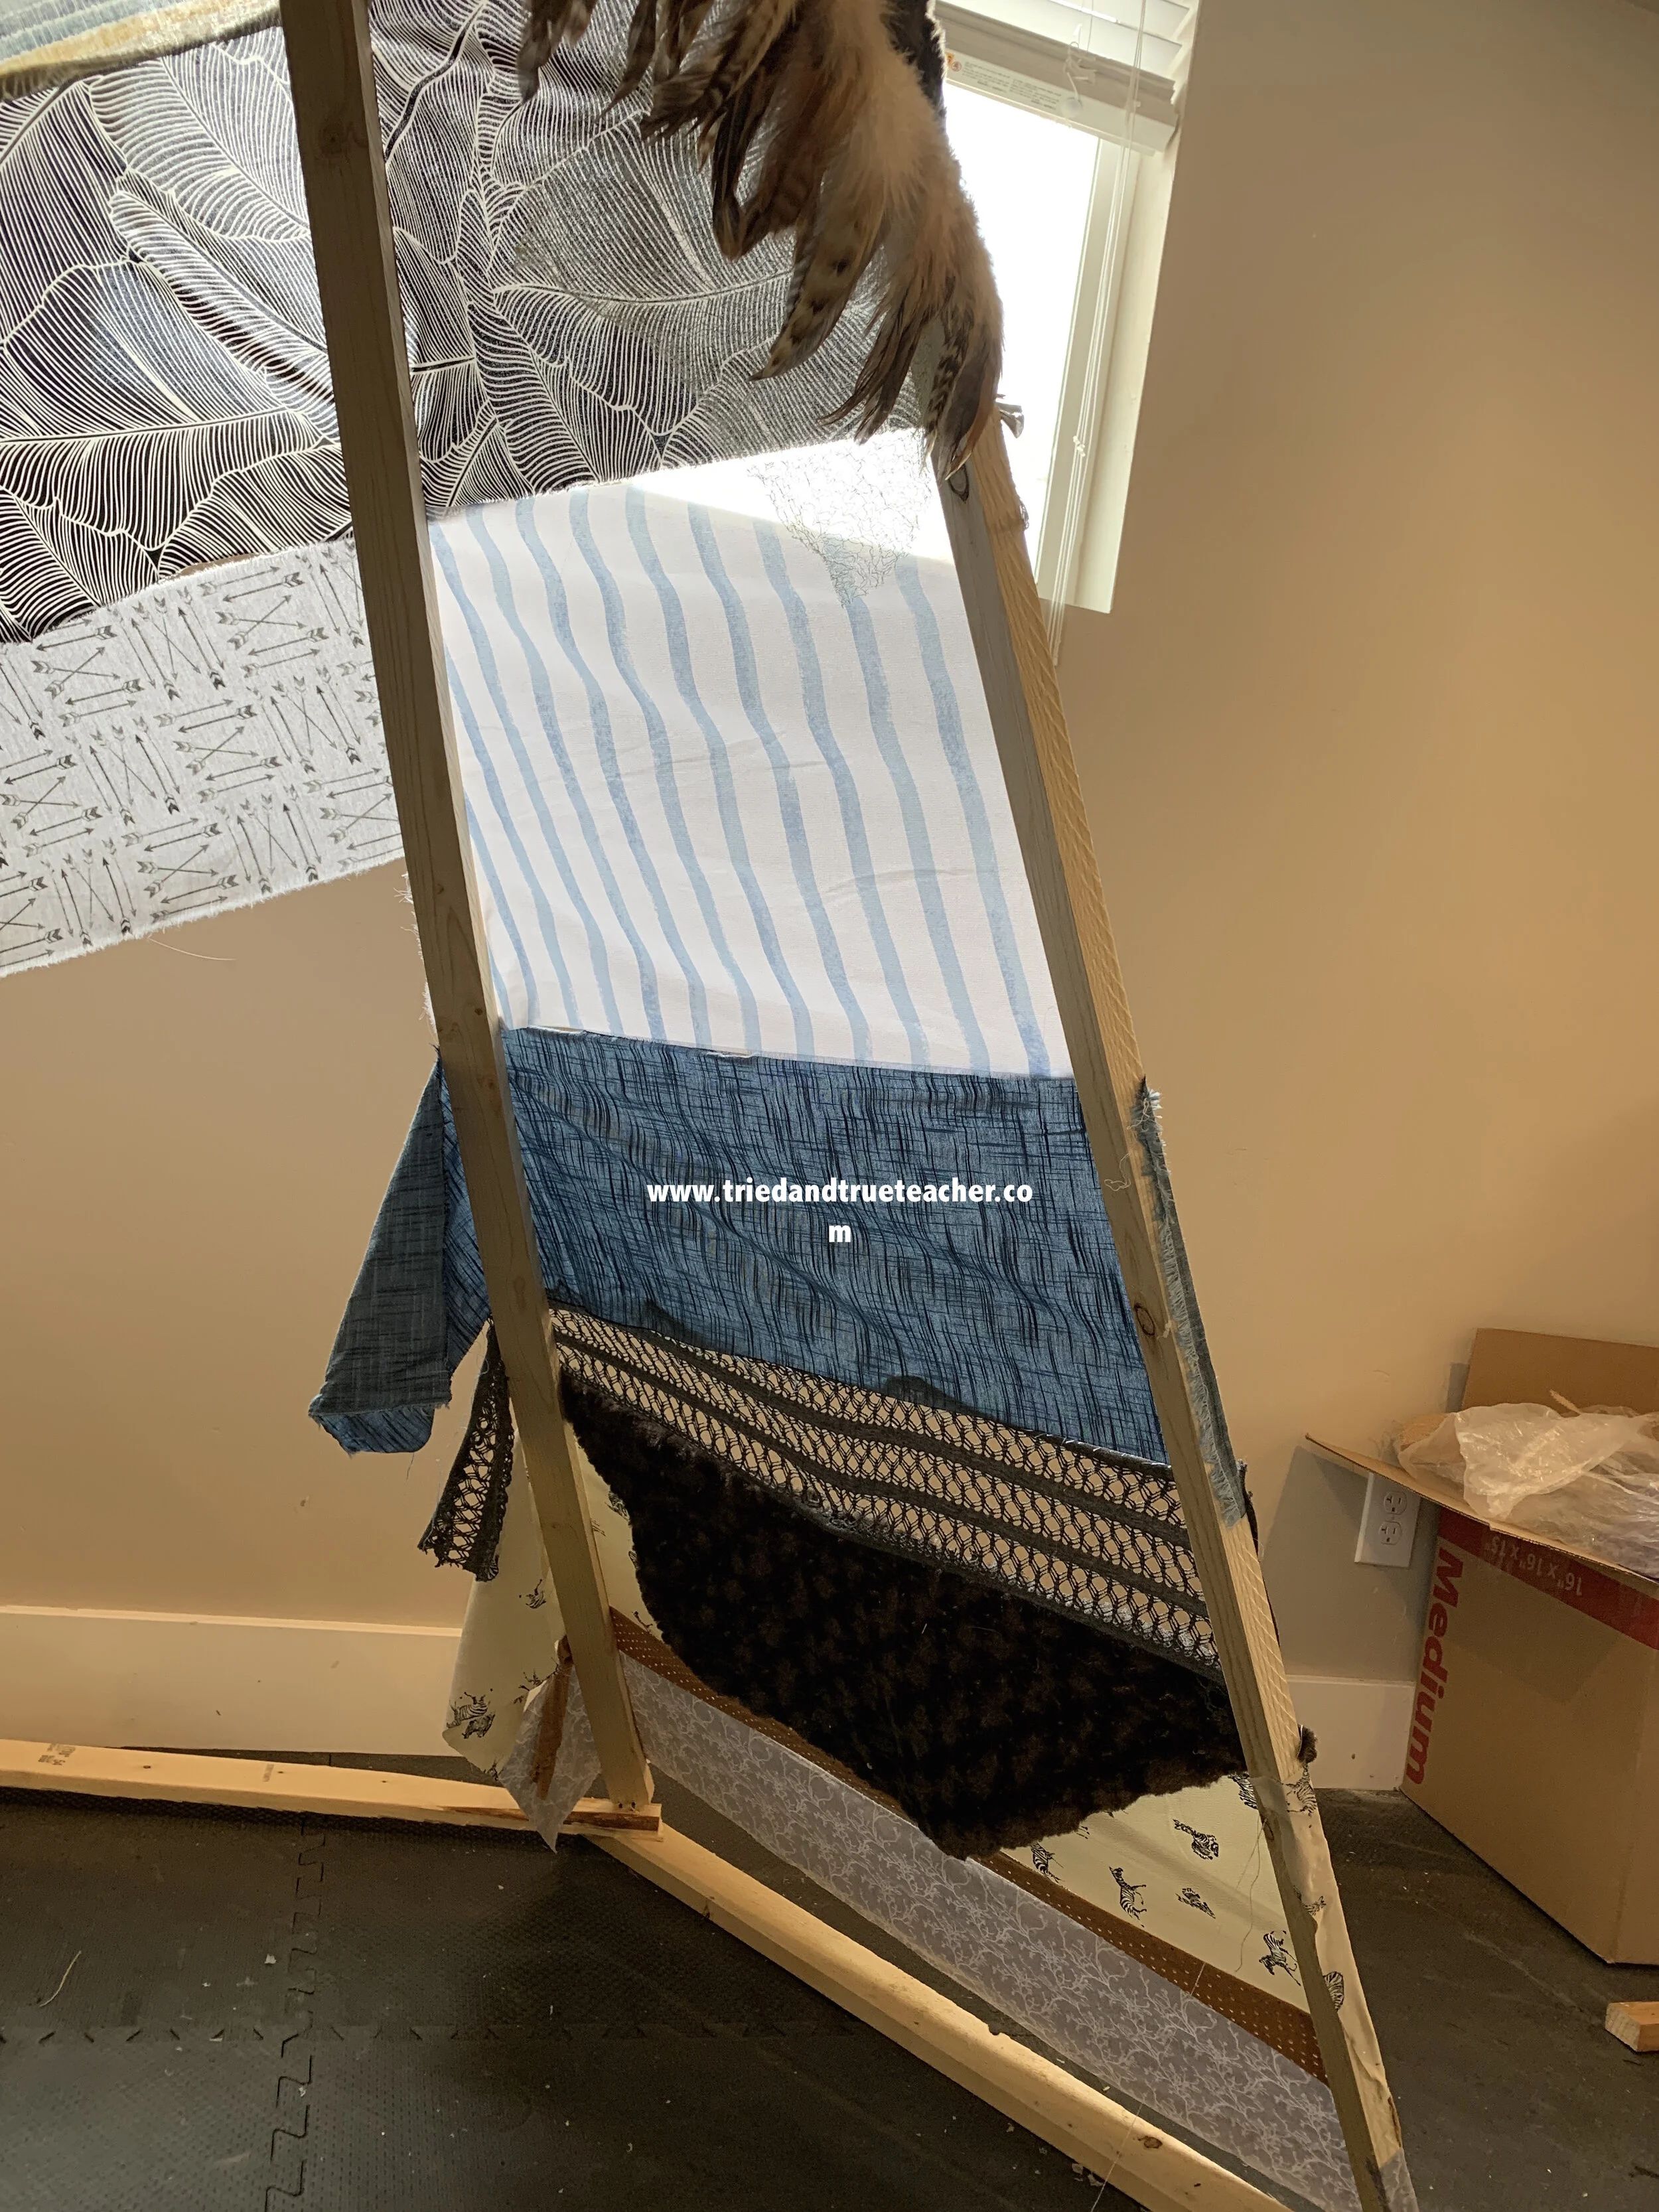
You can have each fabric piece stretch from board to board and end or you can overlap them like I did in the photo above!
^^ You can double wrap the fabric like the gray fabric on the top of this photo or you can single wrap like the turquoise and the striped bottom one… I double wrapped the top one because the back of the fabric was plain… but I chose to single wrap the bottom two because I liked the look of the fabric on both sides!
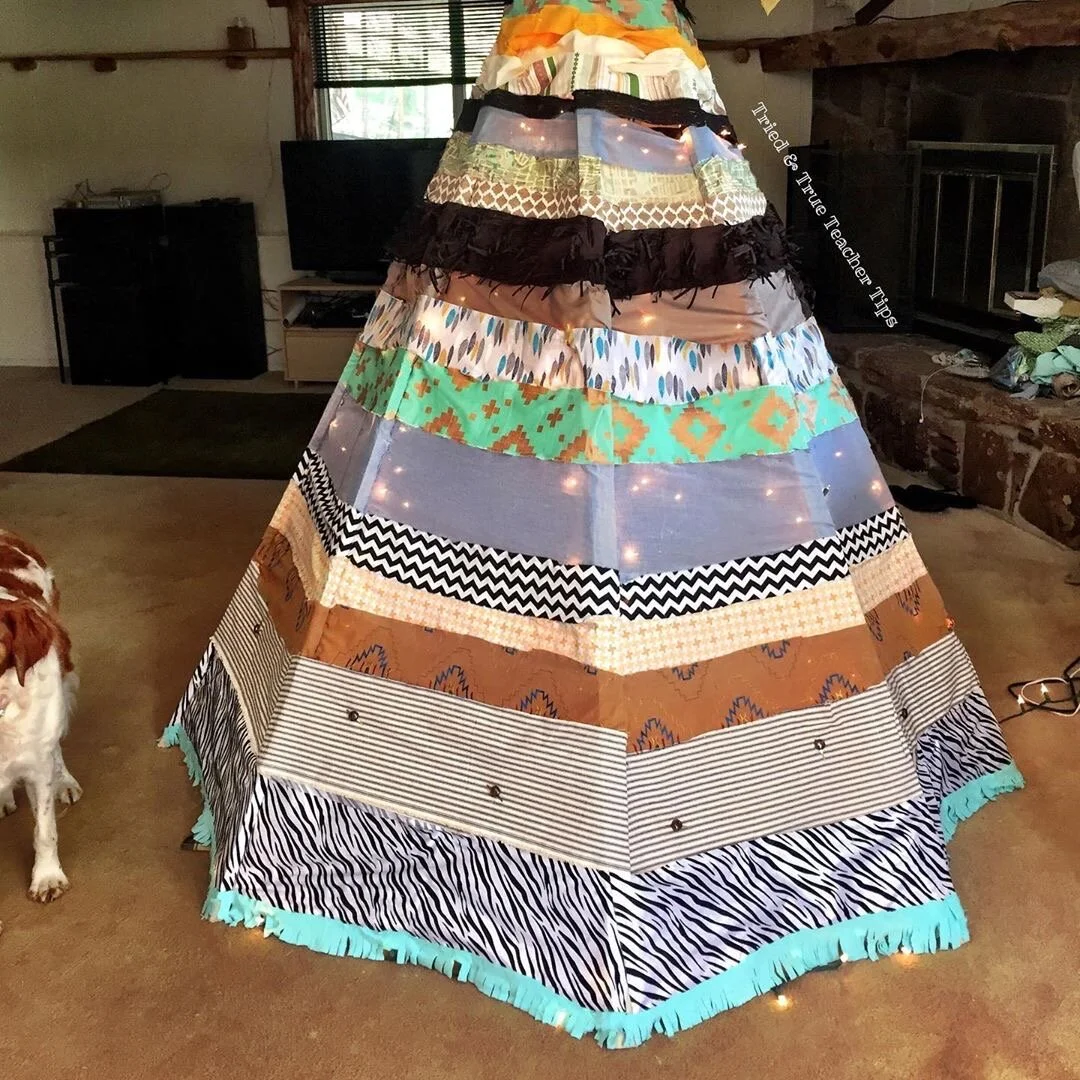
On this one, I decided to do smaller pieces and change it up more… (shown above)
On my first one, I did larger strip sections of a single kind of fabric that wrapped around multiple sections… (shown below)
You decide what you like!

It’s starting to come together now!
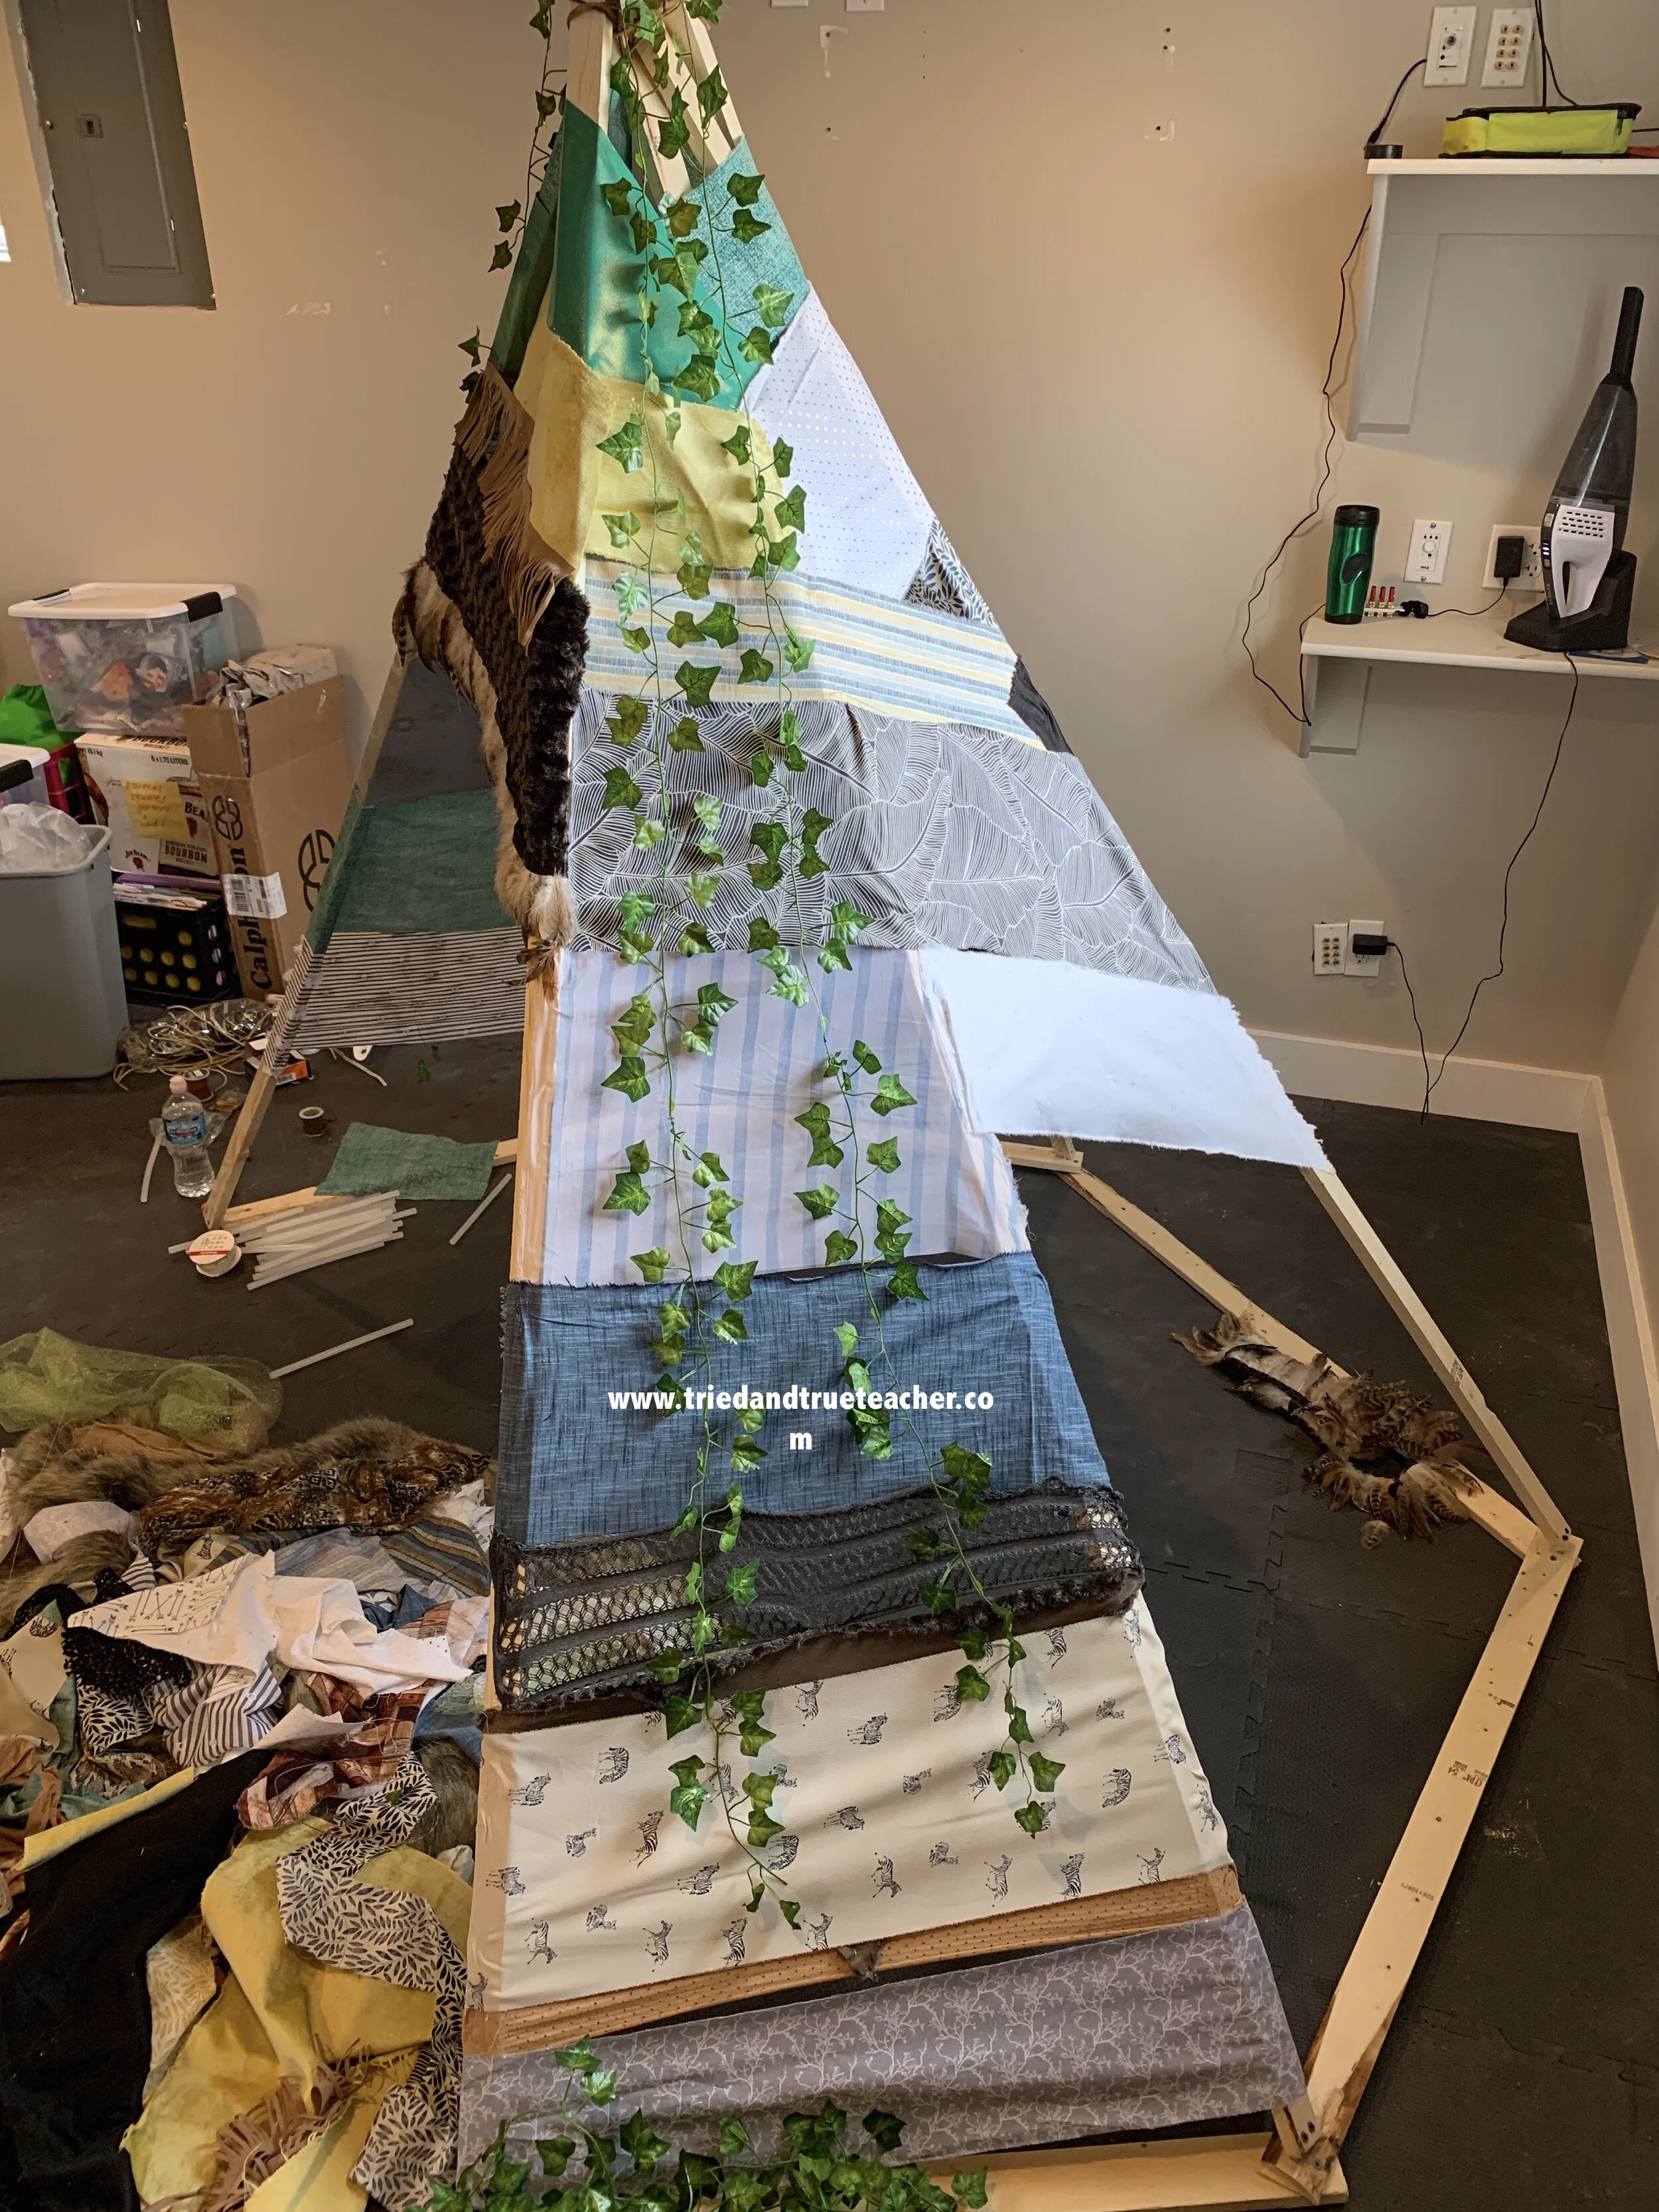

Like the look of the greenery?
Here’s a link to purchase the greenery I used on mine!
I was so happy with this purchase and found SO MANY ways to use the extra… this pack comes with a ton of greenery, it’s easy to use and it looks so awesome!

You can attach two fabrics together at any point by just putting a dab of hot glue and holding it together!
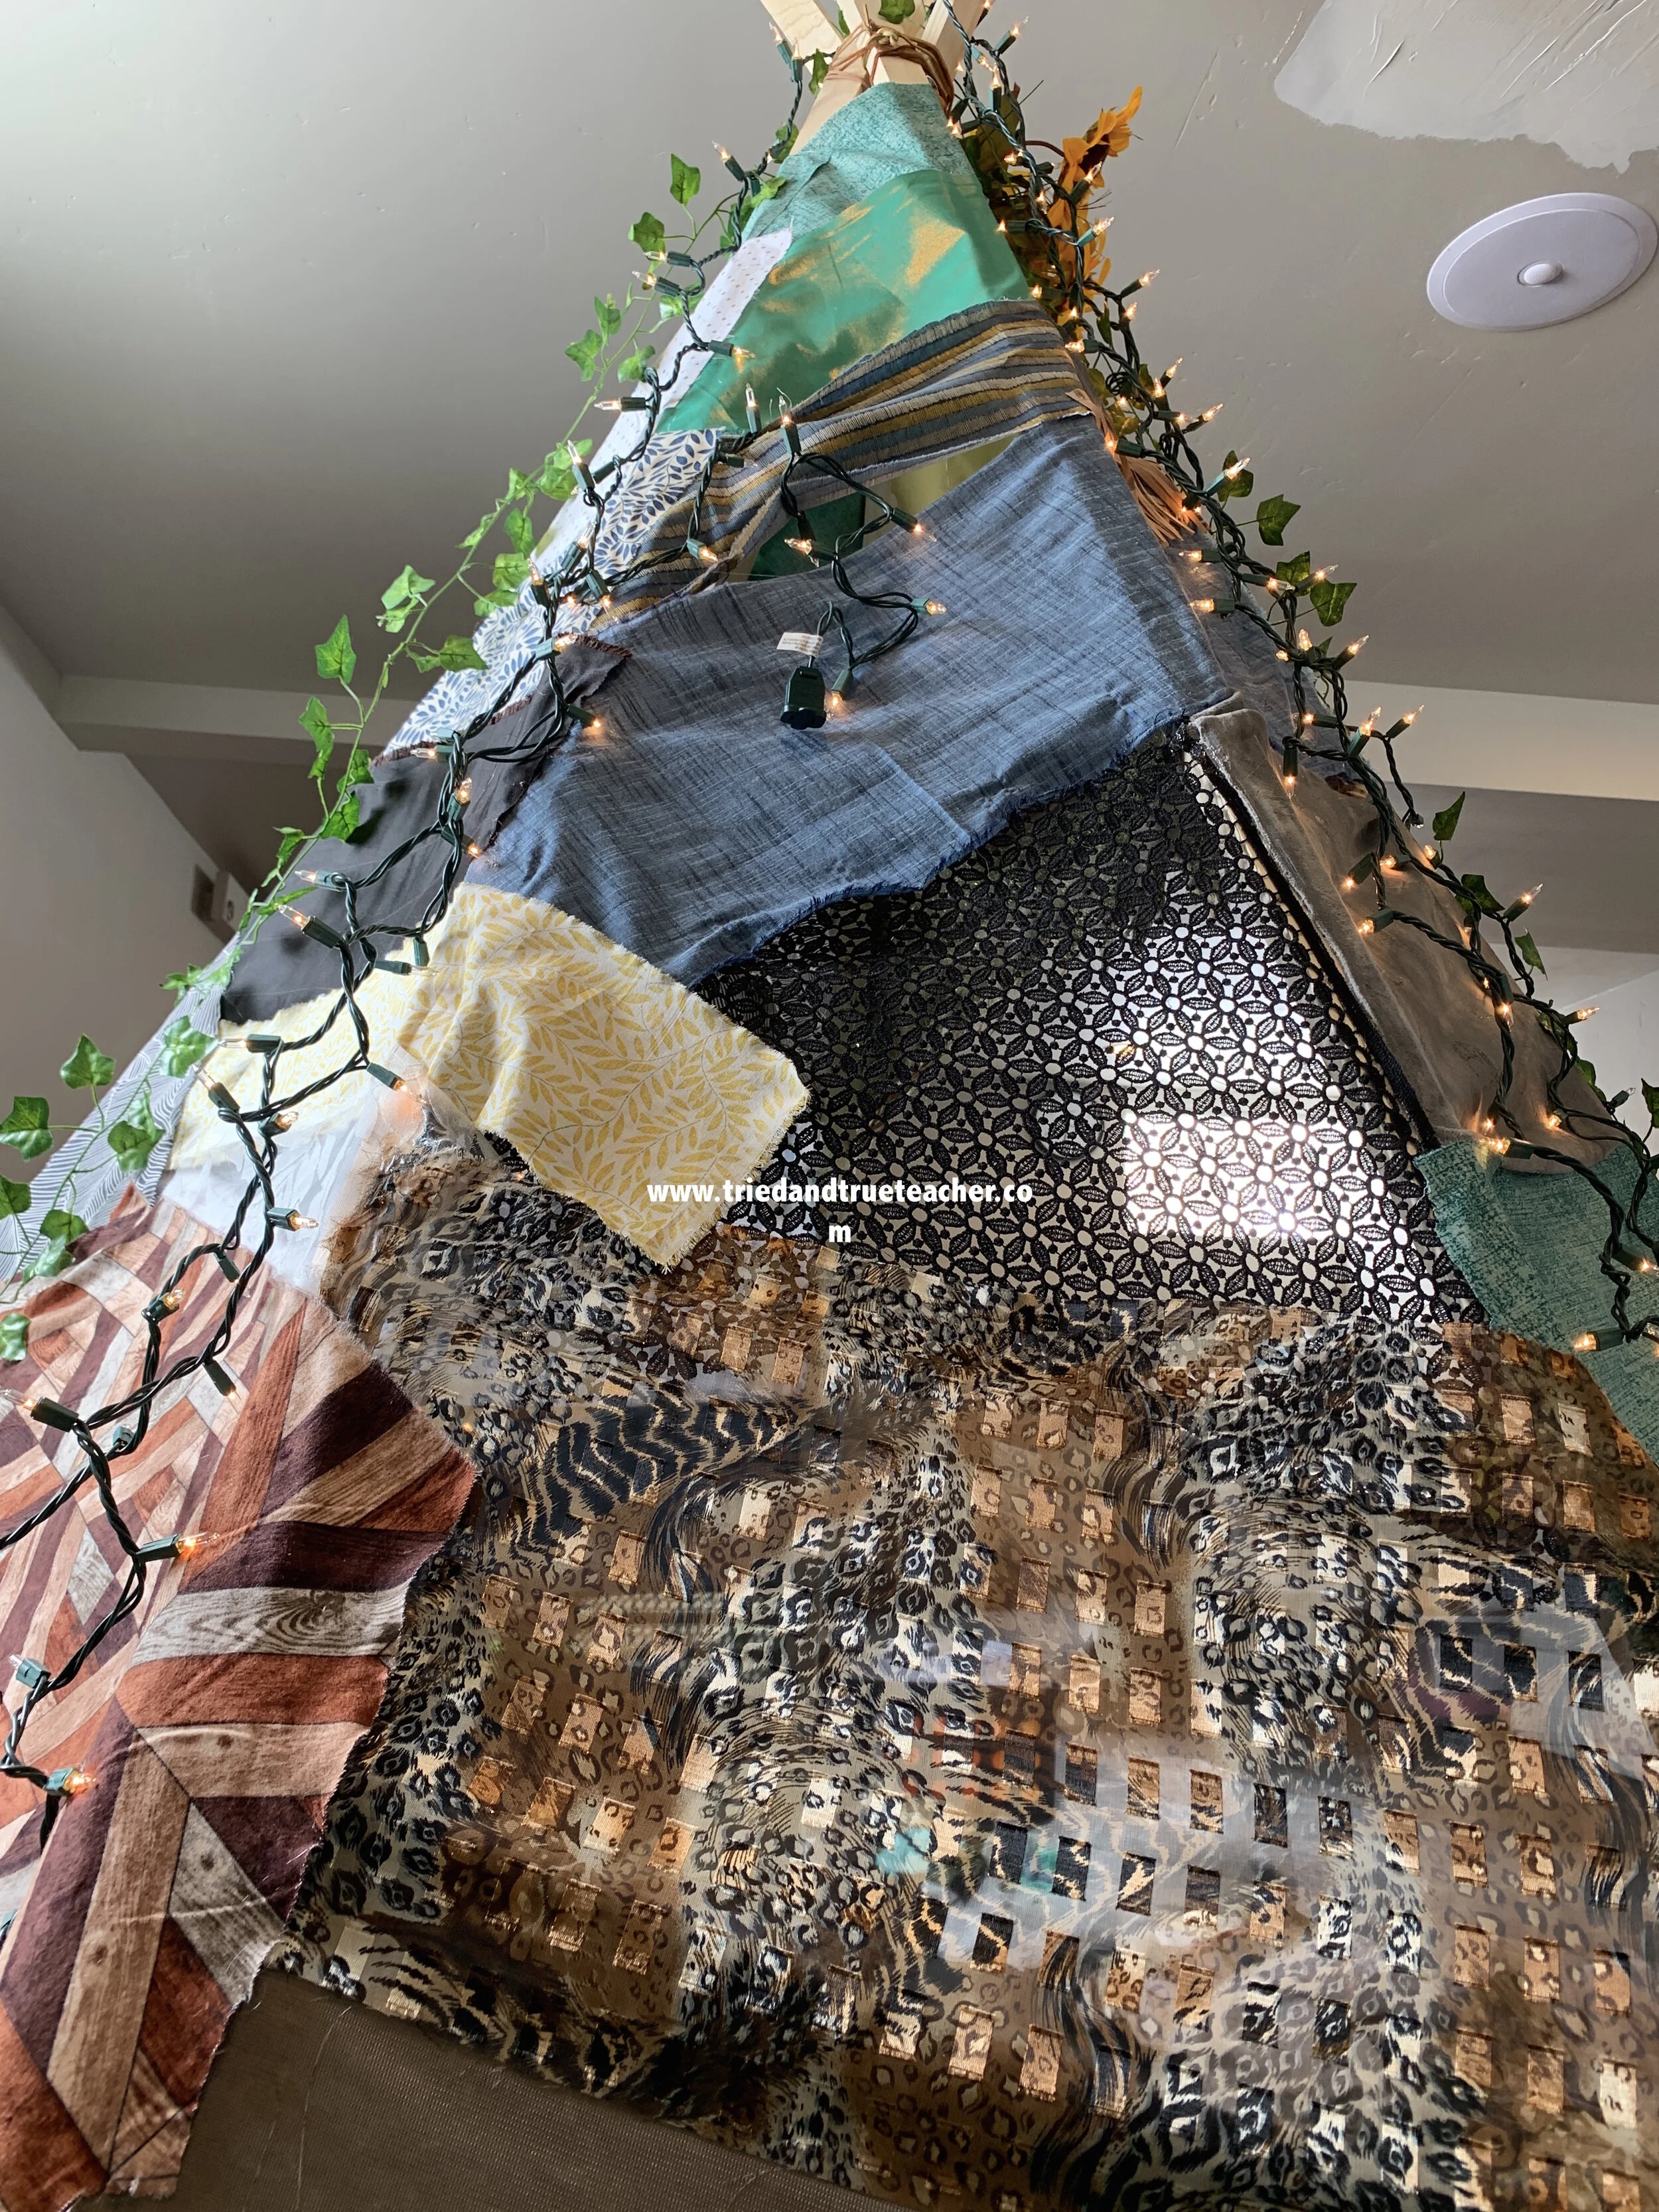
^^^ I also like to hang Christmas lights!


Once you’ve got all your fabric on… you can start thinking about the little extras you want to add!
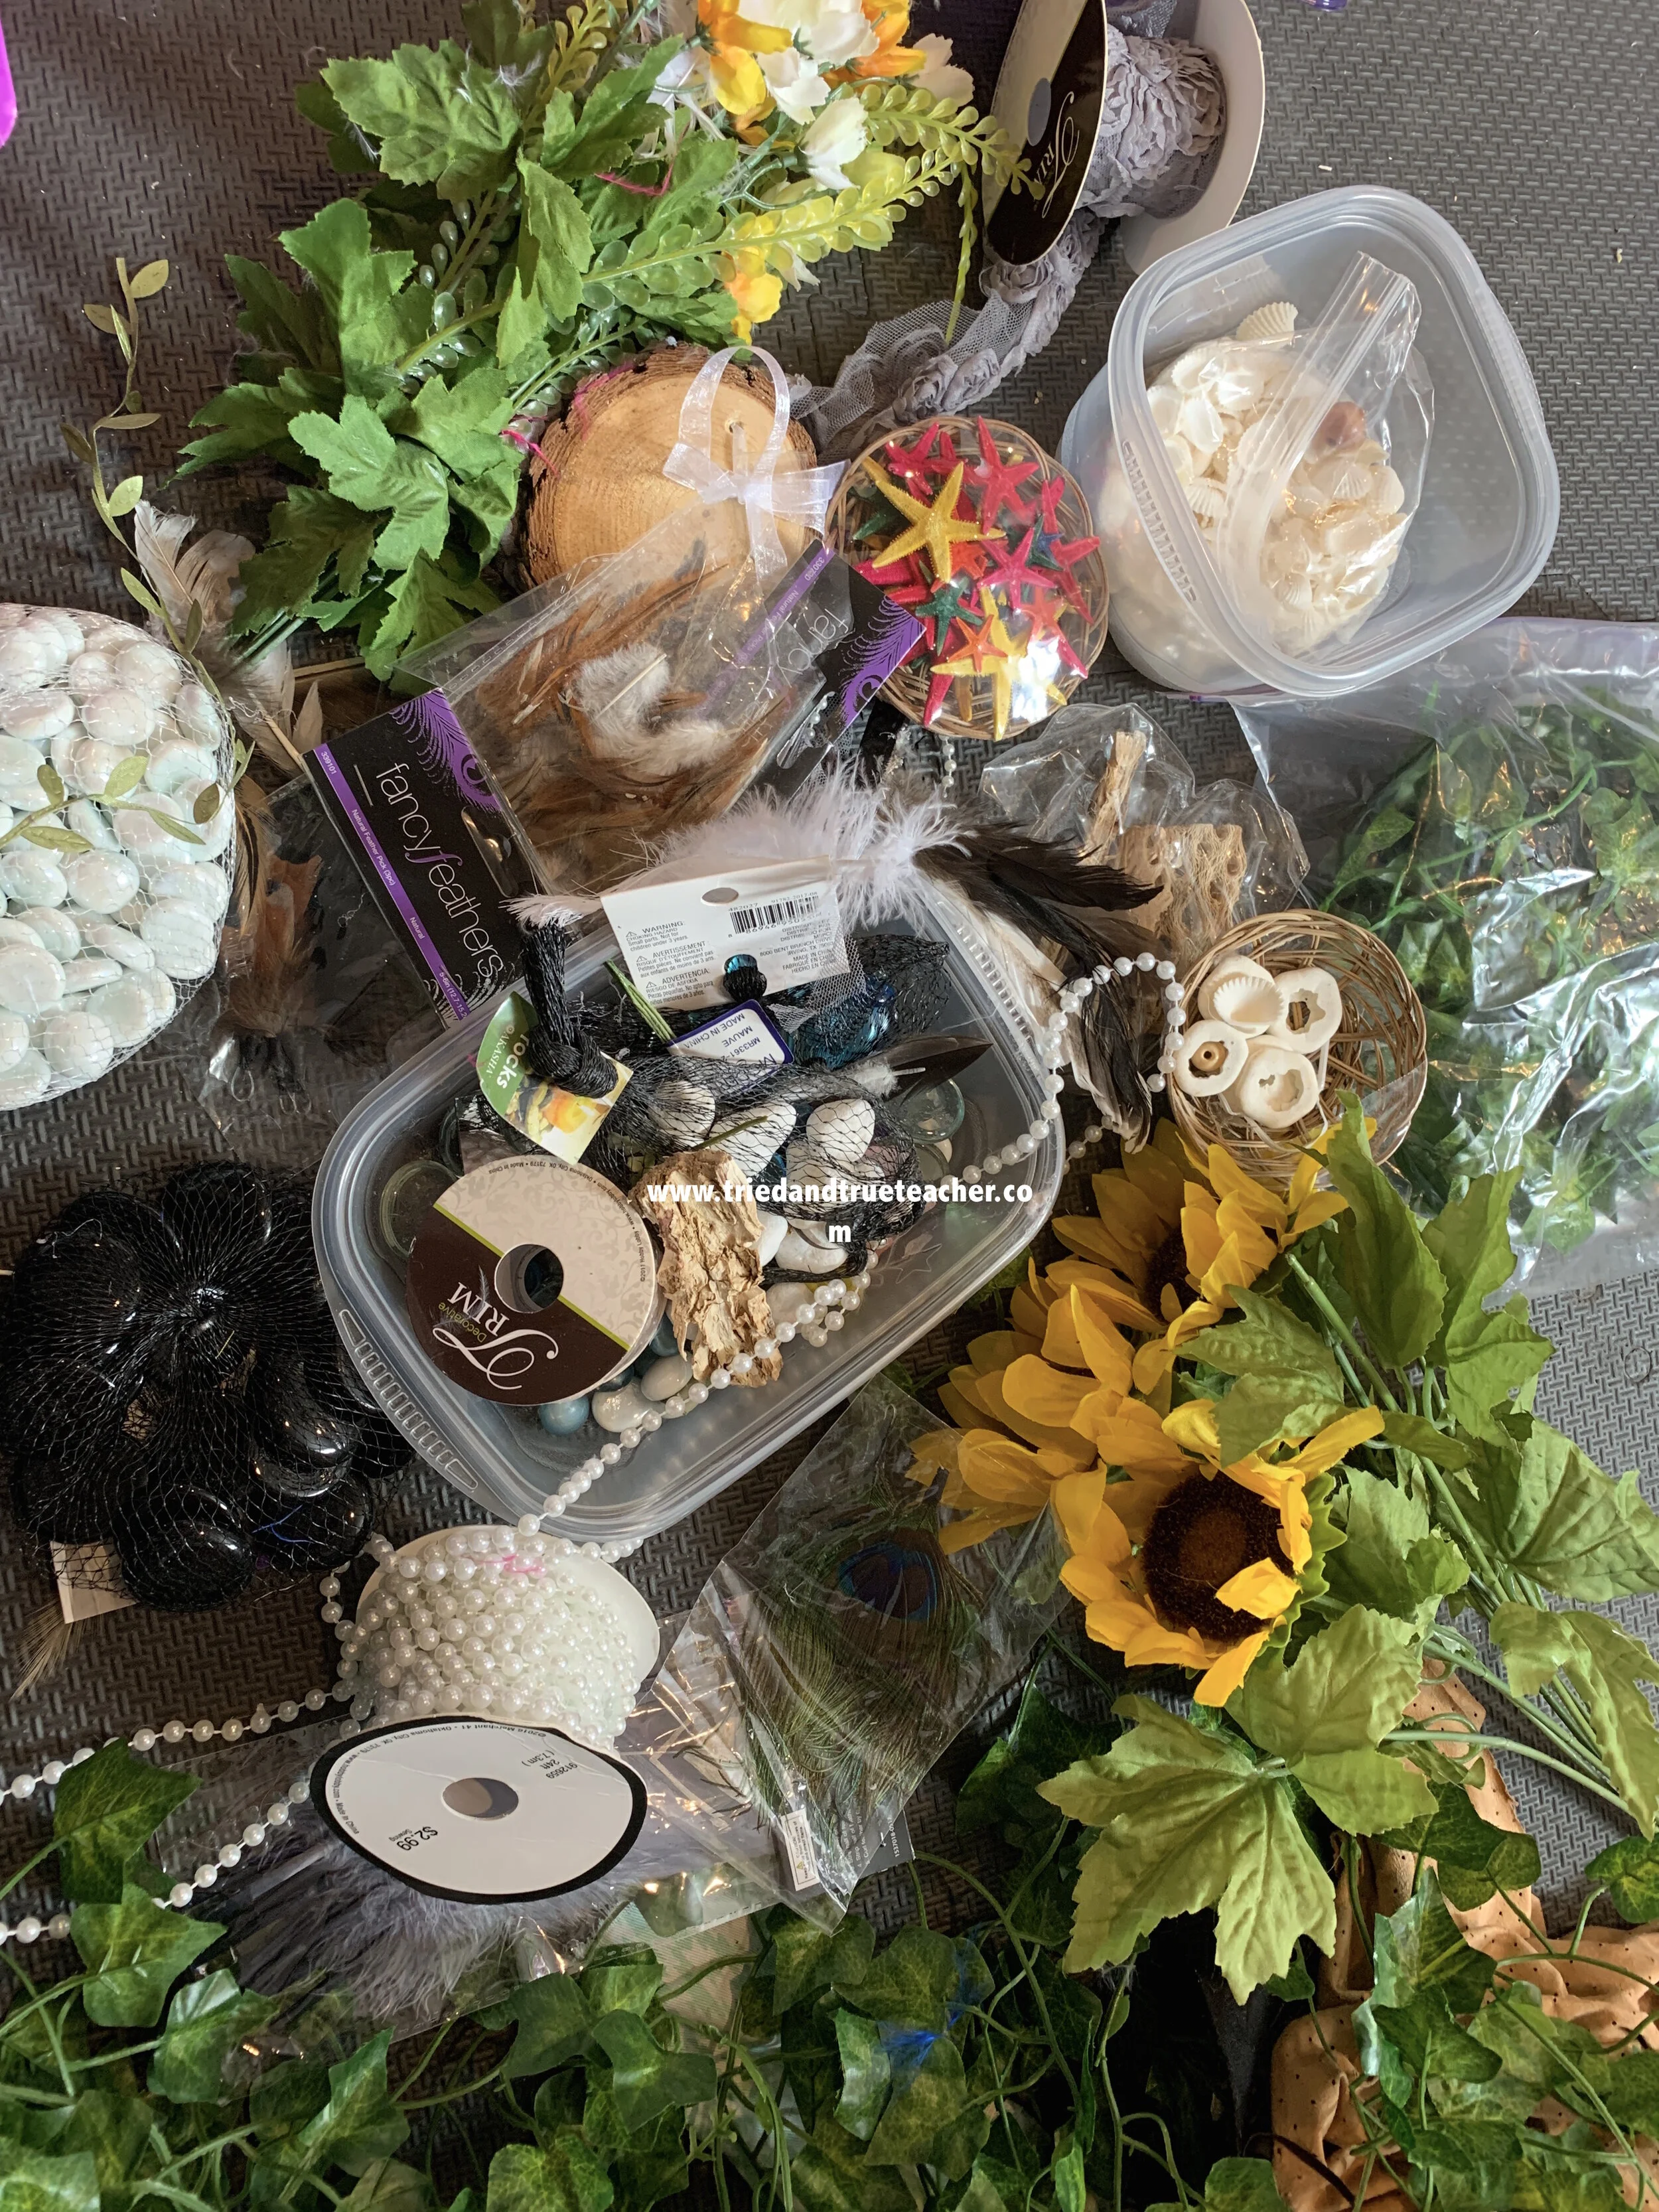
Above are some of my extra decorations and accessories I was choosing from to add final touches! Just to give you an idea of all the fun things you can add to your tent!


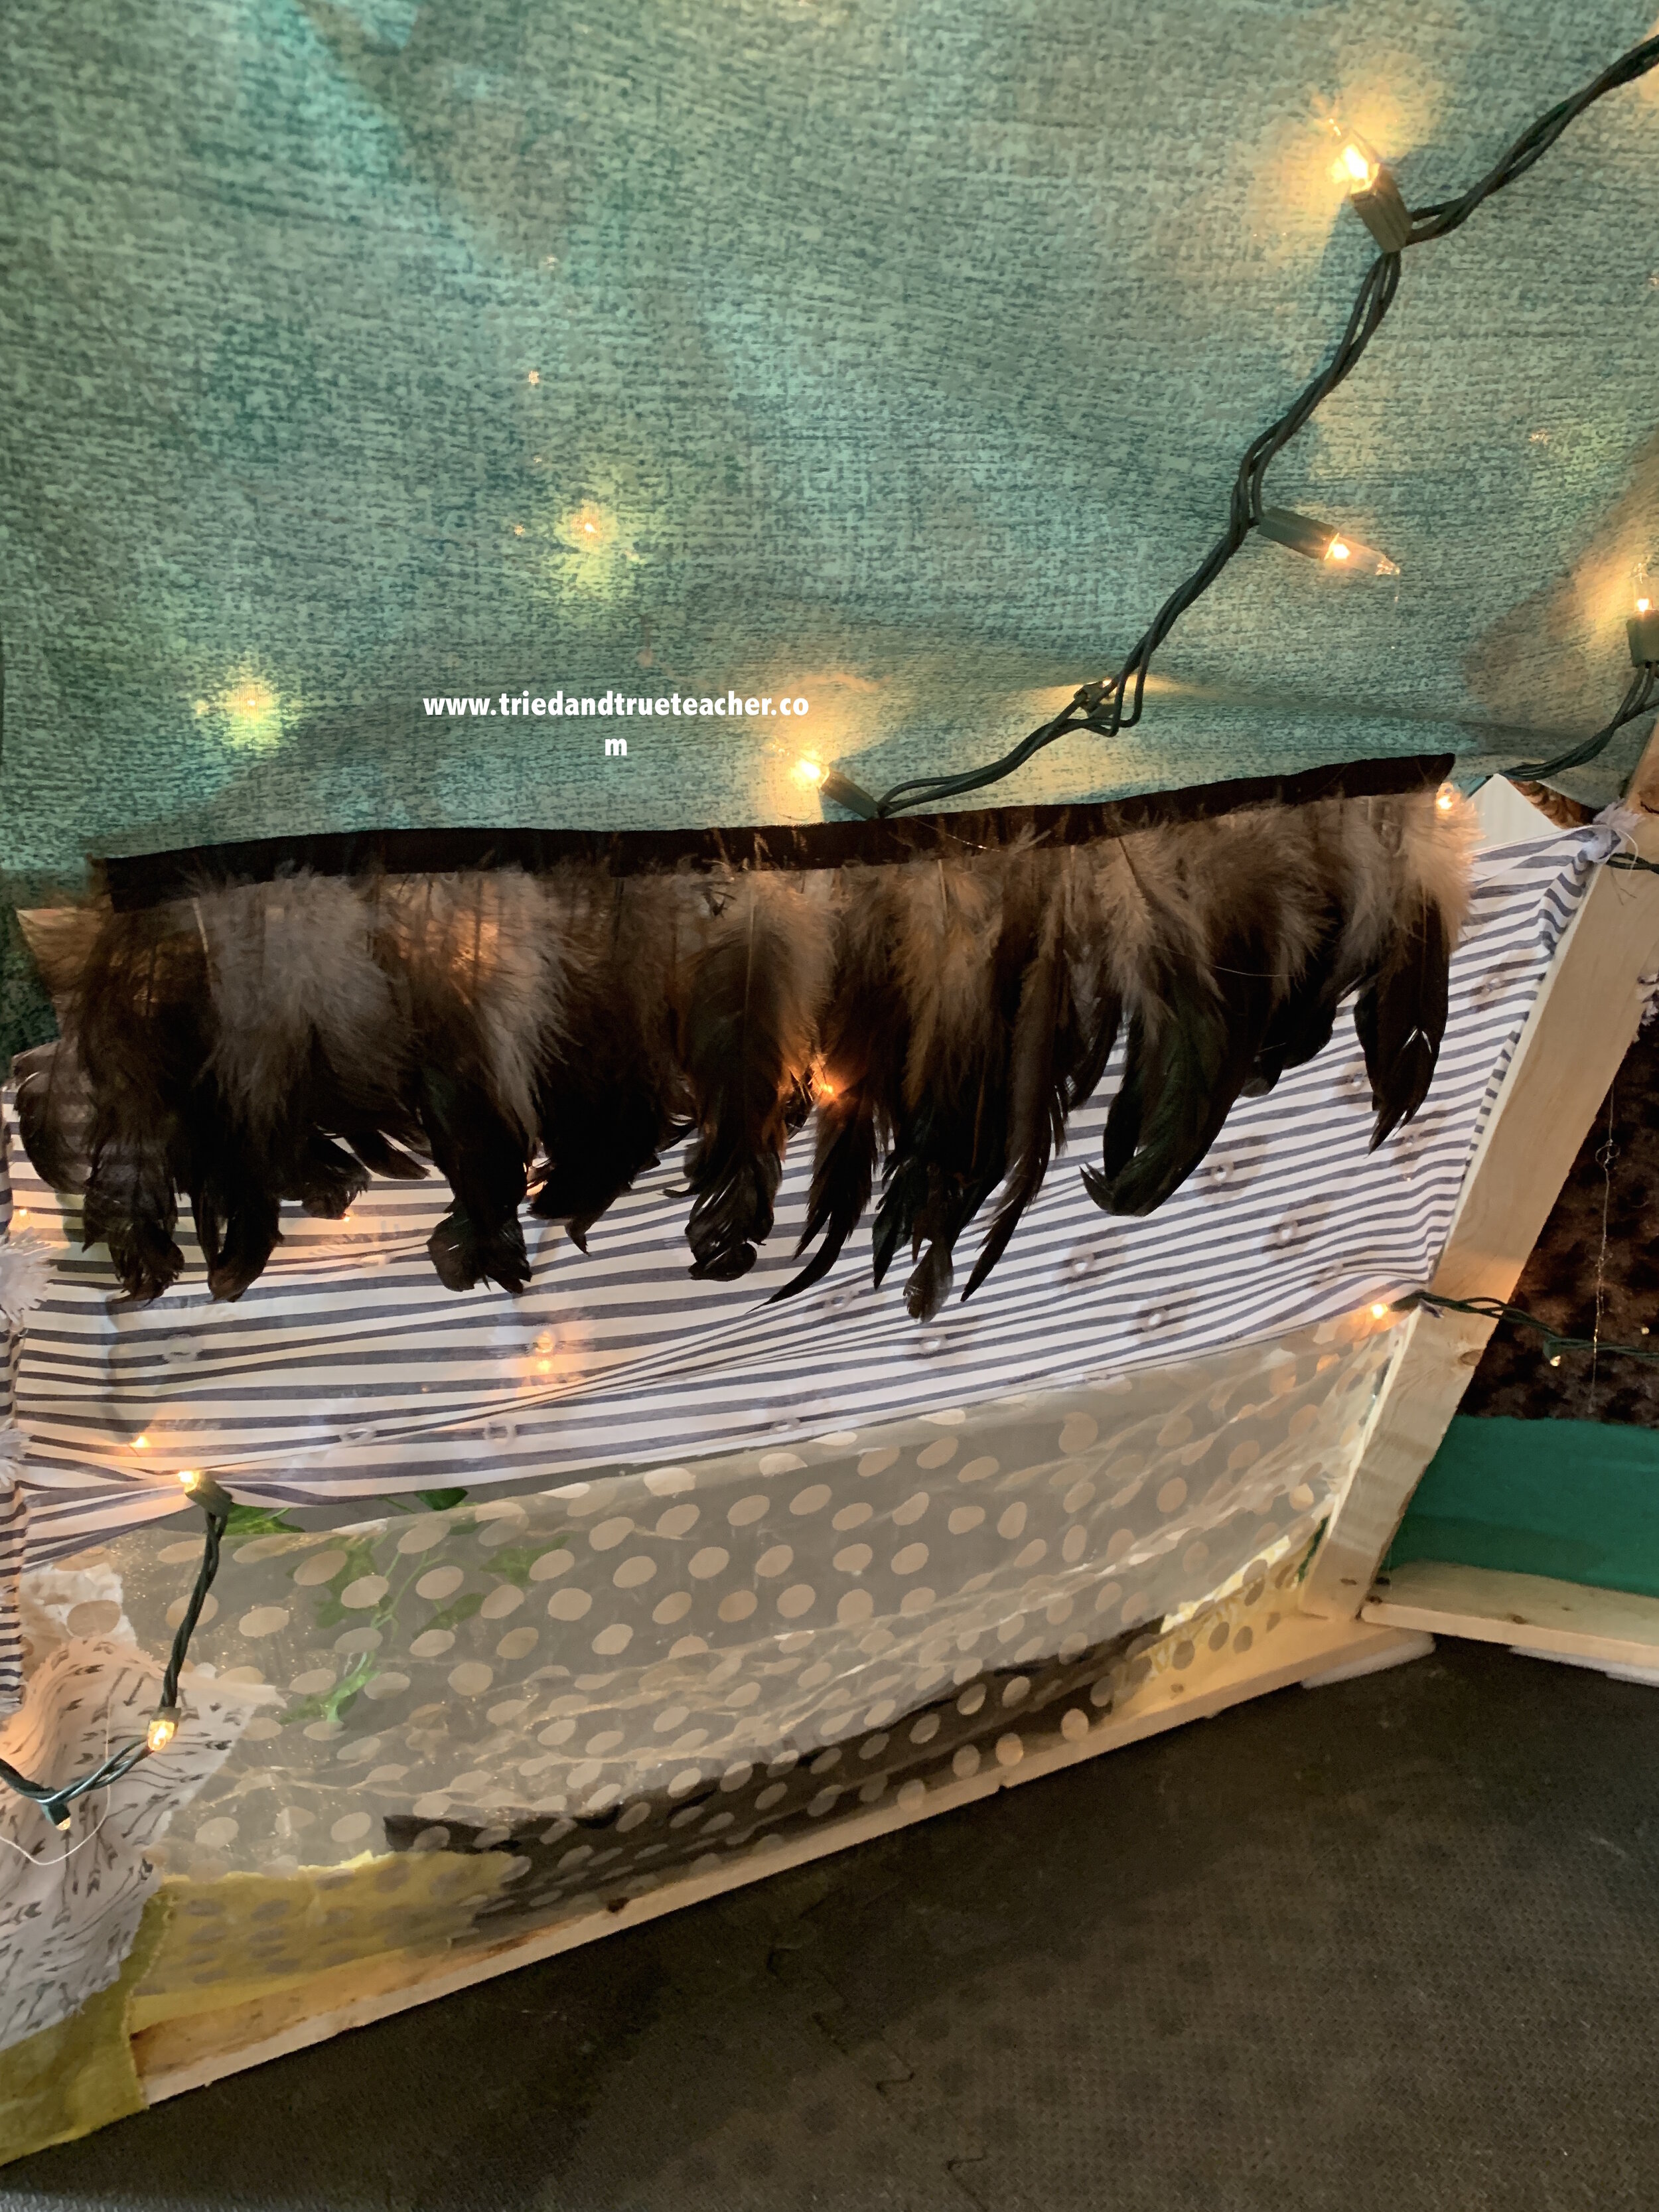
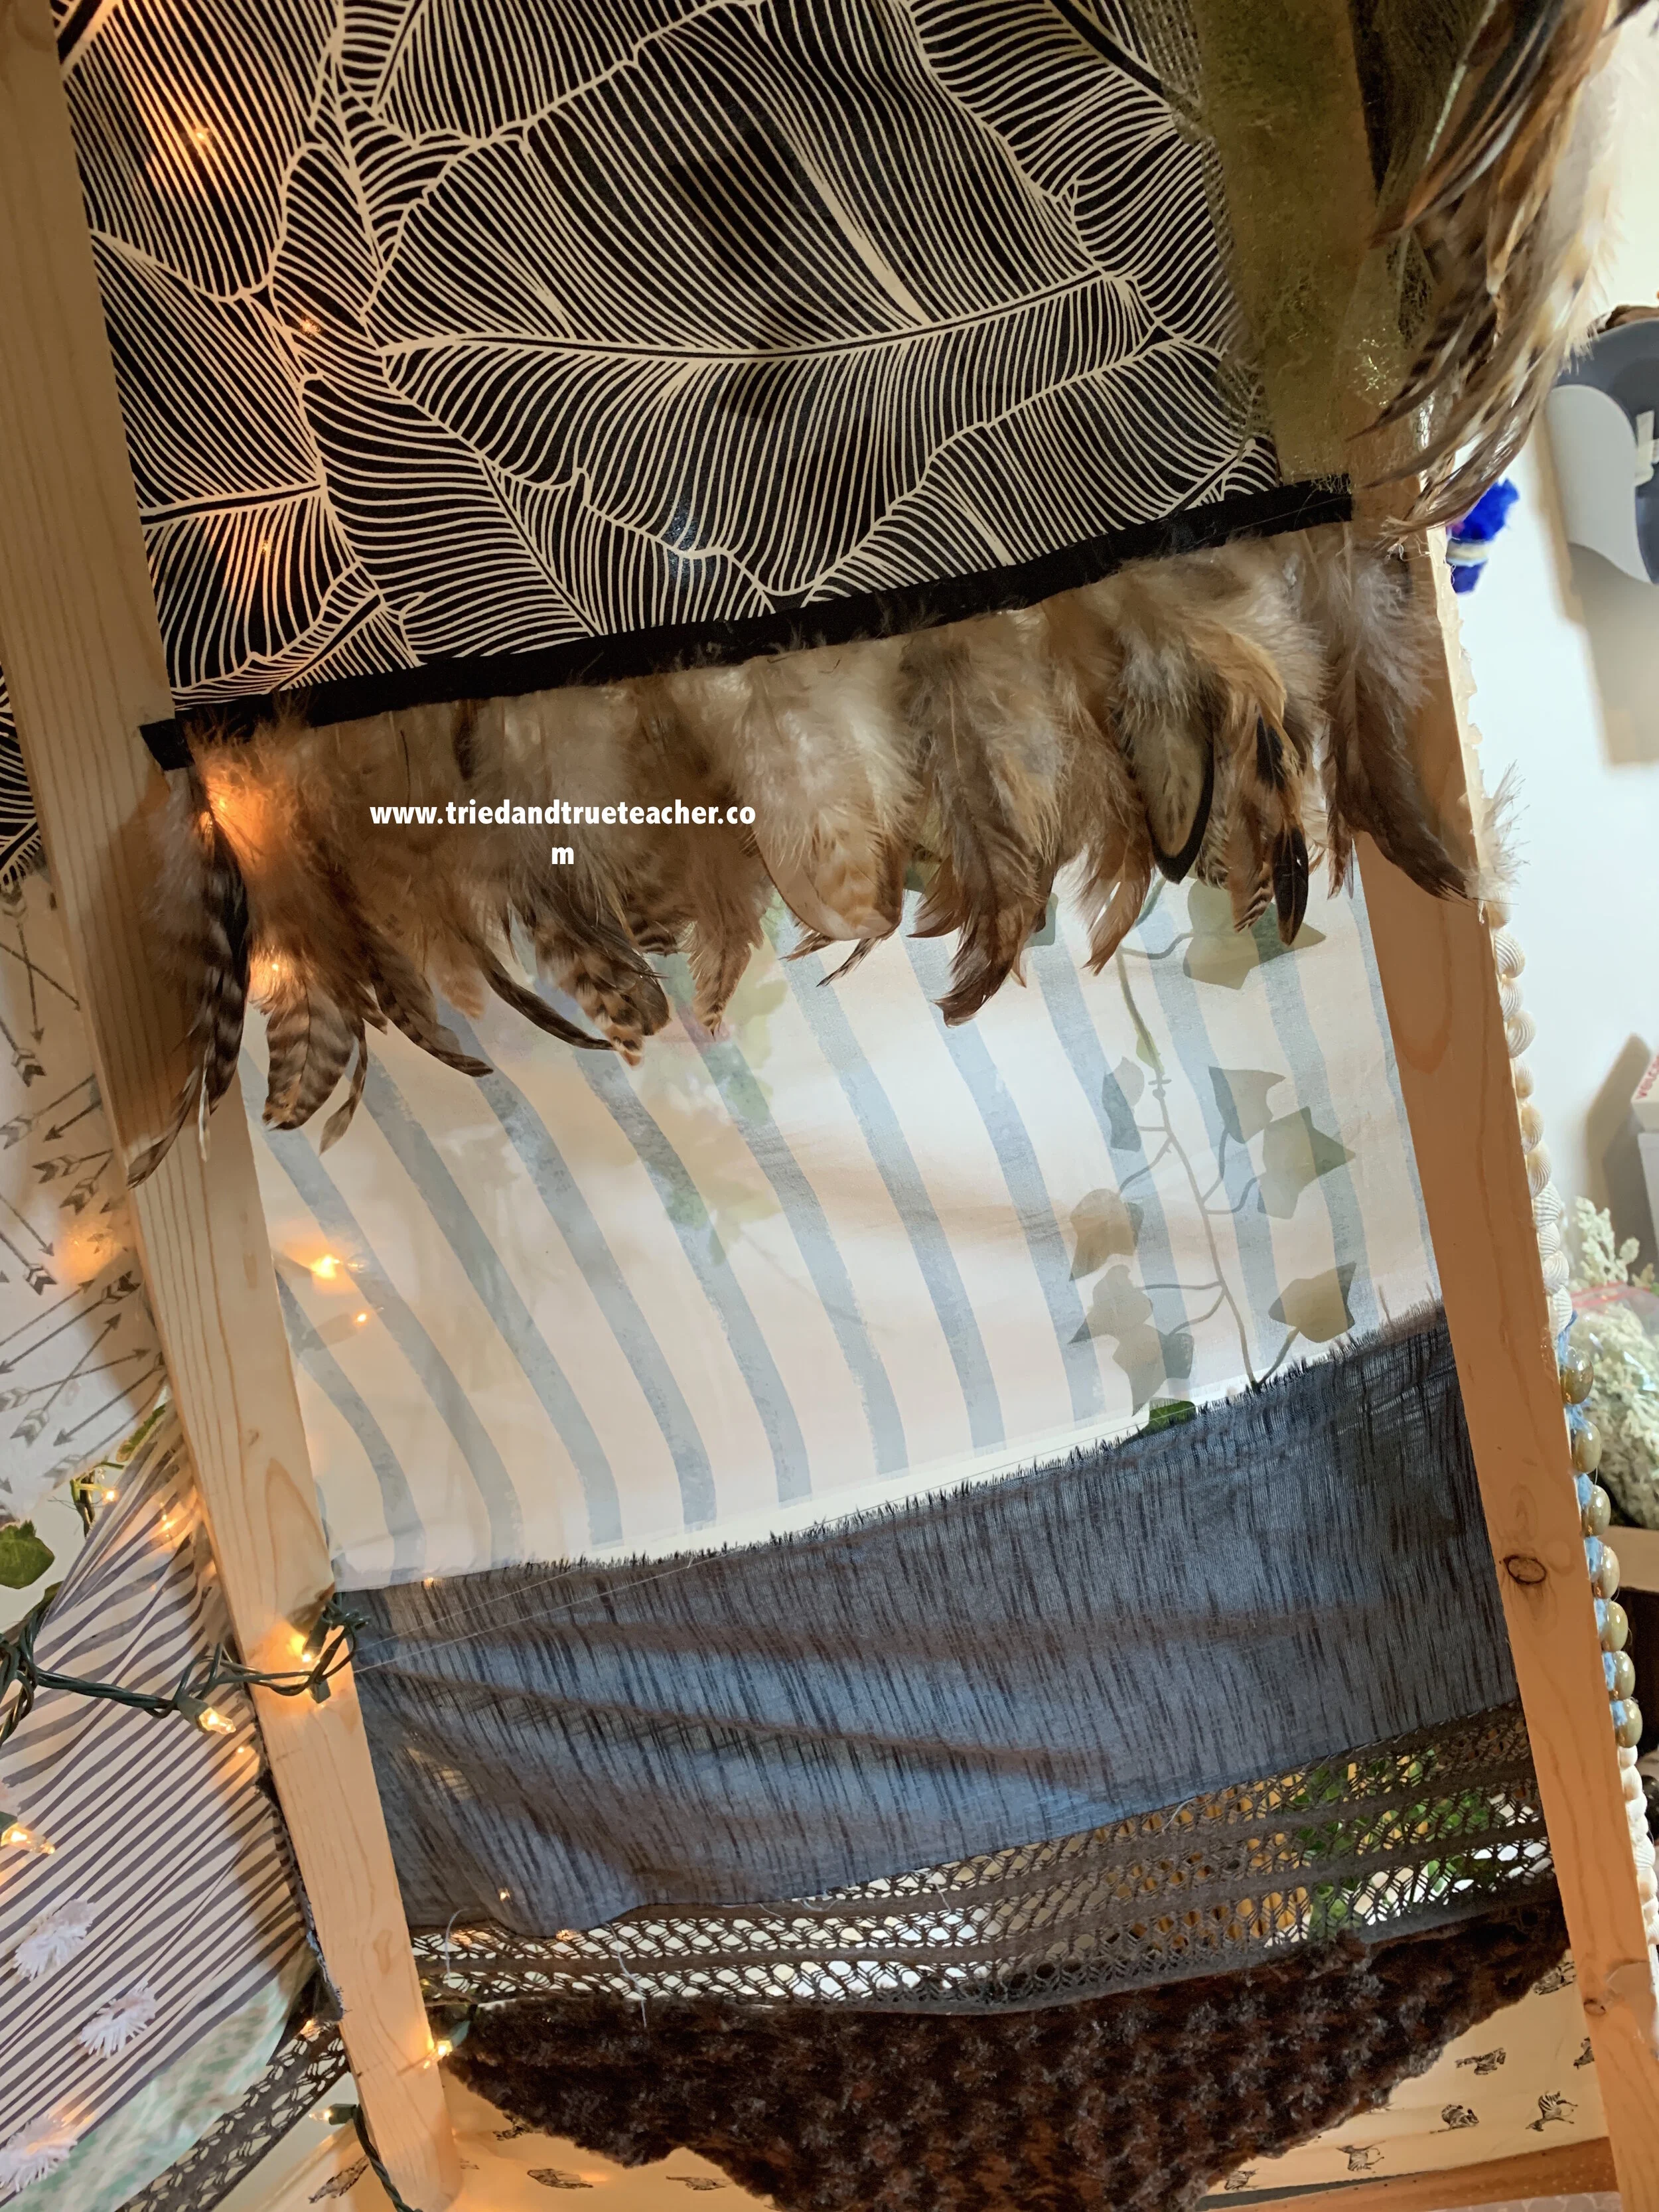
And then I added some fringed edges to cover the bottom beams…

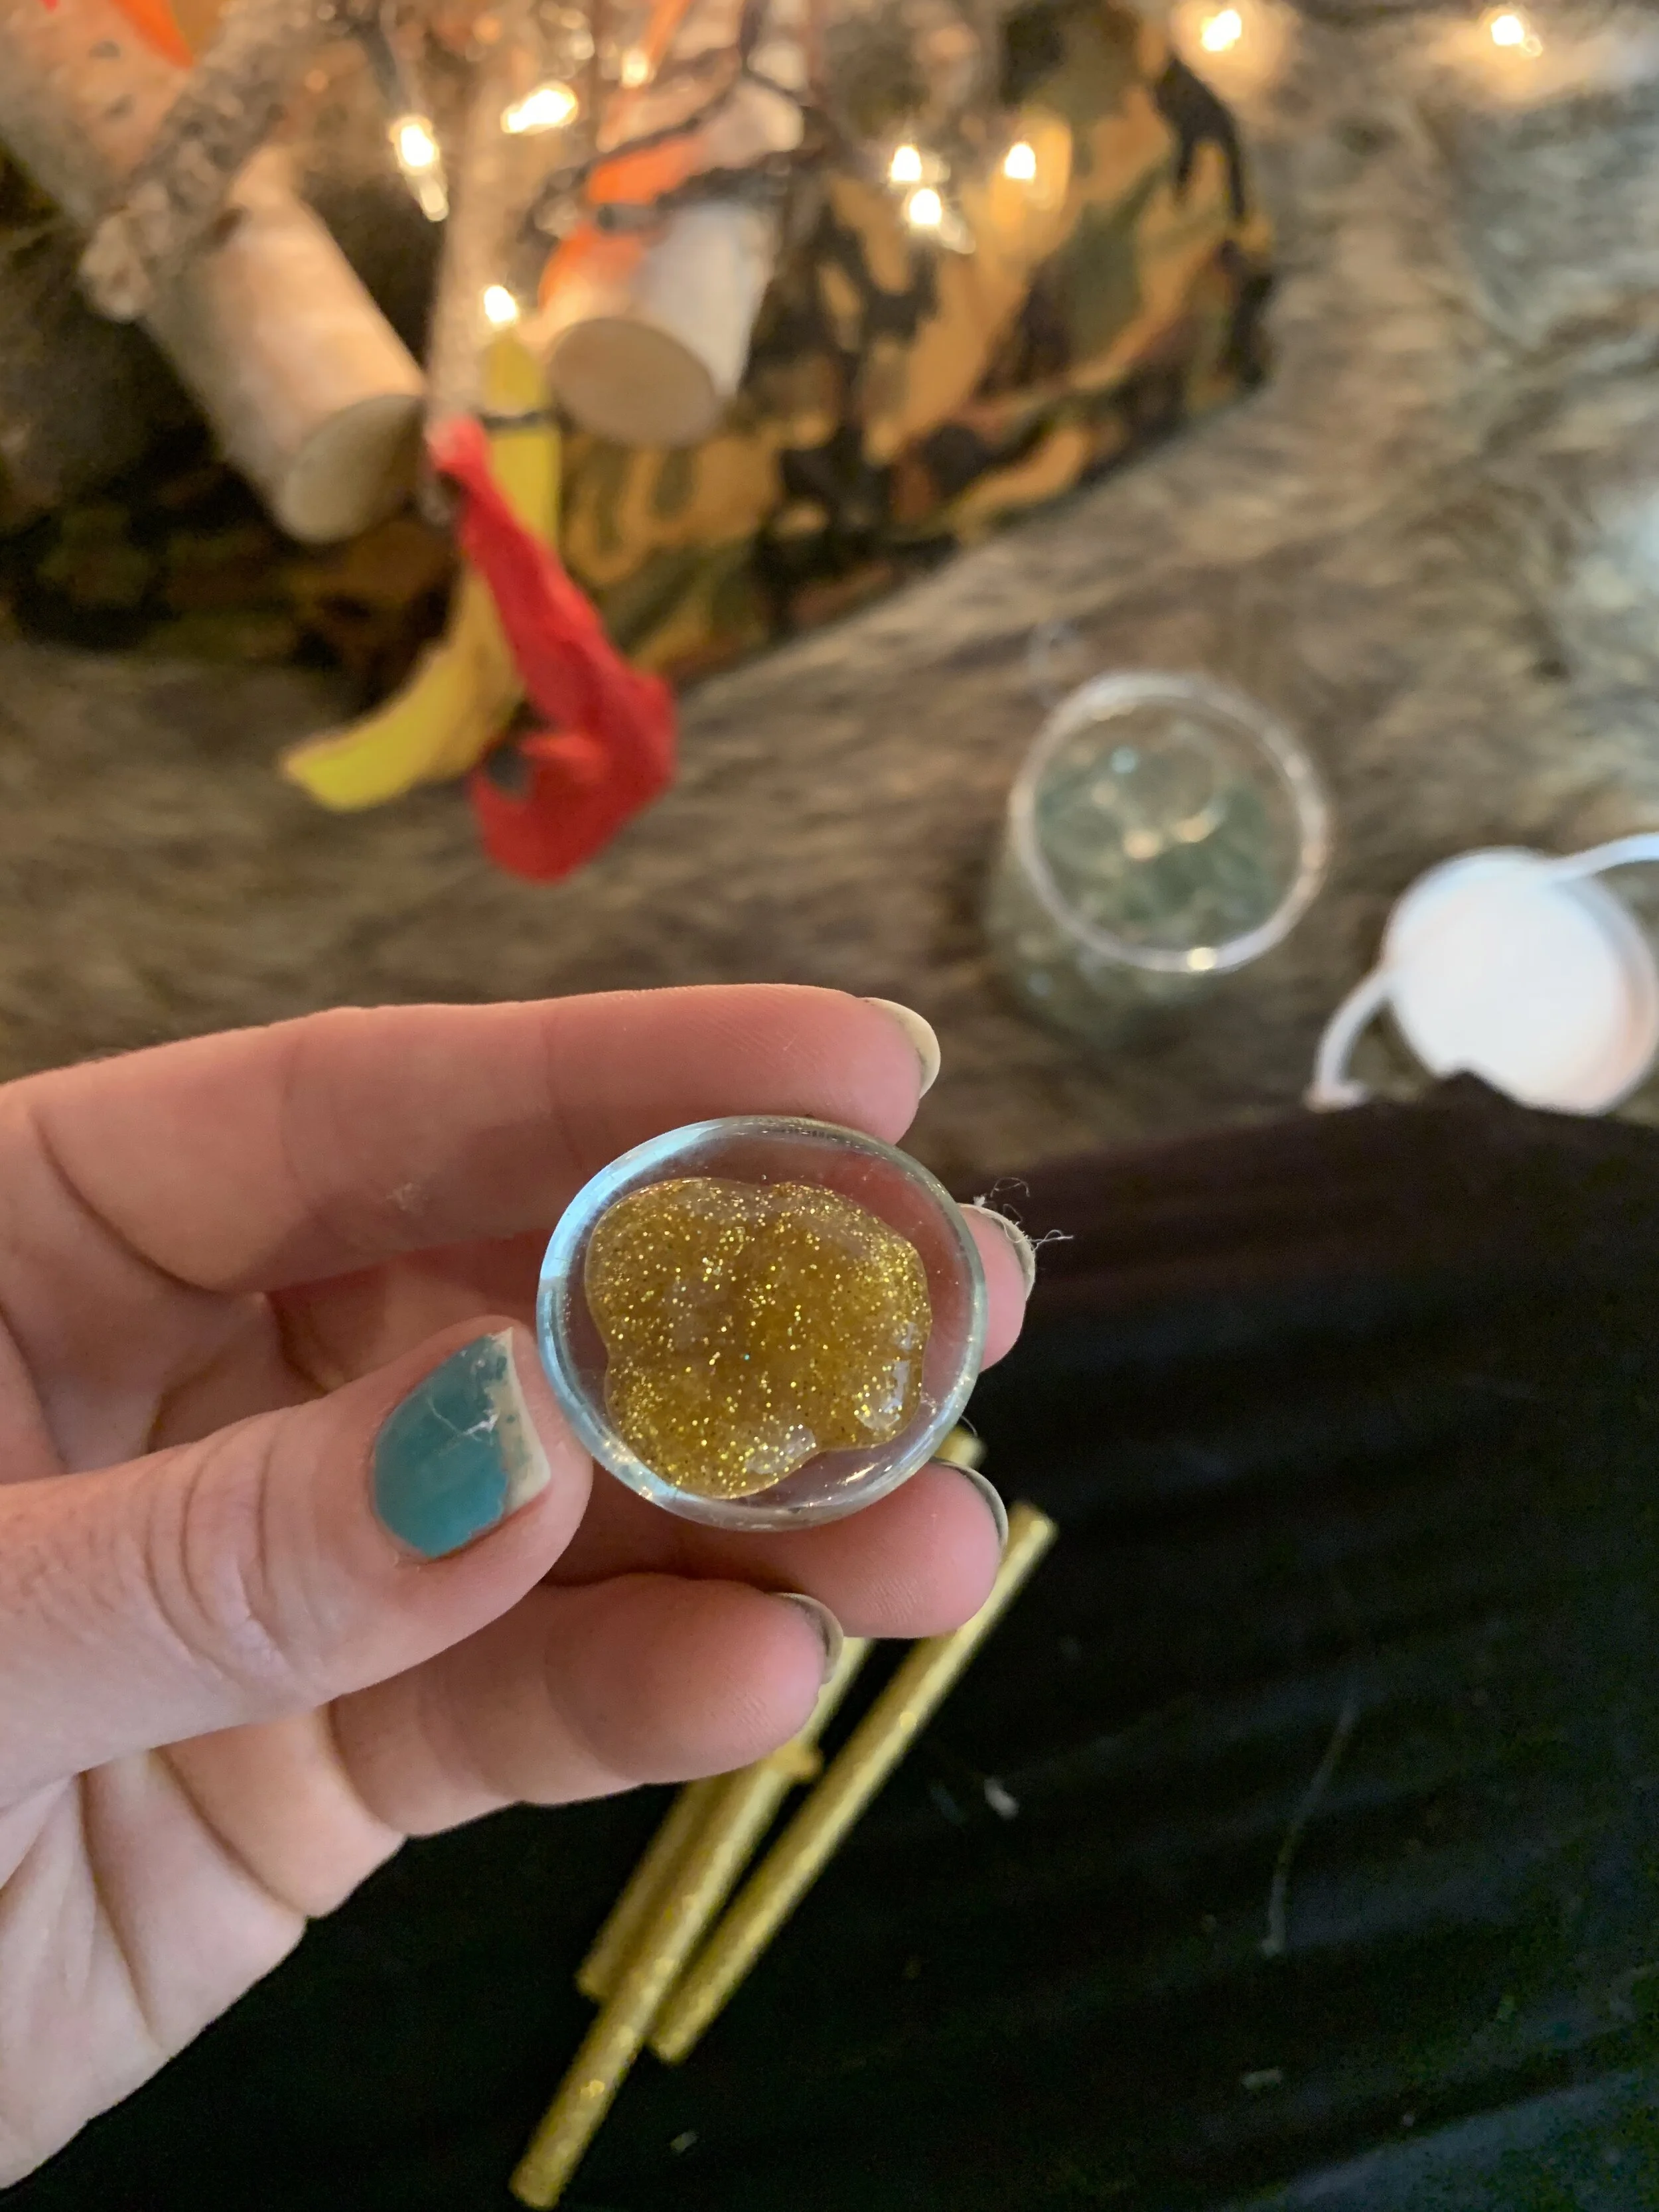
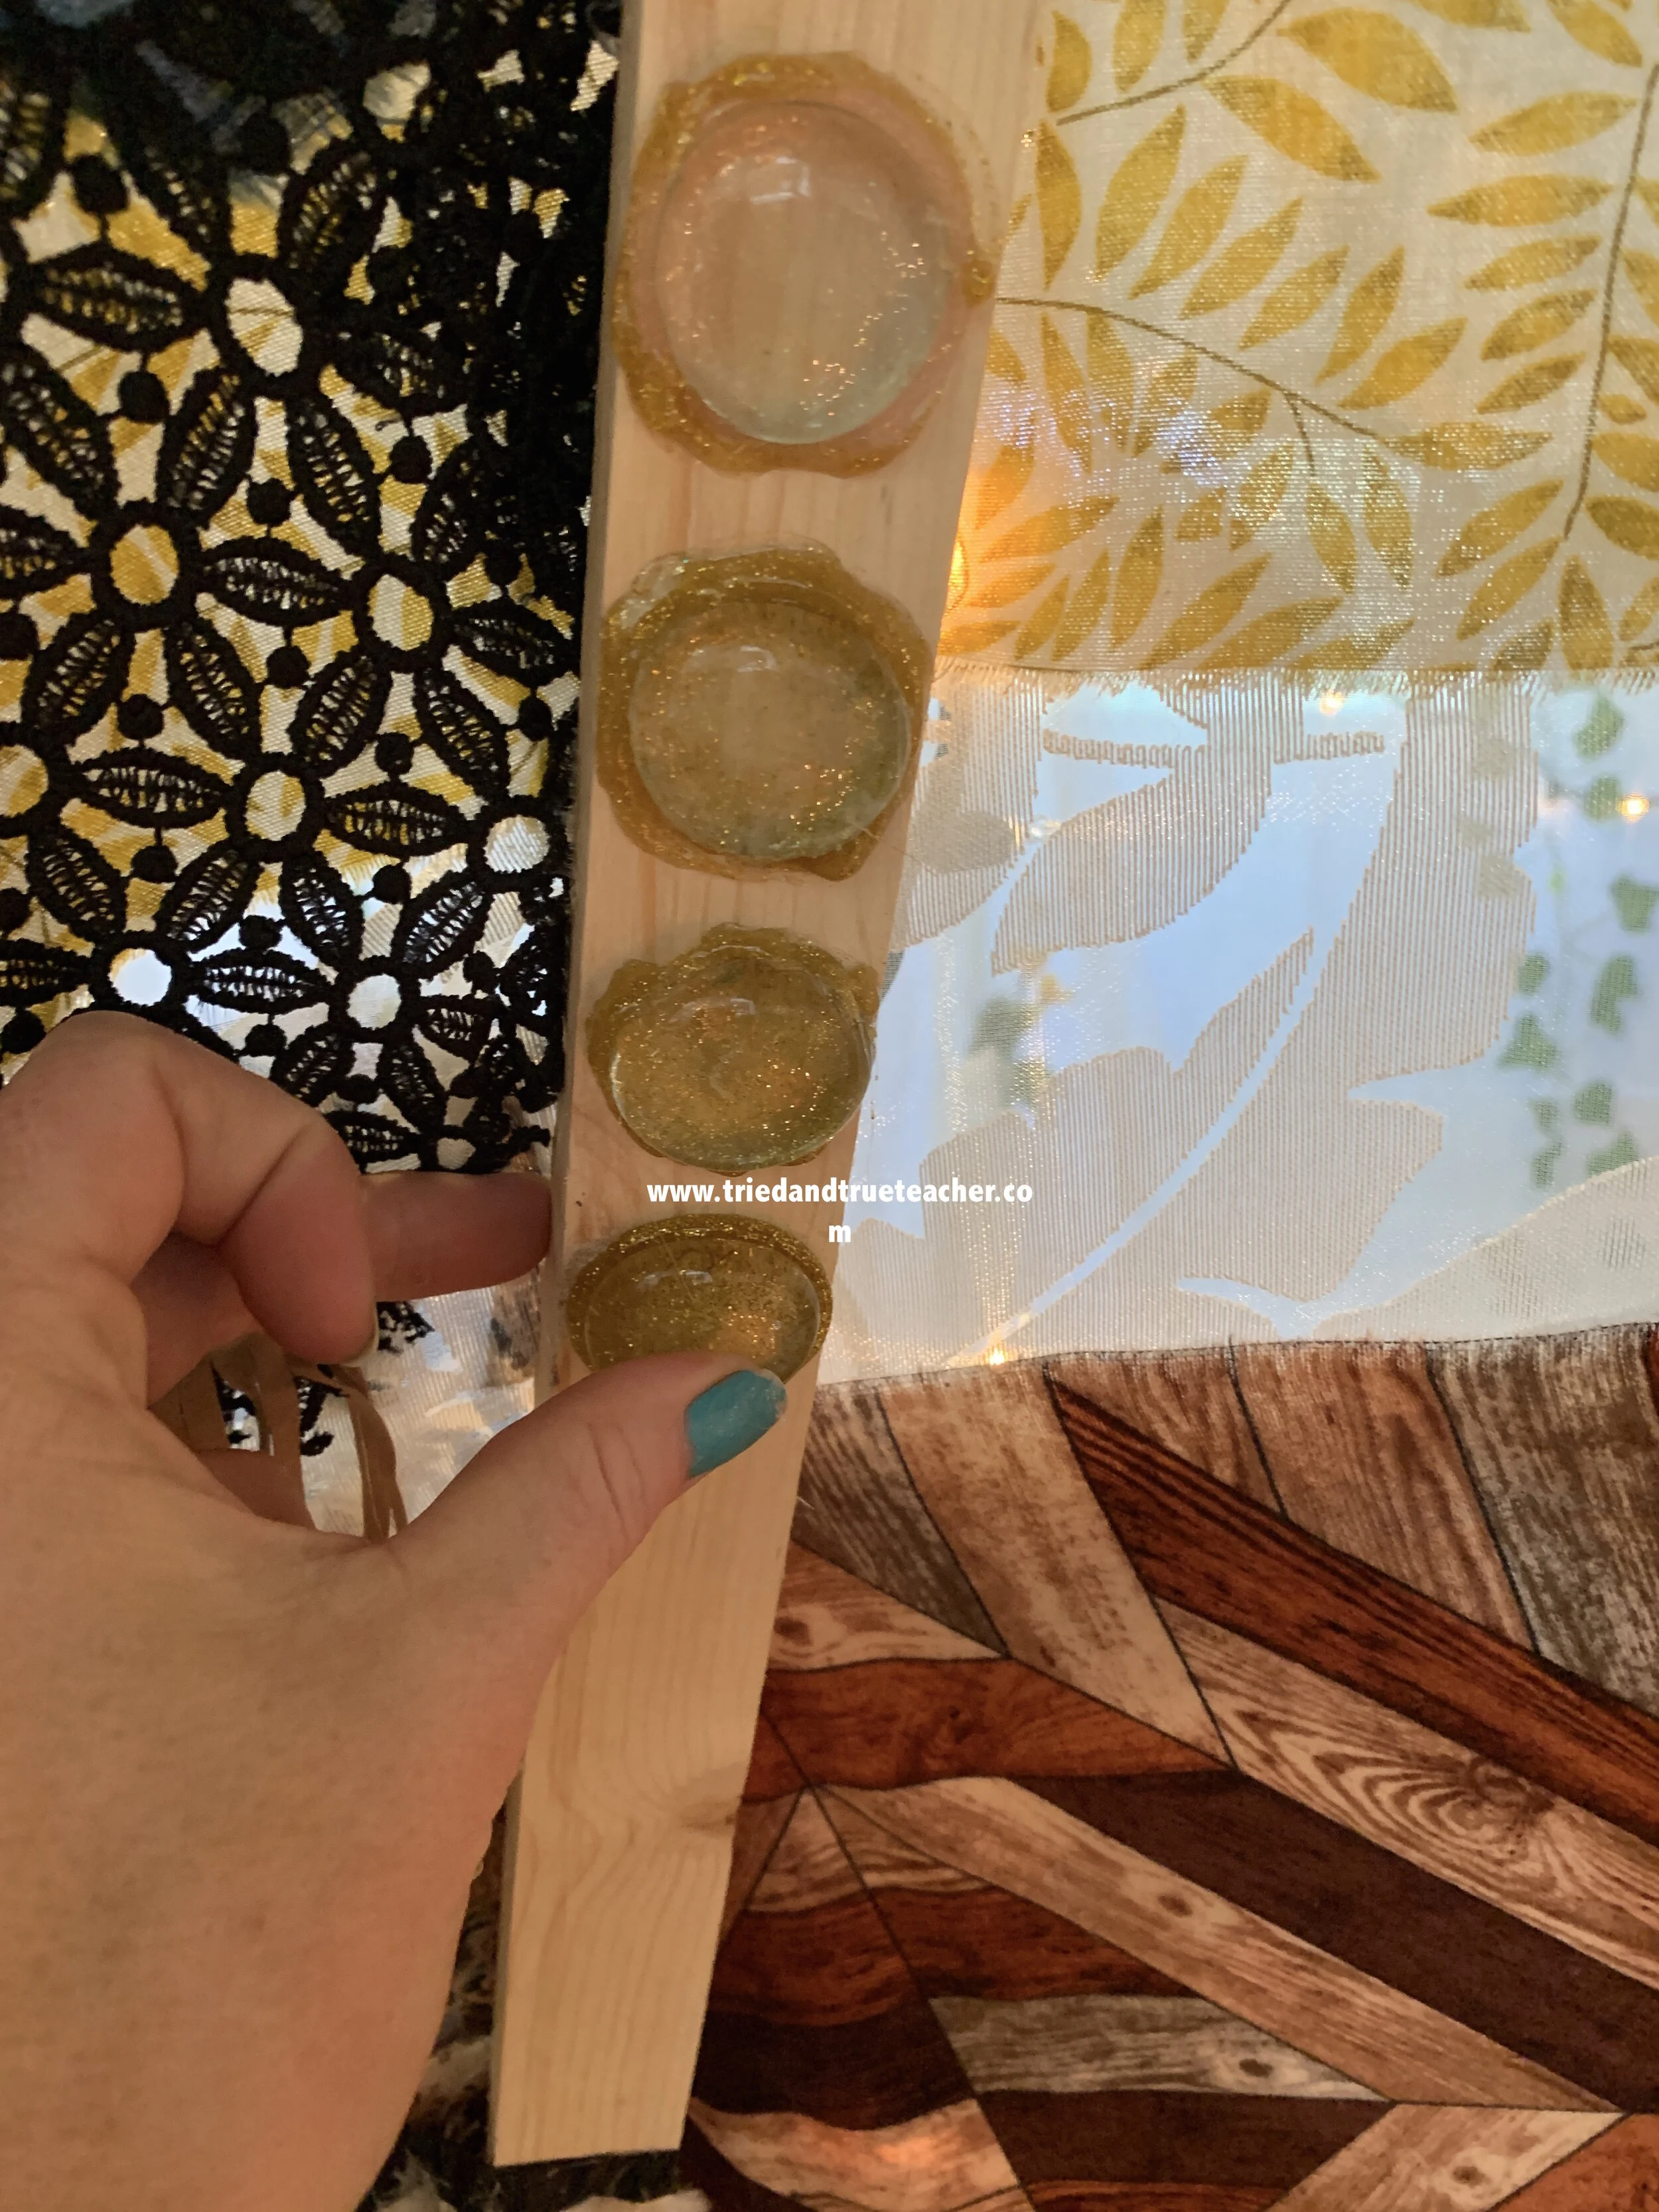
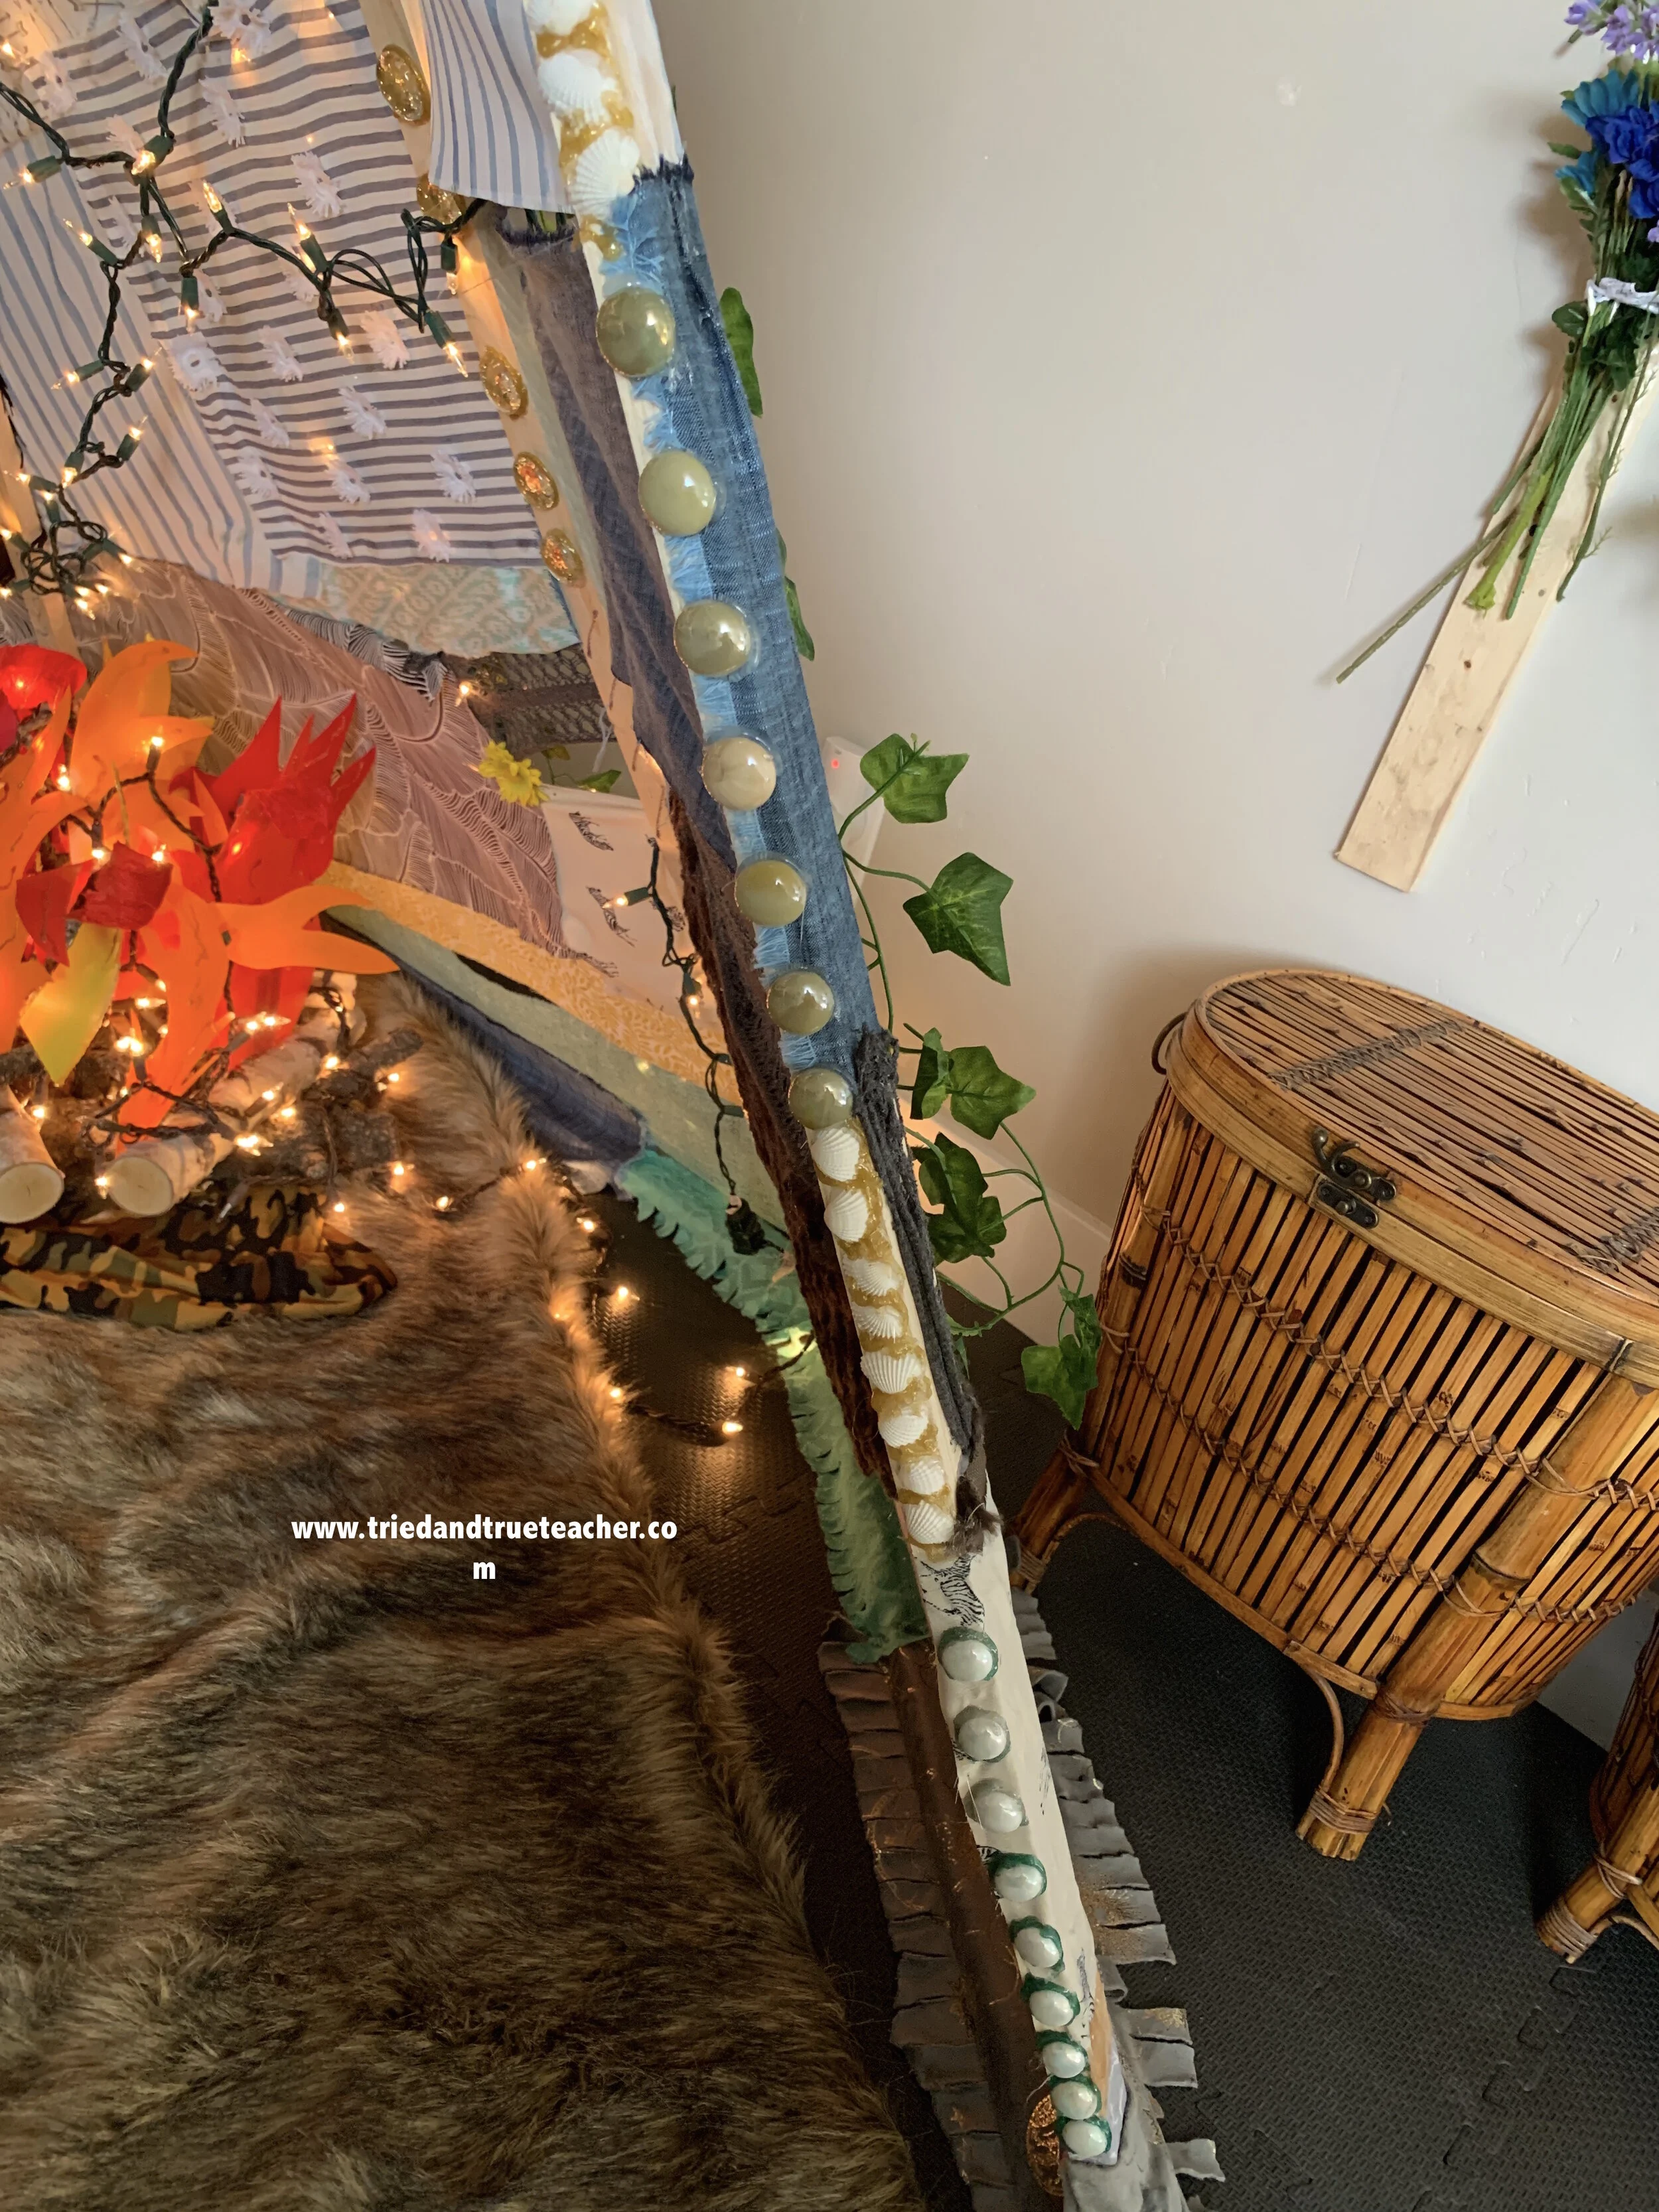
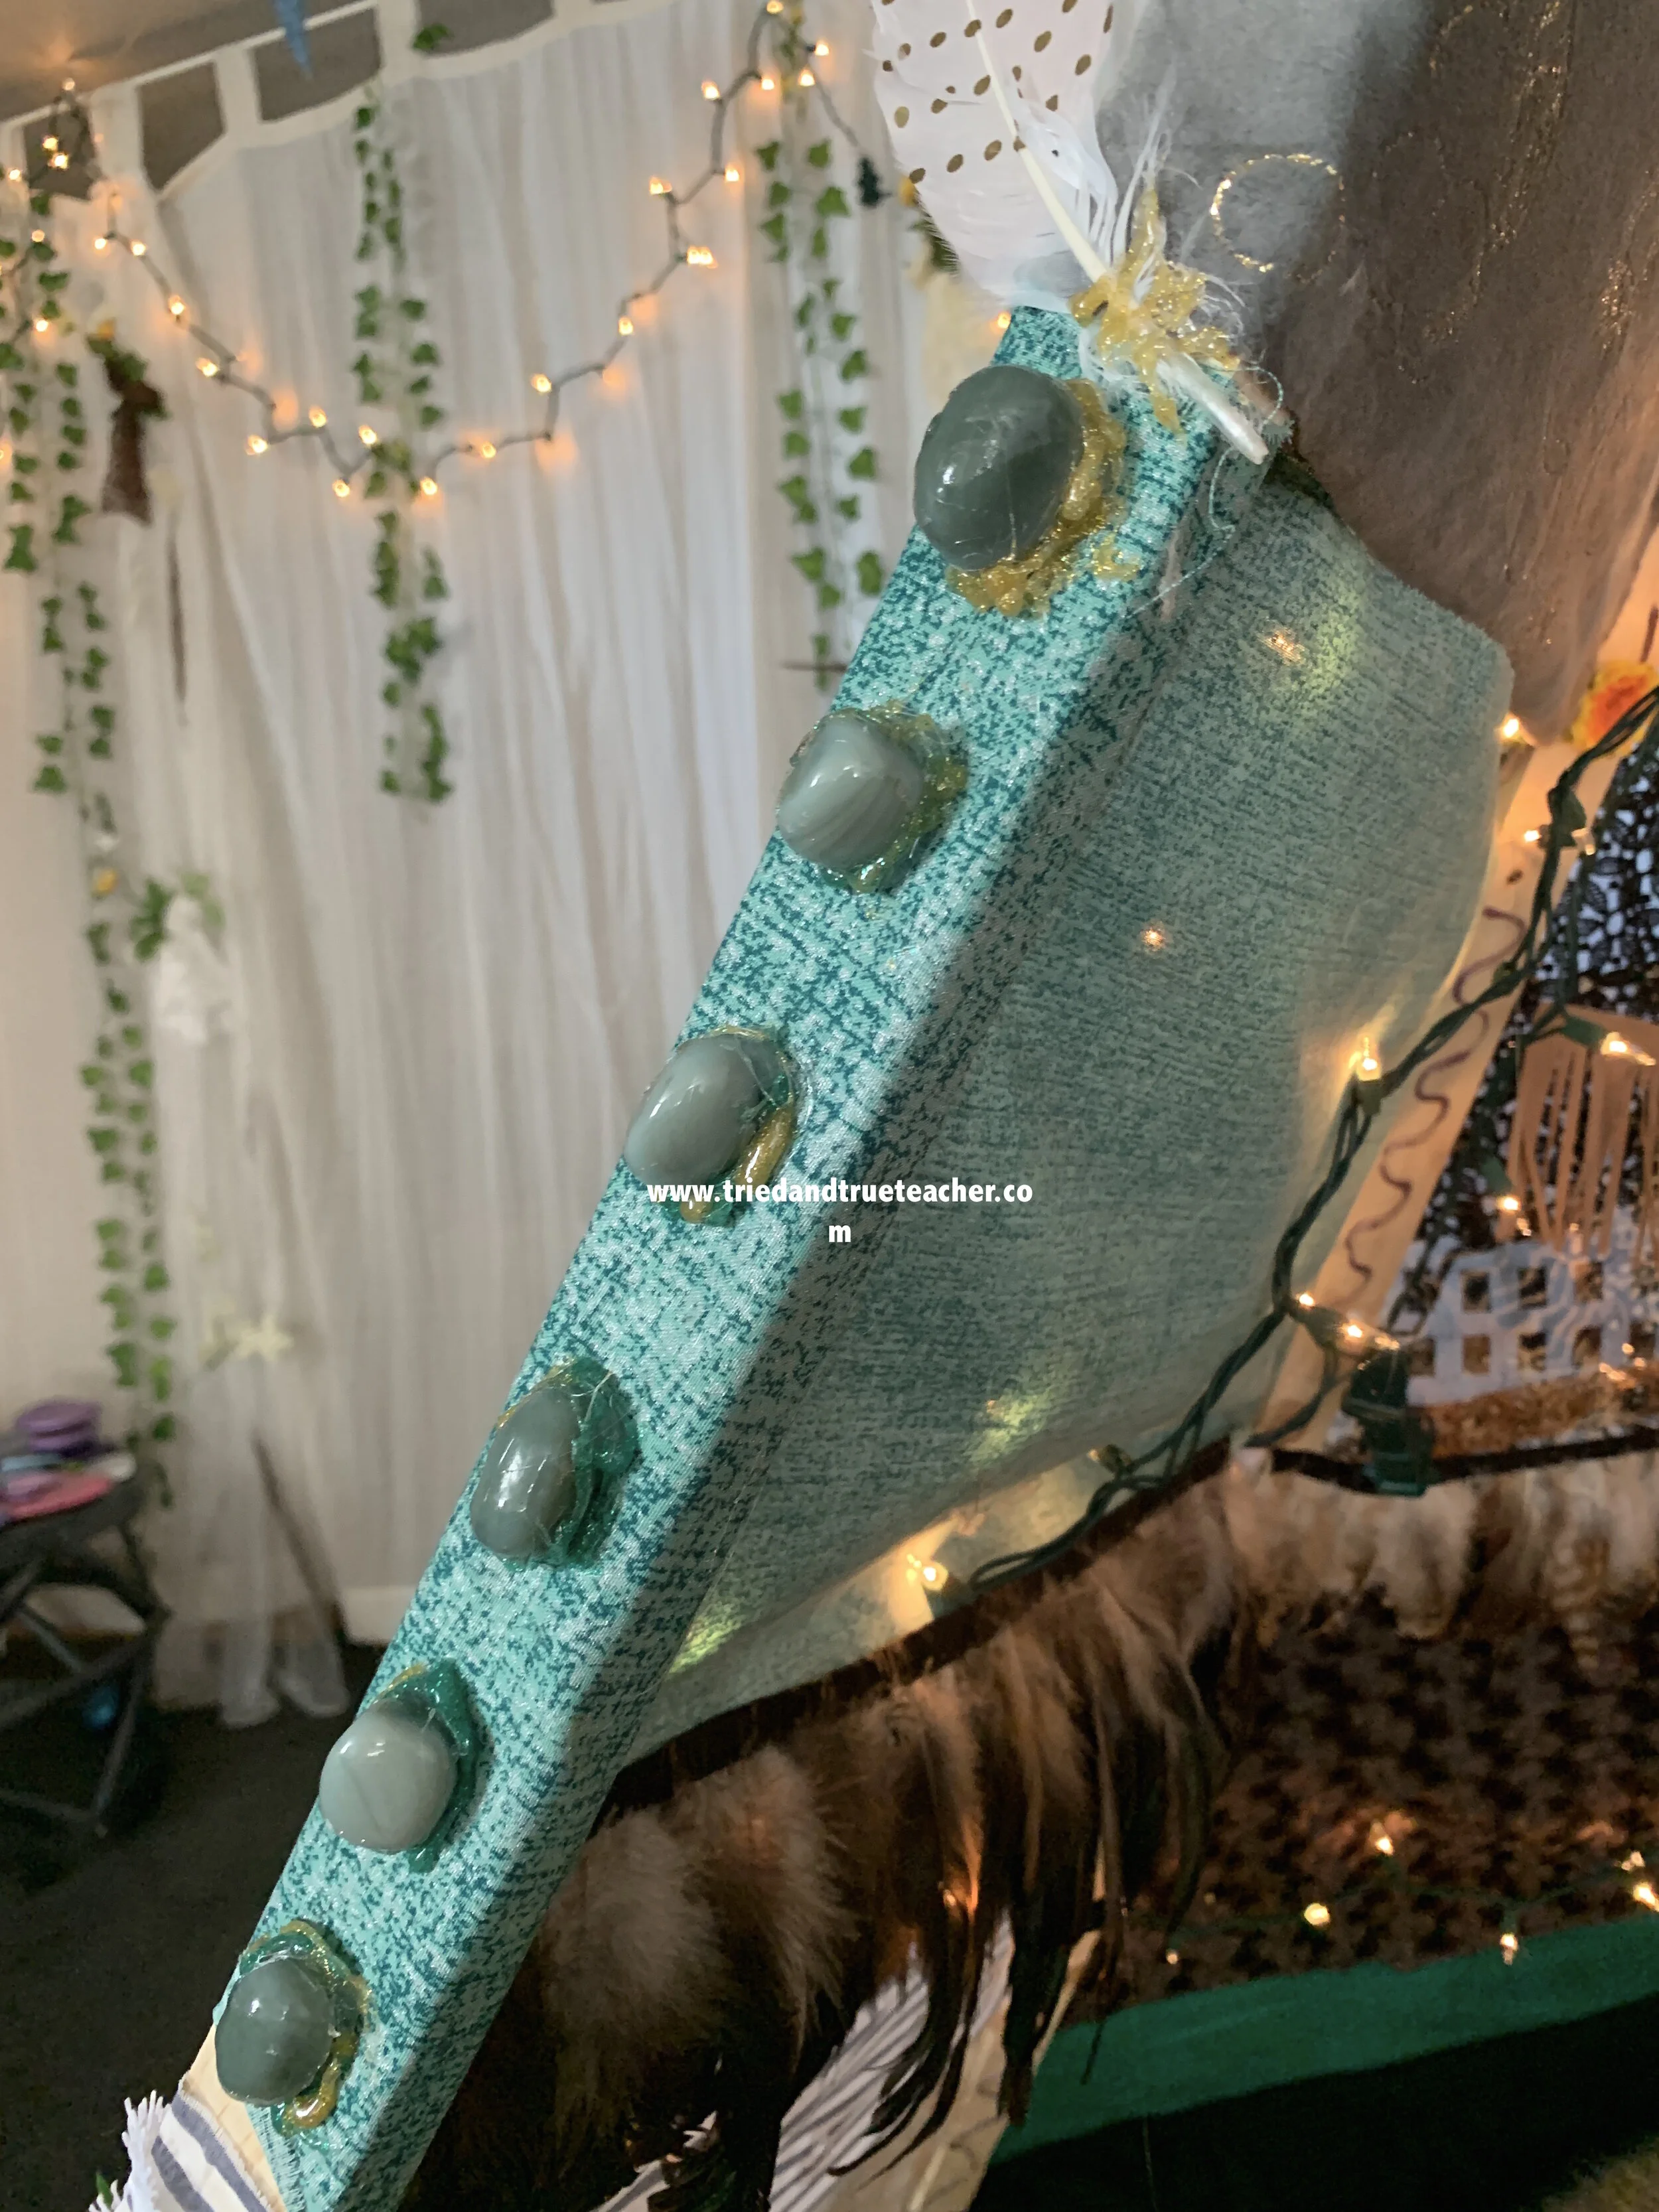
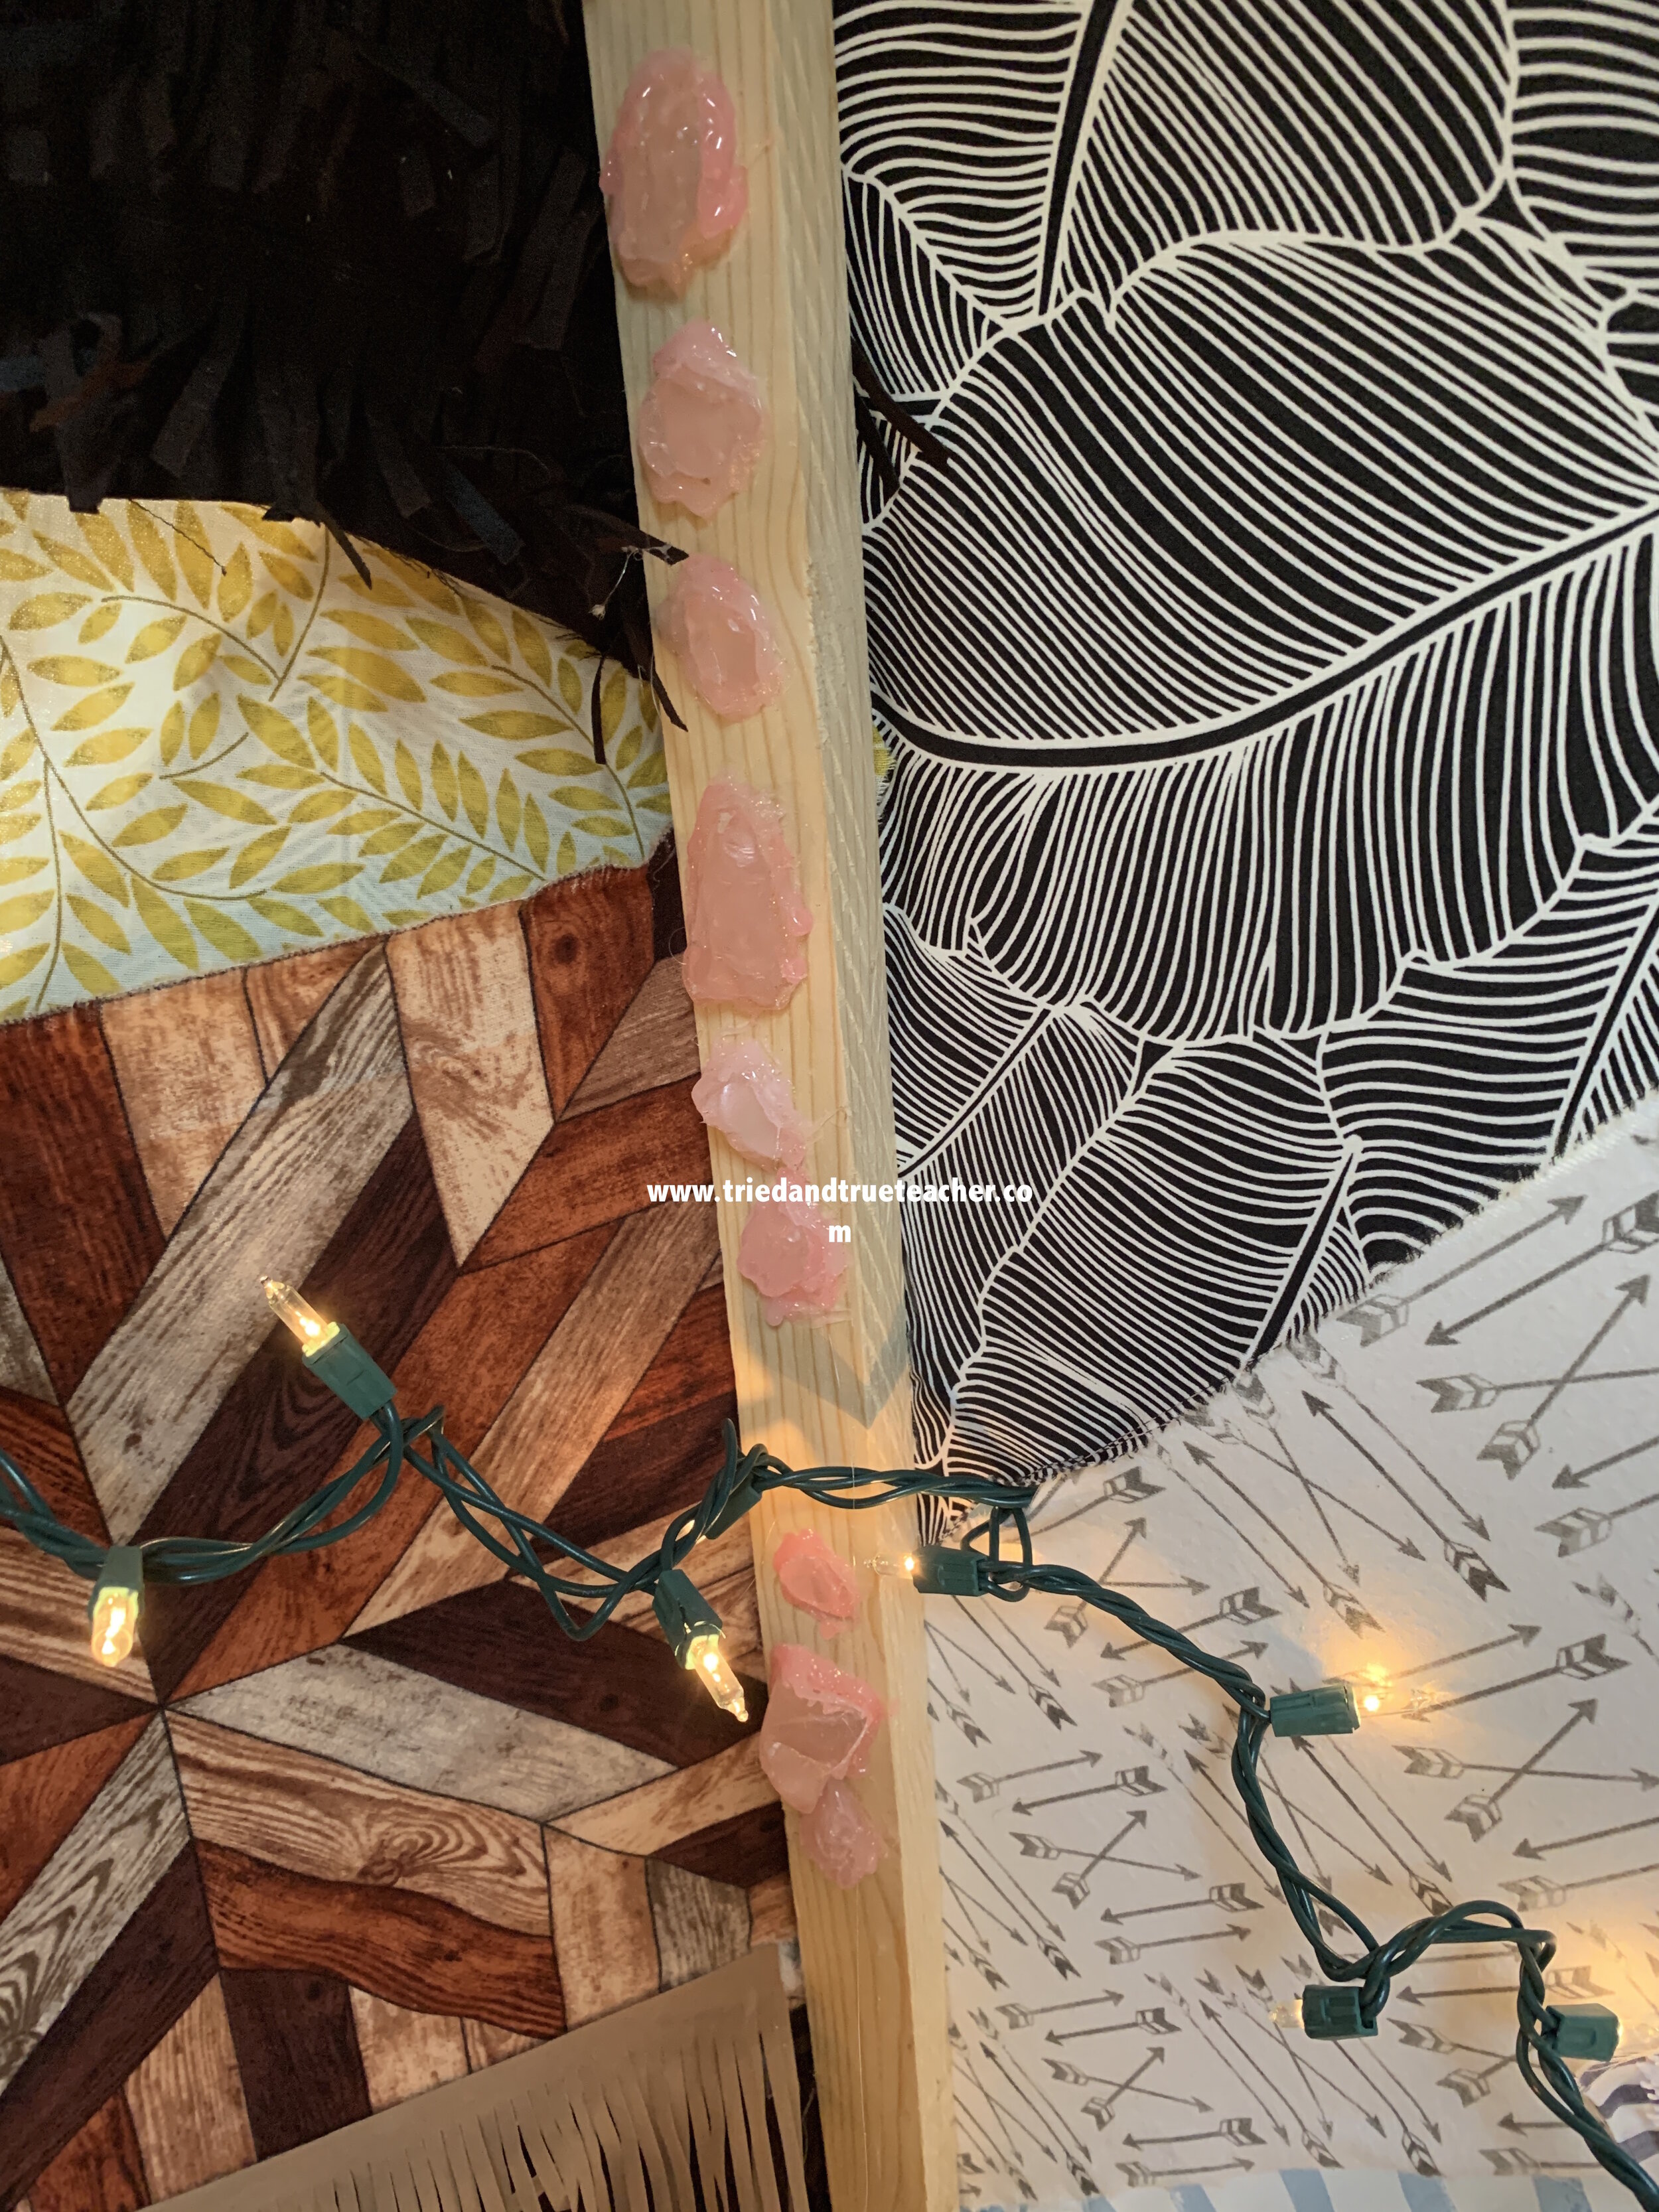
I like to add rocks and stones and gems to give extra texture and feel to the tent!
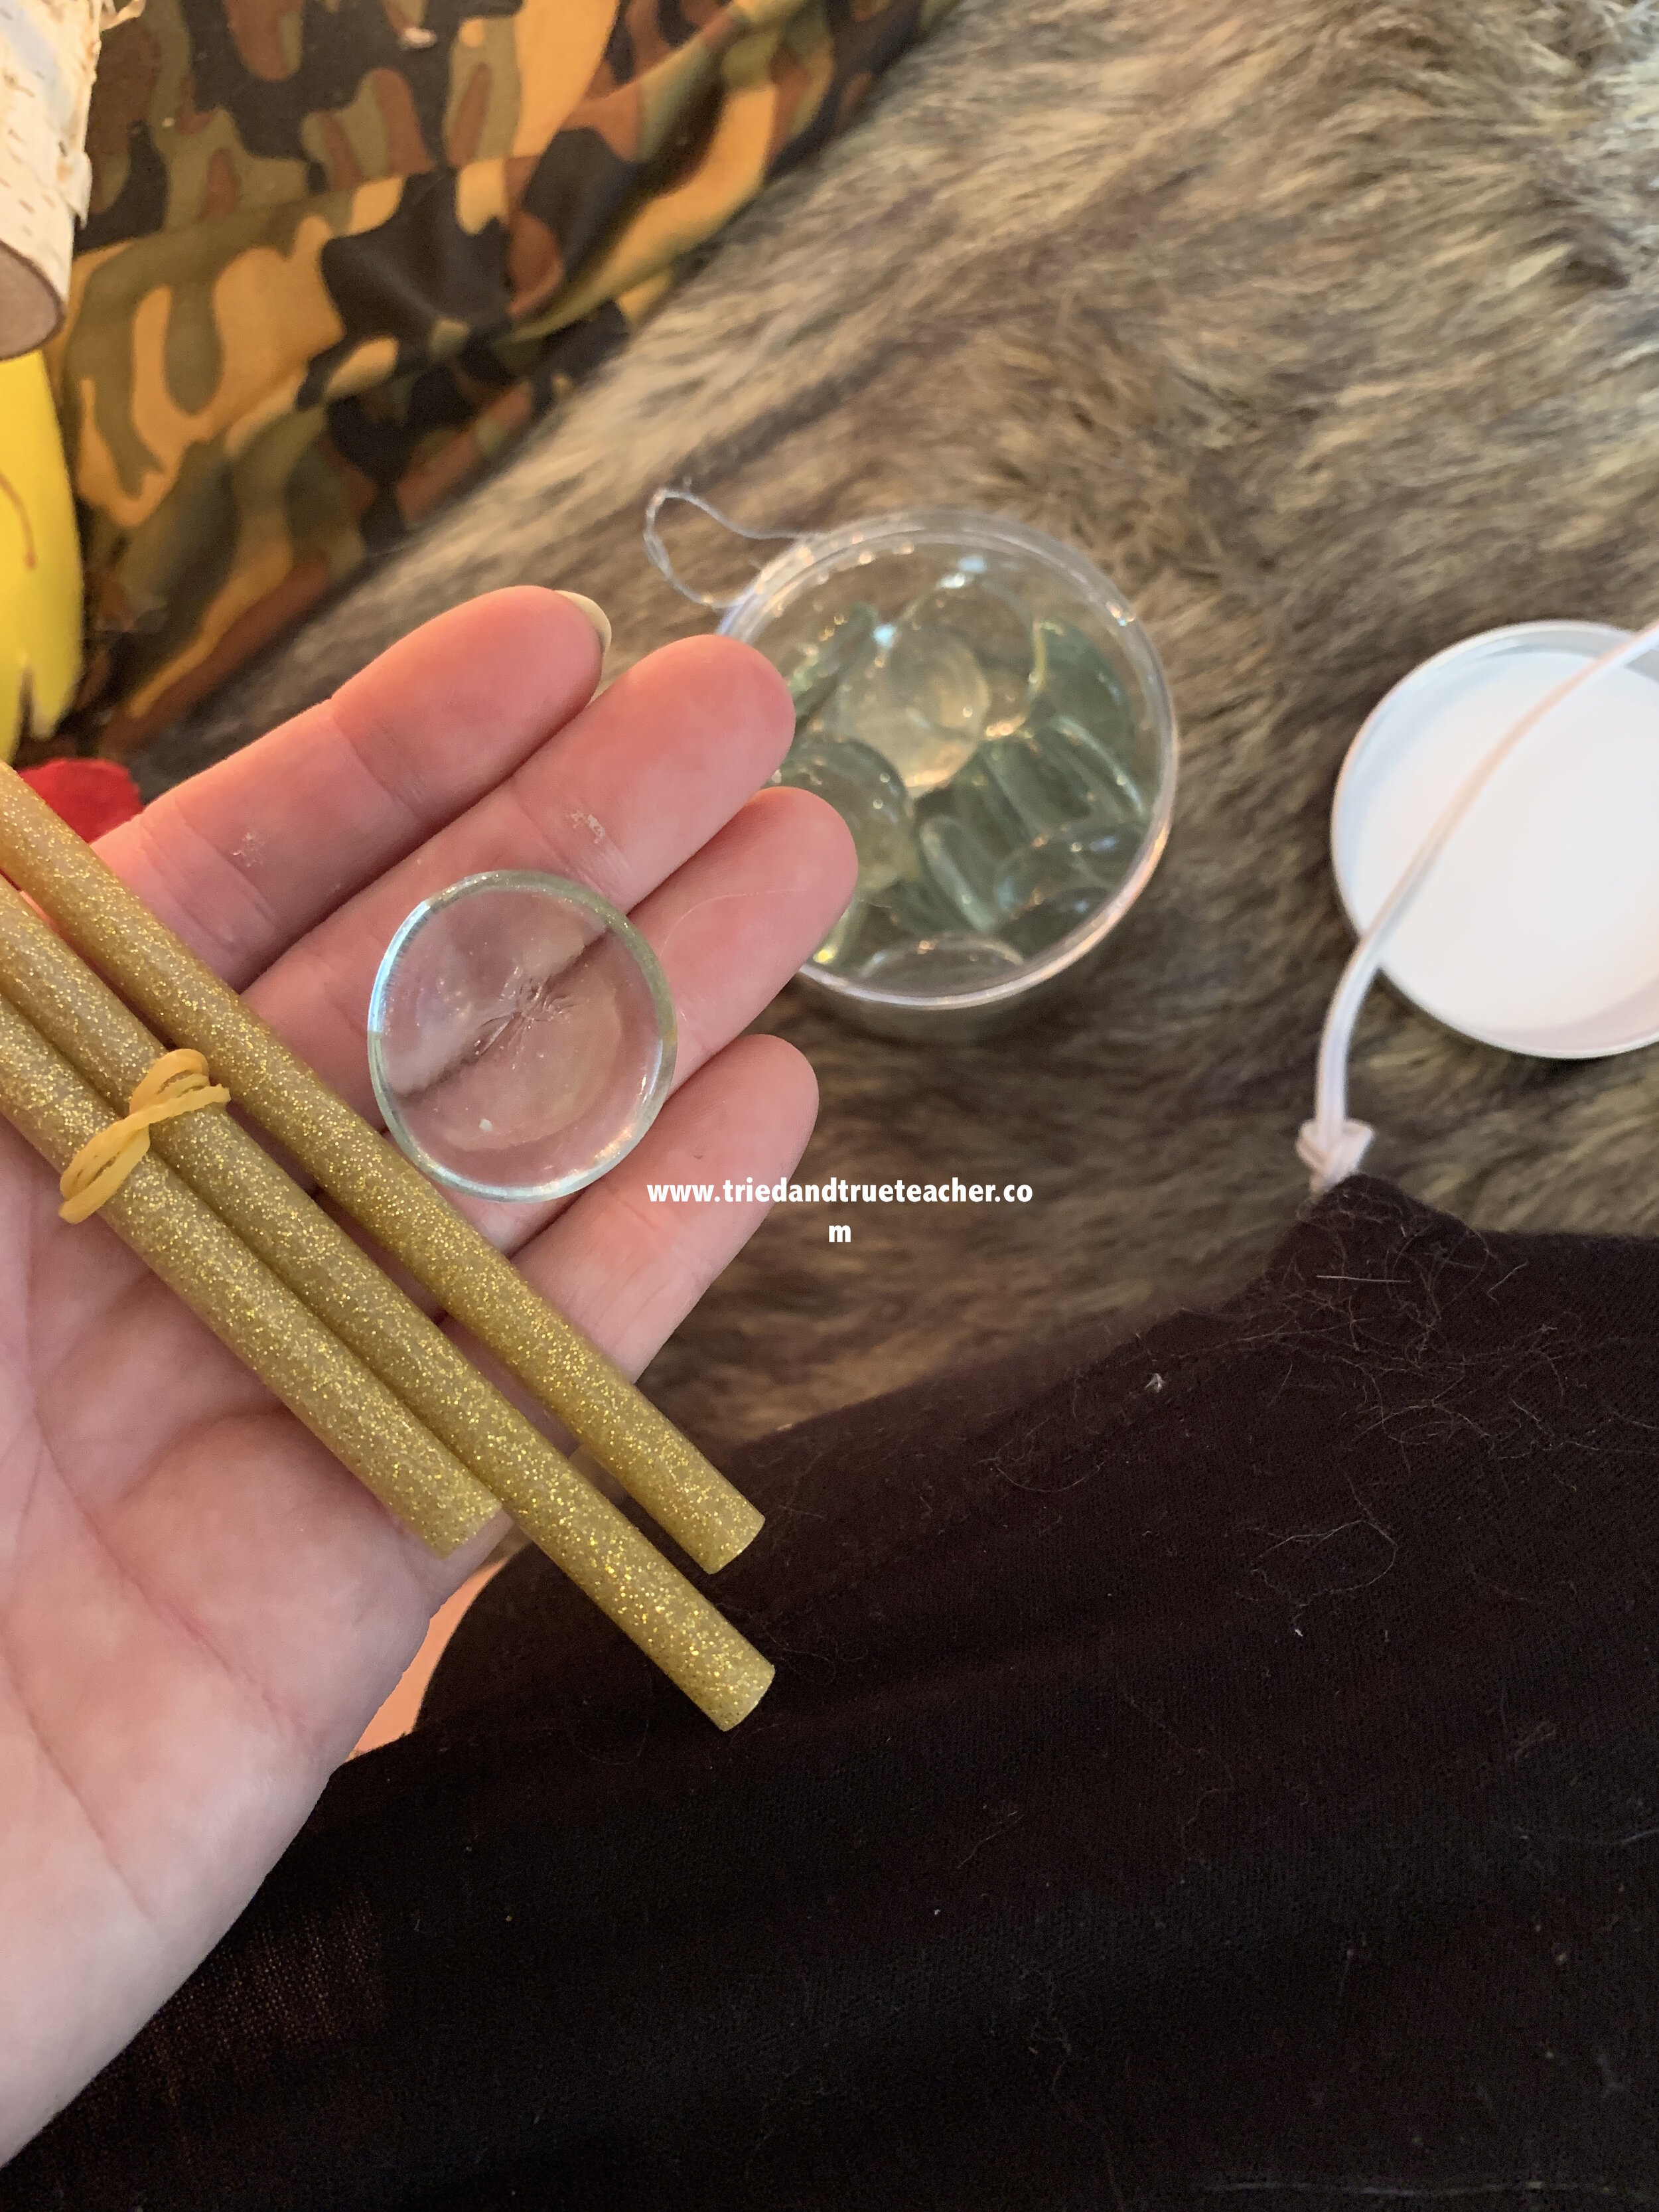
^^I love using glitter hot glue sticks to add some shimmer to the mix!

Click on the button below to pick some up on Amazon!


Notice in the photo above, you don’t have to seal up every inch of the fabric…leaving holes for putting lights through is a good idea!

^^^ I even added some final touches with the glue gun and the glitter hot glue…
There you have it folks!
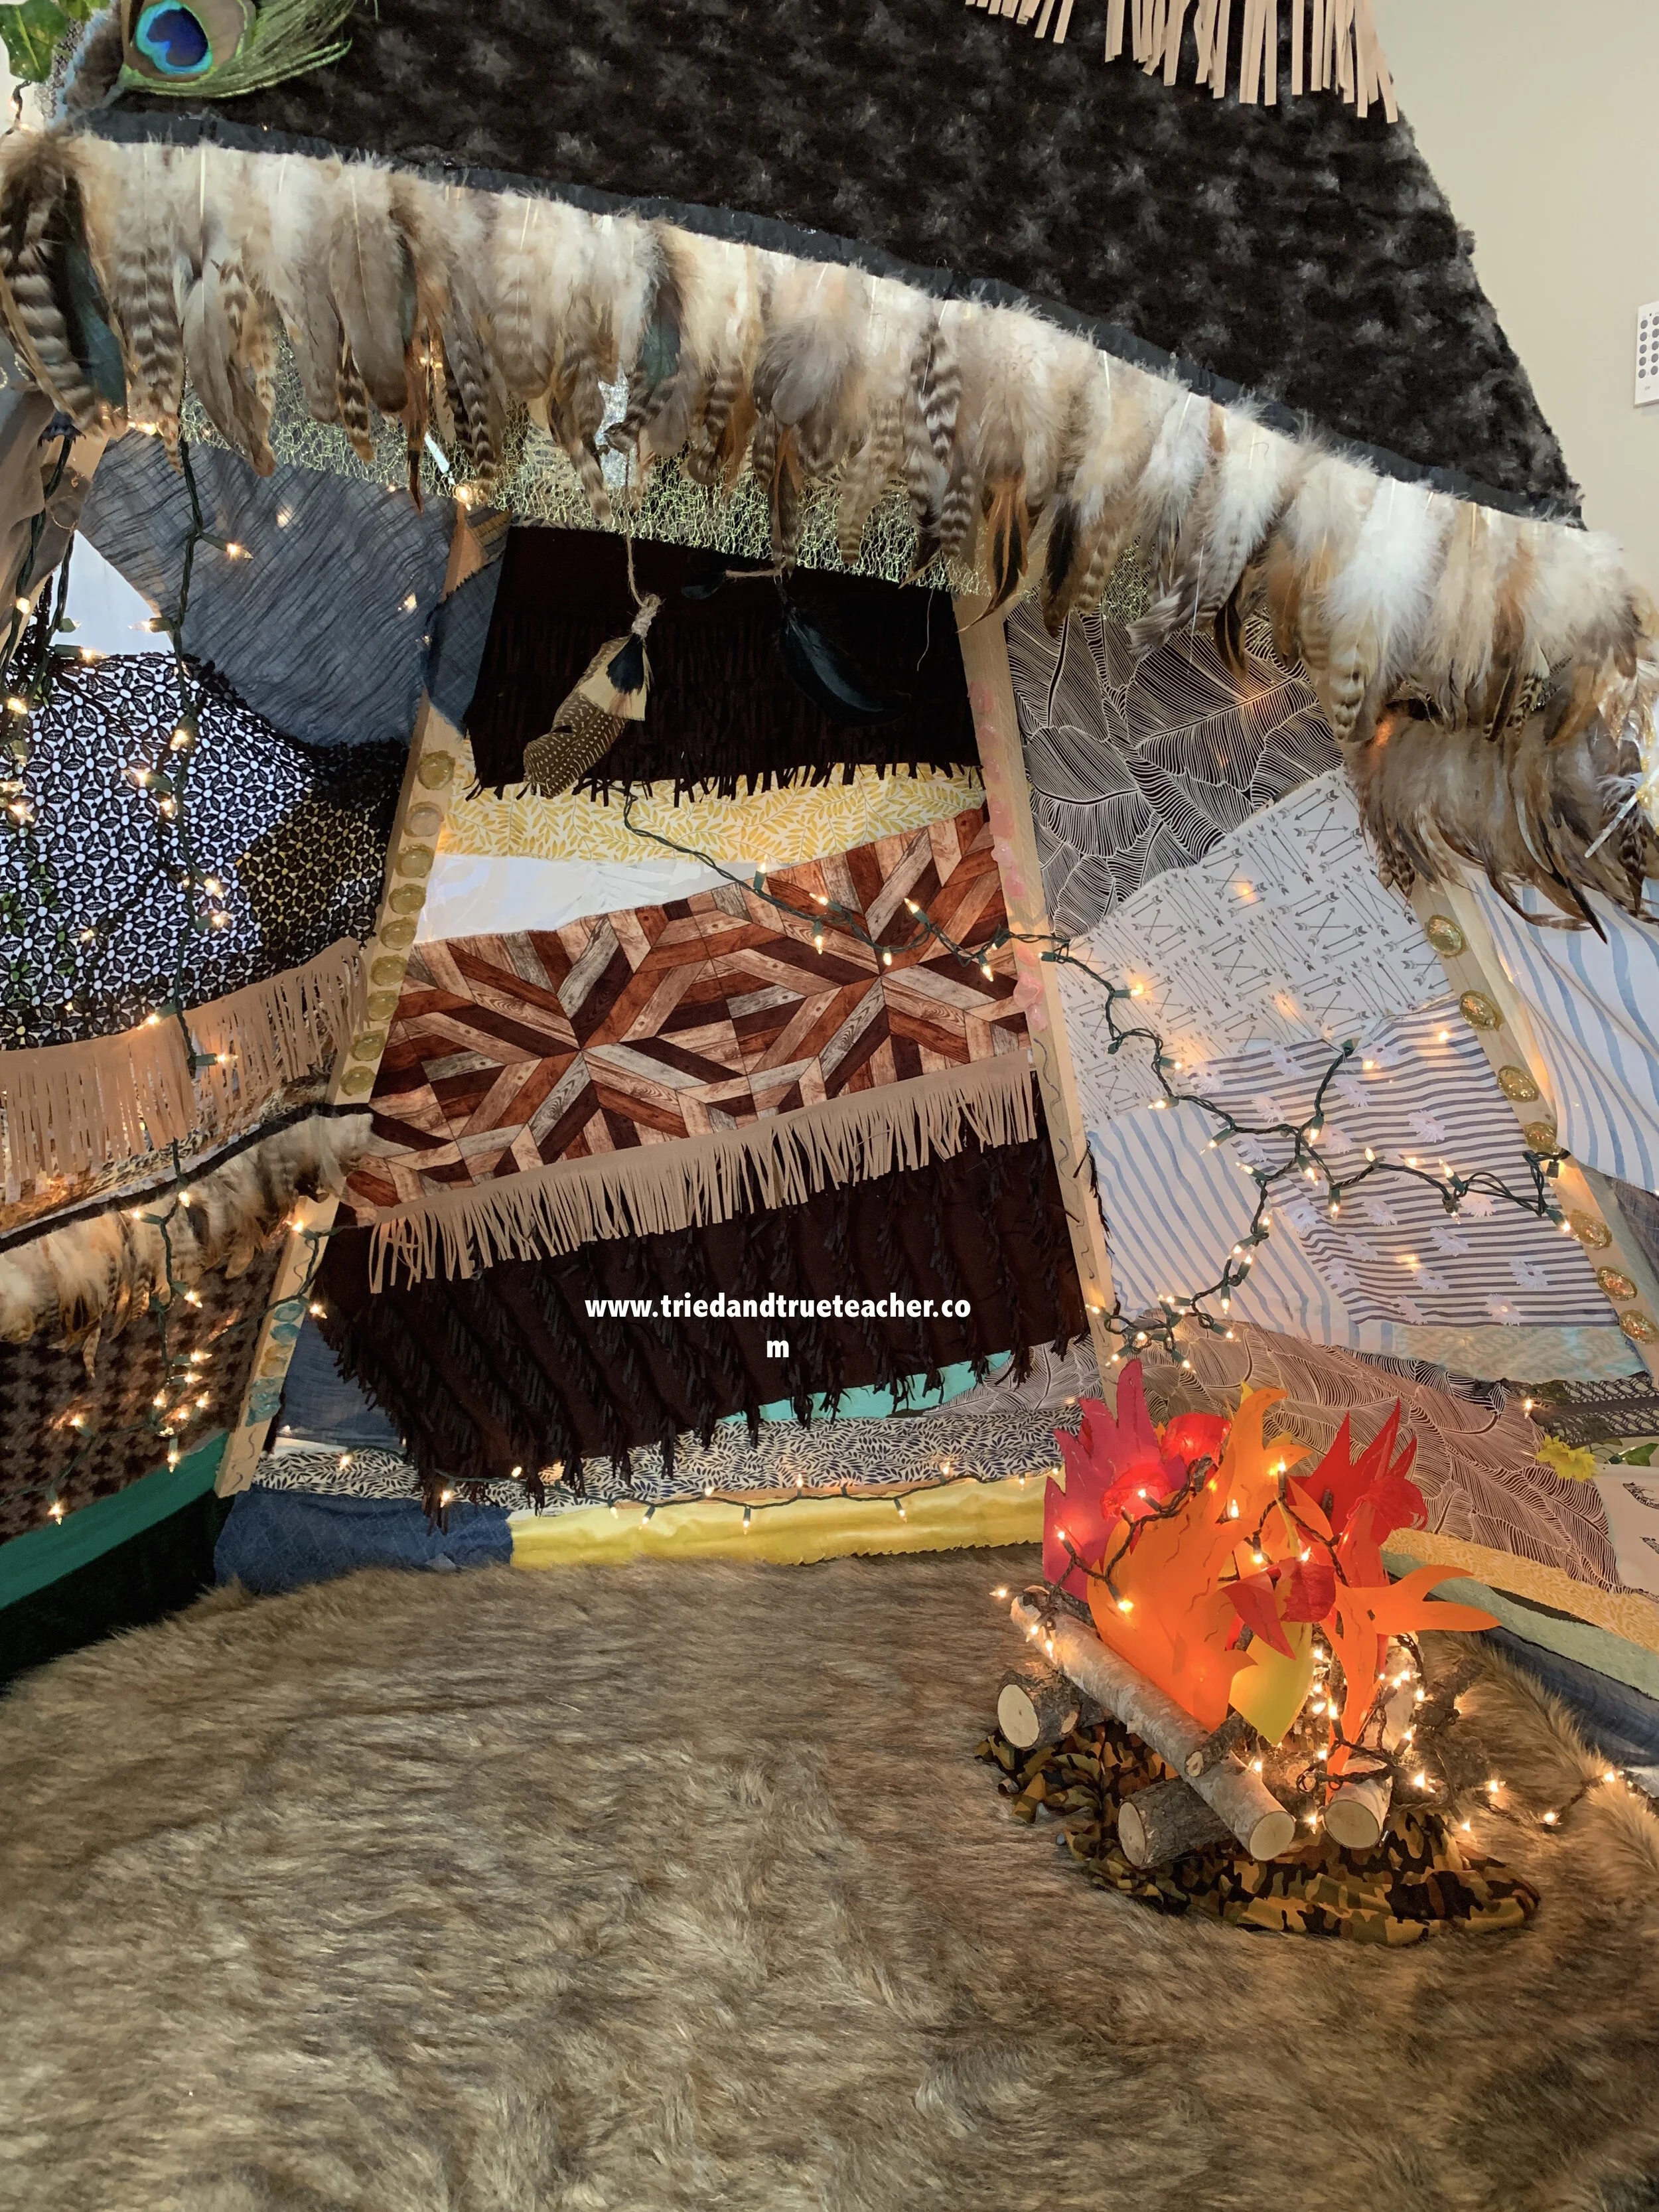

If you’d like to see how I made the fake fire…

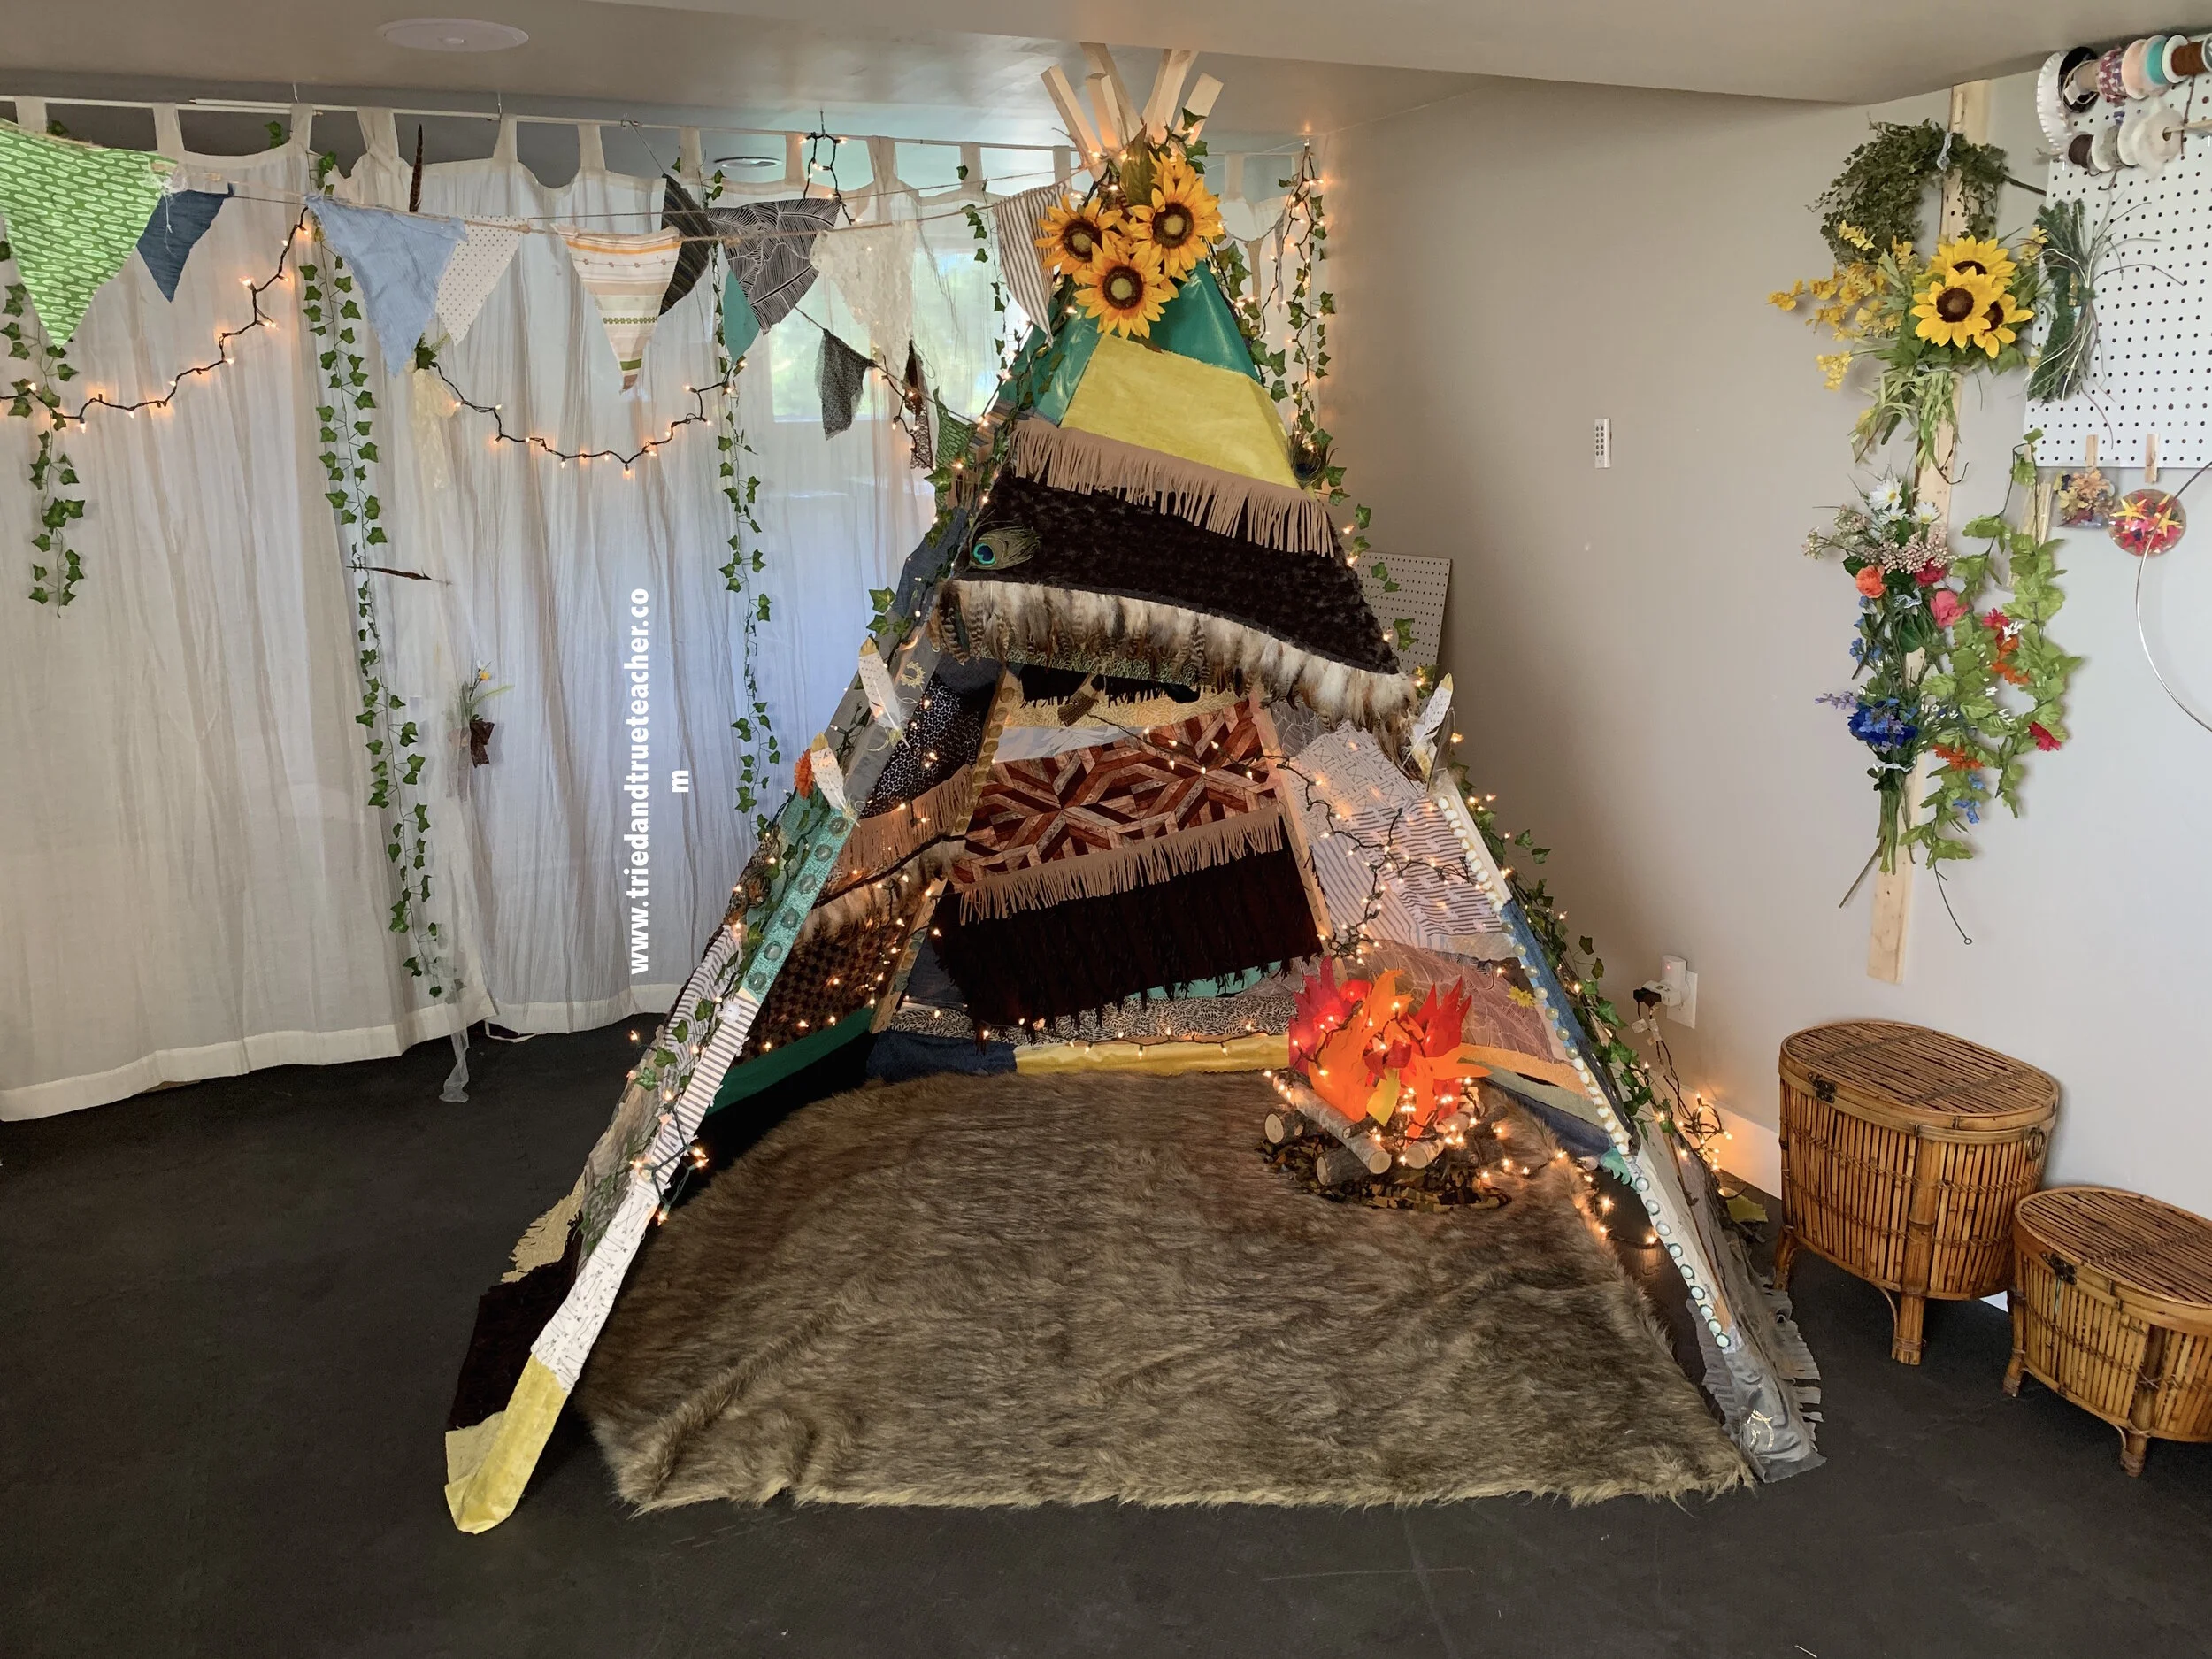
And, here’s a bonus addition you can add if you decide you want it…
On the first one I made, I realized we could fit students more comfortably if there was more space at the bottom, so I built a base. This helped to extend the bottom part so that the angled beams didn’t come right from the floor… they were elevated and now 3 or 4 kids could sit without the top leaning over them.
The base was not a neatly mapped out equation…
Because of the poles all being different and moving, I had to secure them before building it up.
(I pretty much just winged it.) And that was okay because the whole thing would be covered with fabric so no one would know :)
^^ Here’s how it looked once it was complete!
Now there was so much more space for kids to sit in the bottom of it!