Personalize Baby and Kid Puzzles by Adding Family Photos - D.I.Y. How-to Guide!

Disclaimer: This post contains affiliate links which will reward me monetarily when you use them but it comes from Amazon’s pocket - not yours! For more info, read my full disclaimer. Baby June and I thank you for supporting our small business.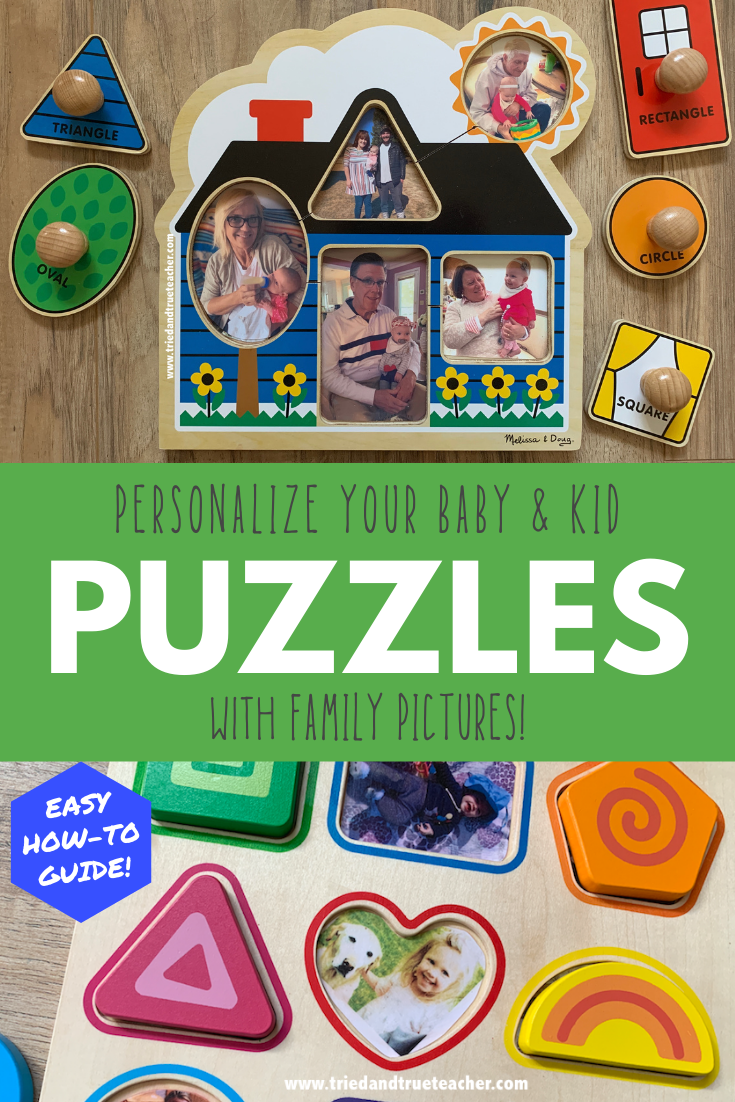
I feel like puzzles are a great idea, in the beginning…
Yes, they are fun for a while.
But, there are so many pieces to lose! (TIP: PUZZLE ORGANIZERS can definitely help with this problem! Wouldn’t it be nice to have this fancy one?)
It seems inevitable that we lose some under the couch or the dogs will walk away with one.
They can be a lot to keep track of… and even if you manage to keep track of all the pieces… it seems like they kind of lose their appeal after awhile… putting the circle on the circle is only fun so many times, before it gets a little, well, boring…
Yep, I said it.
And I’m sorry if you disagree, but if you’re on my side… you’re going to LOVE what I’ve come up with…

I wanted to buy some puzzles for my daughter… but I wanted to see if I could find a way to make them special…
This DIY puzzle transformation not only makes them special enough that kids will want to take good care of them…
IT ALSO MAKES THEM SO MUCH FUN, to do OVER AND OVER AND OVER!!!!
These turned out so awesome, I will now be adding this to my stack of favorite gifts for kids.
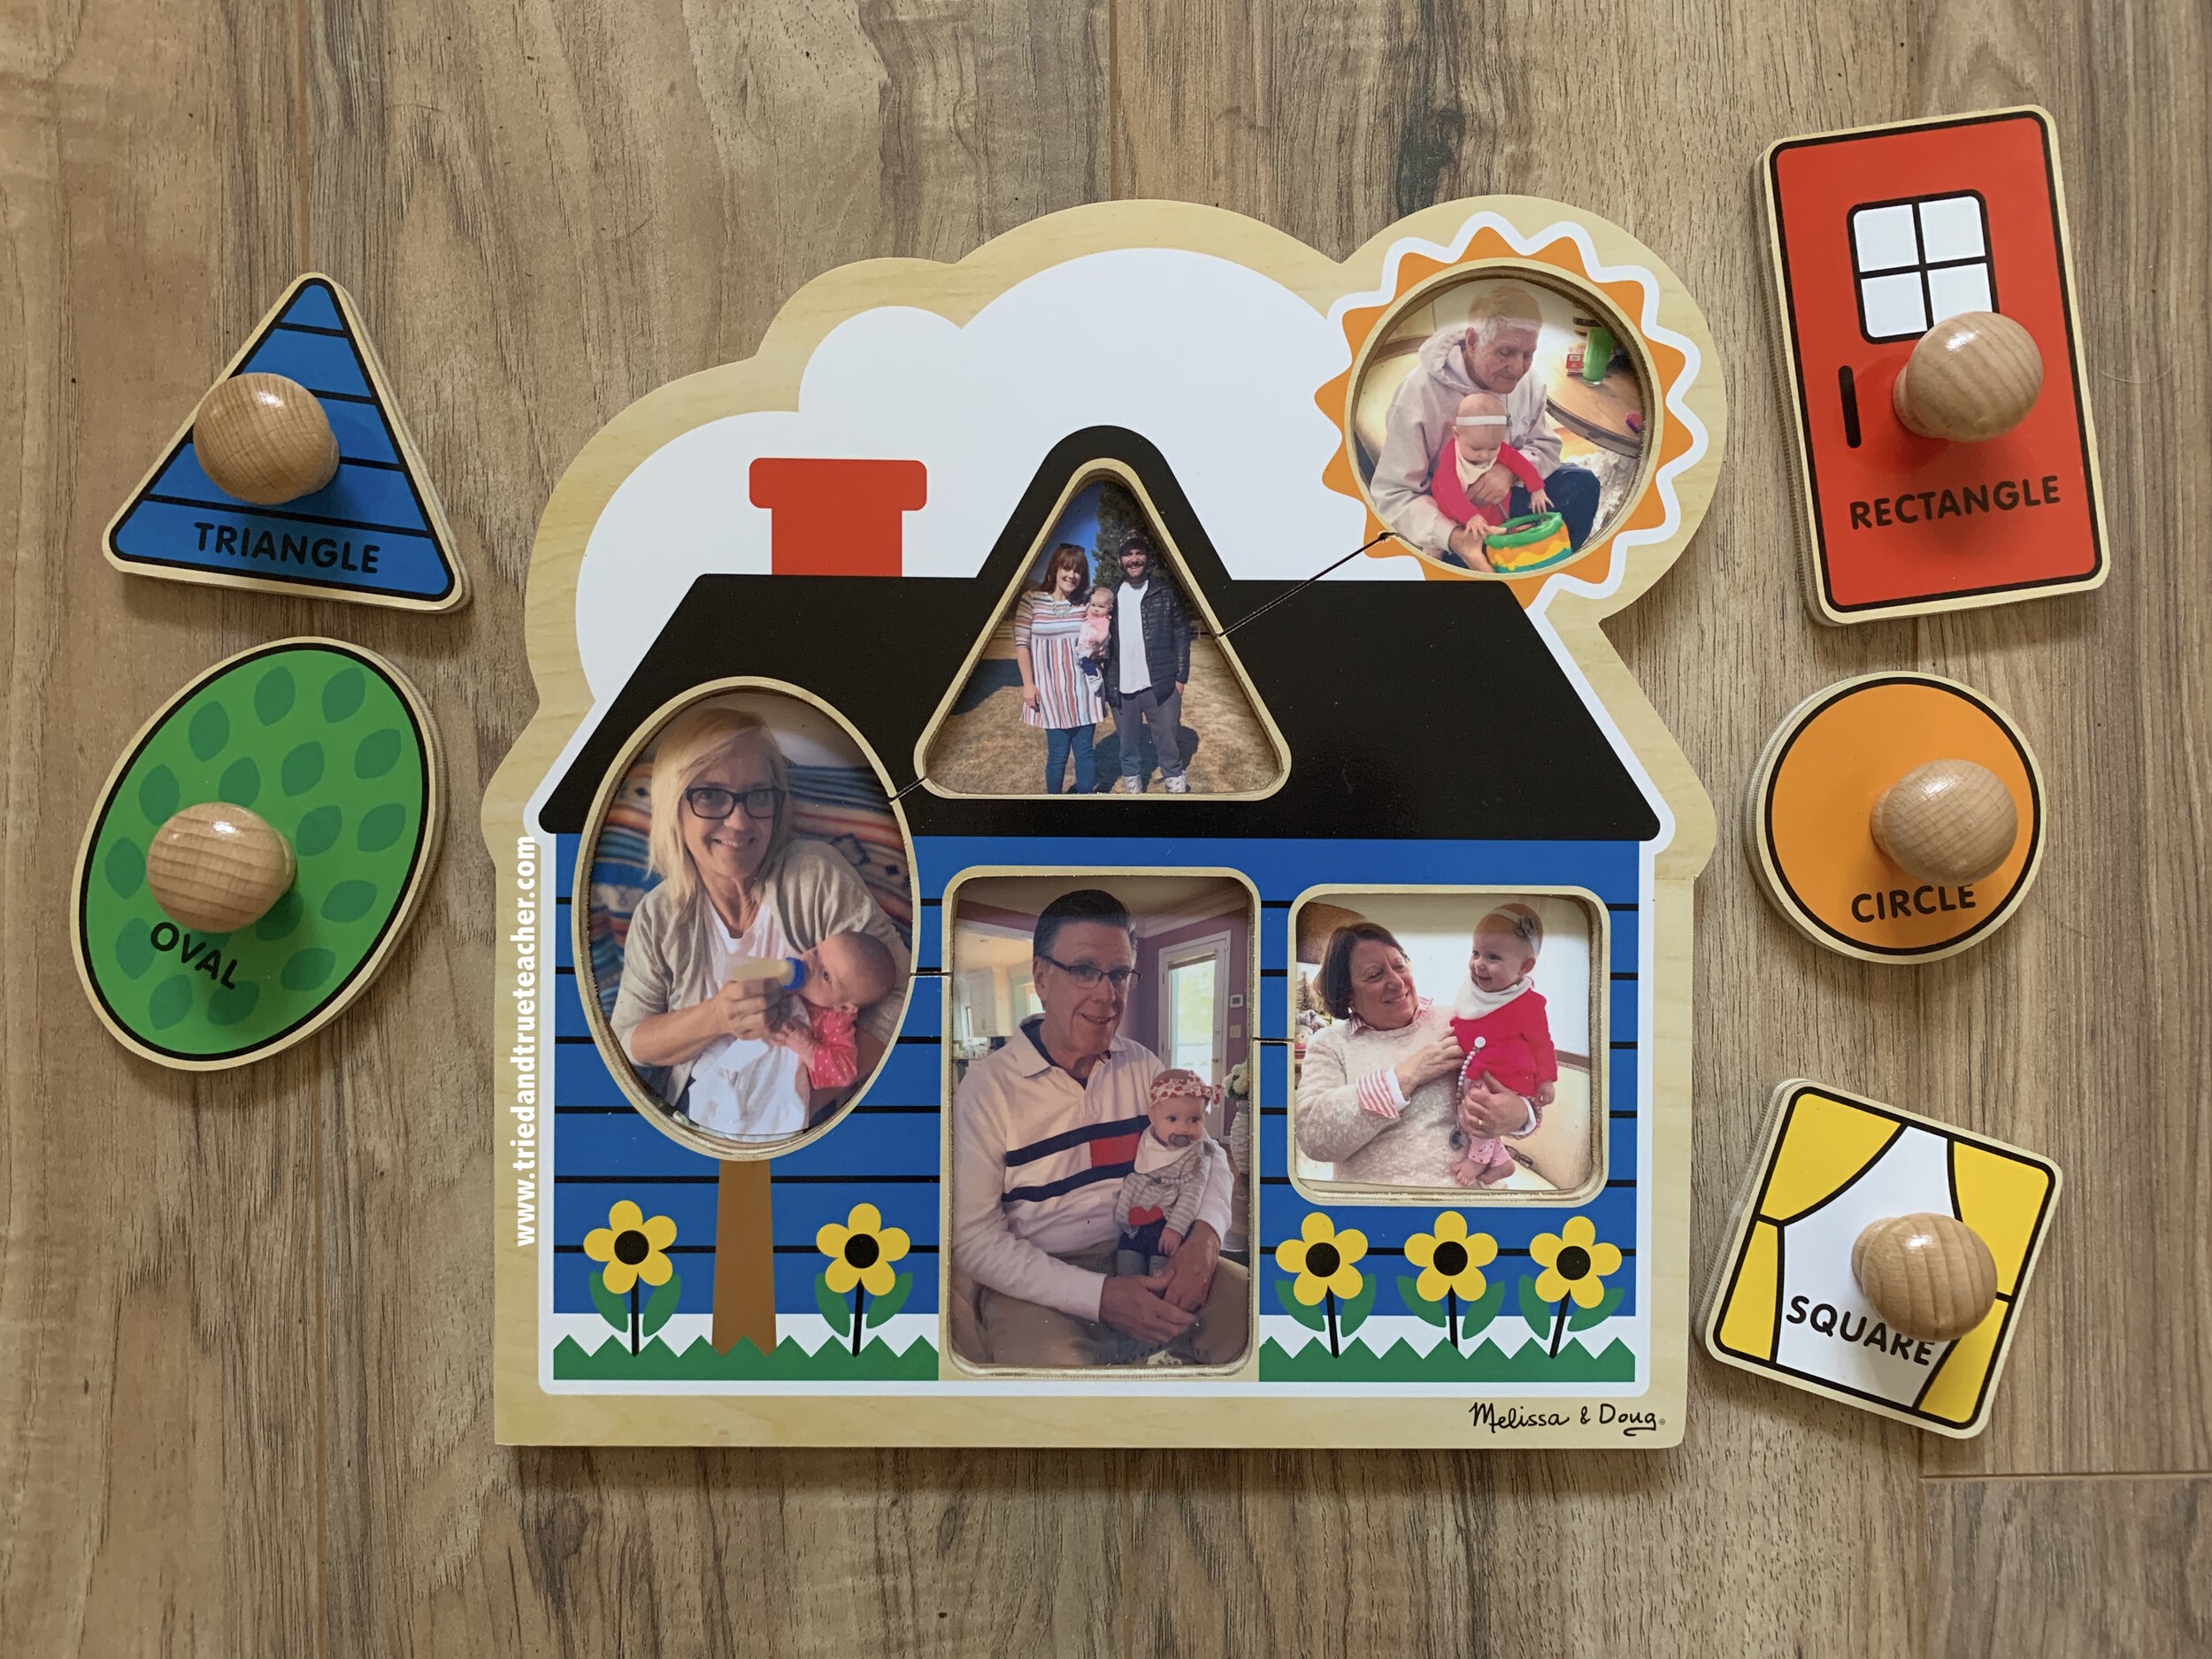
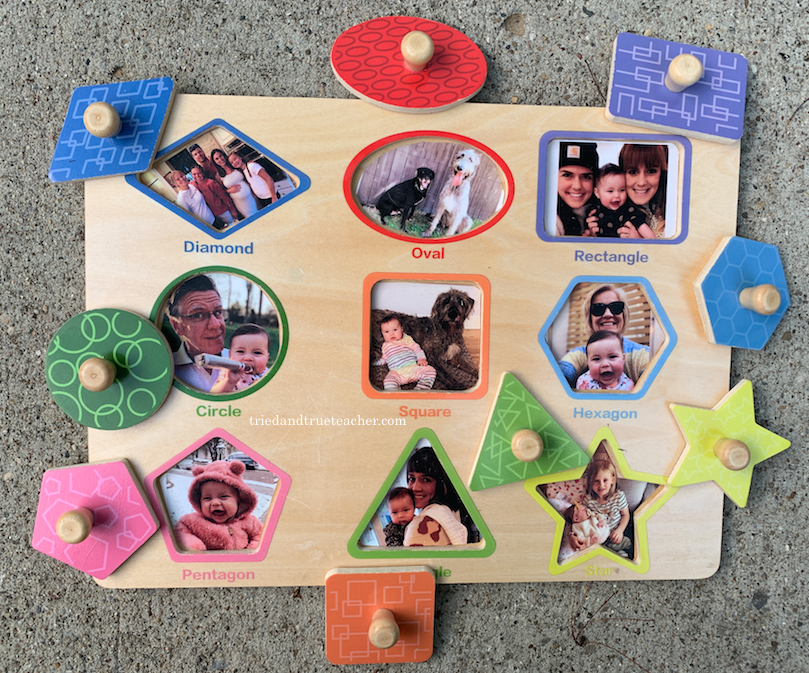
This is a puzzle I made for my daughter, June, so she can see her grandparents faces and we can talk about them when we miss them! We live far away from each other so this puzzle is a fun way to keep our family around until we get to visit in person again :)
For this project, all you need is:
Wood Puzzle - (I chose to do a shape puzzle, but you could use any puzzle.)
*see photo below for puzzle guide!
Paint Brush - These will do just fine
Family Pictures


Here’s one I made for my niece. I’m telling you, these have become my favorite thing to gift to all my friends and family who have babies!
PUZZLE GUIDE!
I ordered a bunch of puzzles from Amazon so I had sizes and options to choose from.
I’ve numbered the puzzles below and I’ve attached links so you can see them all next to each other and decide which one to order!


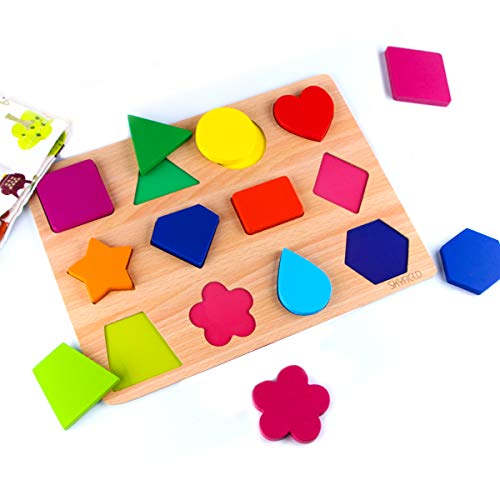
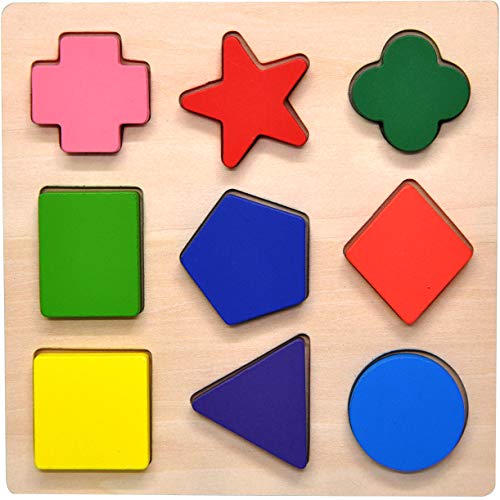


This one (#4) was only $10 and it came with two puzzles AND a carrying bag… such a great deal!


^^^ This one came a few days later so it didn’t make it into my original photo, but I love how it has the knobs for younger children to be able to grab the pieces!

Once you’ve decided which puzzle you’d like to use, you are ready to print your photos.
It’s important to use photo paper, which I learned from trial and error.
I tried using normal cardstock printer paper, because I have been so excited about my HP INSTANT INK subscription… I’m a printing machine these days, and it only costs me $2.99/A MONTH… I am not kidding.
I used to buy $50 worth of ink and run out in 10 pages… I don’t know what the deal is, but any time I was printing at home from those expensive cartridges I bought at the store, I would never get more than a few pages. WHO’S WITH ME ON THIS?!
I’m not exaggerating when I say the only thing we used to print at our house was fishing licenses… ink was SO EXPENSIVE!
If you don’t know about the HP INSTANT INK subscription, you gotta give it a try… with my code, you can get ONE MONTH FREE!
SIGN UP HERE FOR ONE FREE MONTH!
I found that when I printed the photos on cardstock and went over them with the Mod Podge, the colors would smeer and blend a little bit, so you definitely want to print on photo paper or use real photos!
This was my first time printing on photo paper at home but it was so easy and they turned out exactly like real photos from the store… I’ve already got more photo paper on the way and tons of other fun ideas for it!

A lot of the puzzles have pieces that are all around 2 inches so that makes it easy to print and cut photos.
TIP: Make sure not to crop photos too much, having more space makes it easier to fit them into the shapes.
I used the bigger sized puzzle and I learned it was harder than I thought it would be, to just print the photos and have them fit nicely in the space…
Especially because the shapes on this puzzle are so different.
After once or twice of trying to eyeball it, and failing… I decided to do some measuring.

Then, once I had an approximate measurement, I just put the photos into Powerpoint.

And in Powerpoint, it’s easy to right click, go to CROP, and see the dimensions of the photo, so you can adjust accordingly.

Print the photos on the photo paper and then use the puzzle pieces as a stencil to trace over top of the photo so you know where to cut.


Then, cut them out!

Once you’ve cut them out, use the paint brush to put a layer of Mod Podge directly onto the puzzle…

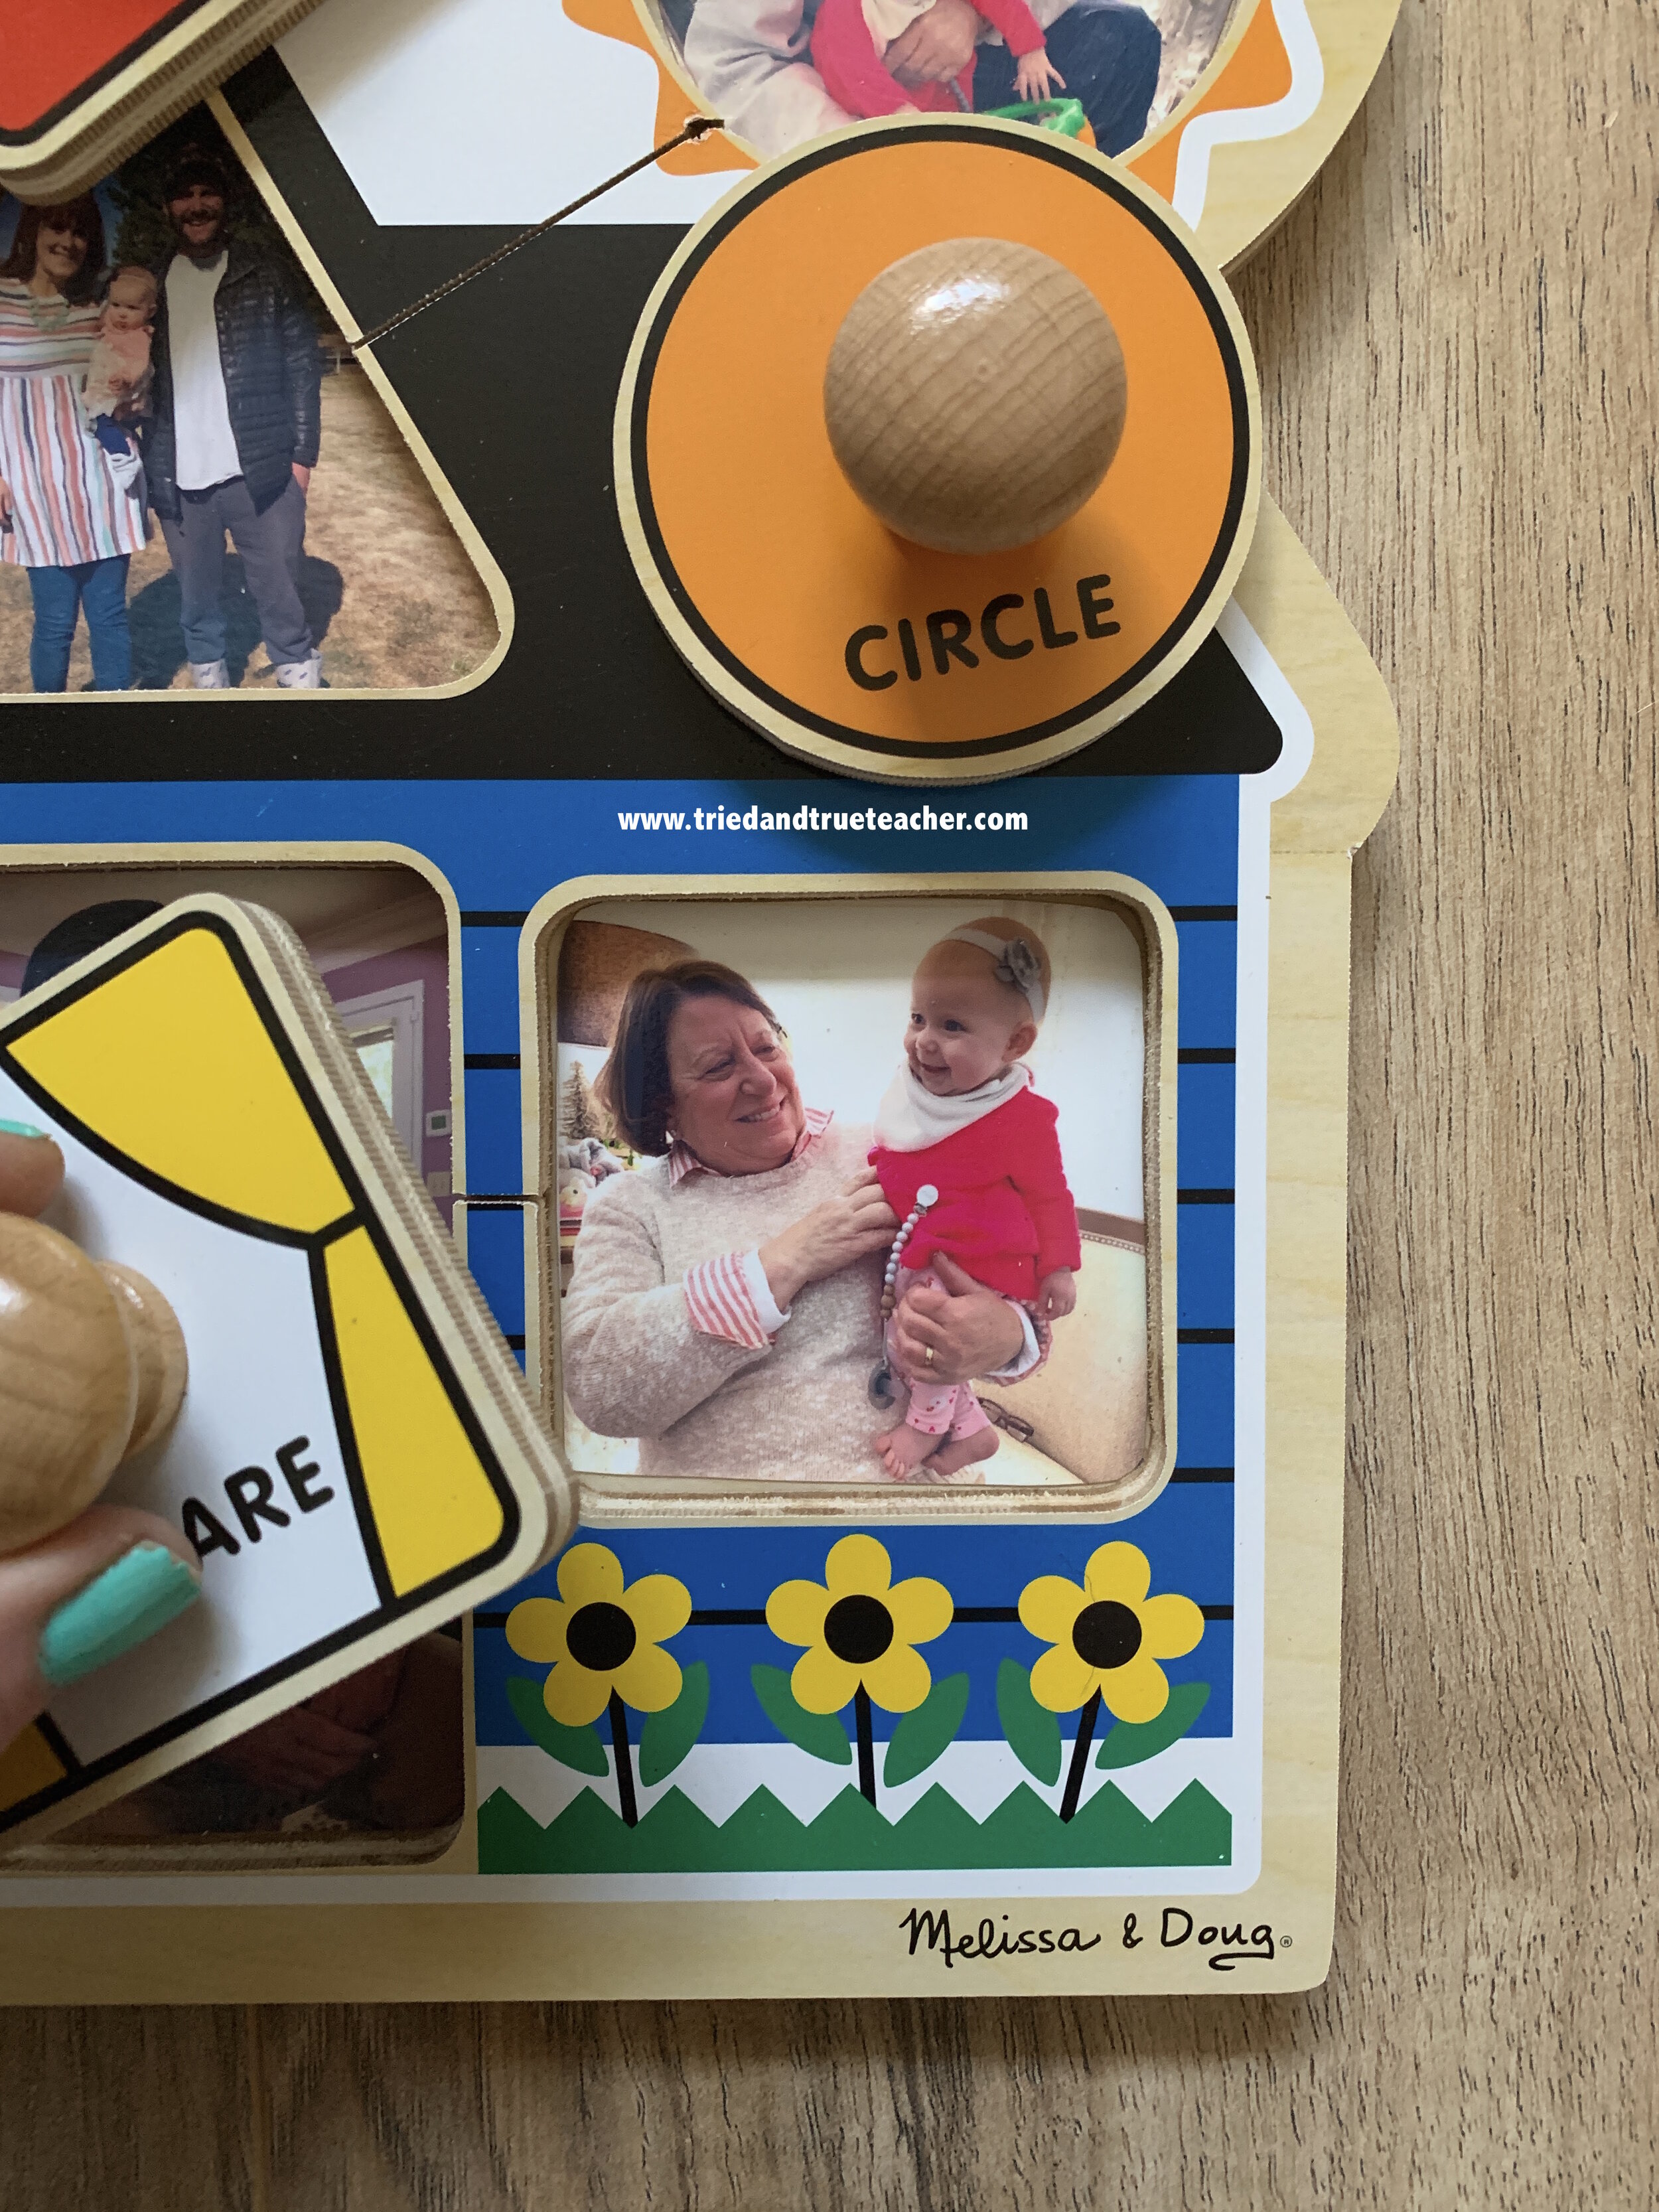
How adorable is my dad? Hehe, thanks for being a model for my blog, Dad.
Then, you stick the photo in and press down all over to flatten any bubbles...

(I even went ahead and pushed the puzzle piece on it to help flatted it completely… worked fine for me but I guess if you had put a lot of Mod Podge, that might not be a great idea.)

Once you’ve made sure the image is flat, you go over the top with one more coat of Mod Podge.
EXTRA TIP: At first, I just coated the whole photo but sometimes when it dries, it can look a little weird — so on the last few, I went heavier around the edges and went super light over the faces…

Repeat for all the other photos!
AND FINALLY, LET IT DRY!


Now that I have about 10 puzzles here, I will be making these as gifts for friends and family…
Below, you’ll find another puzzle I made for a friend… it turned out SO CUTE.